I have a sweet tooth, i would choose dessert any time over a starter if i go to a restaurant, it's actually the first thing i check on the menu card. If nothing sounds appealing, i would only then choose a starter instead. Life is about priority after all ;)
So if we talk about portuguese cuisine, the first thing that comes to everybodies mind is codfish, which is a cliché -a true one- but still a cliché, because there's so much more to it. But i didn't associate the country to a dessert in particular, and that's only because i got to discover there were too much of them.
Here are some of the lovely sweet pleasures or place you can check out if you're in Lisbon.
Bolo, Pastéis...
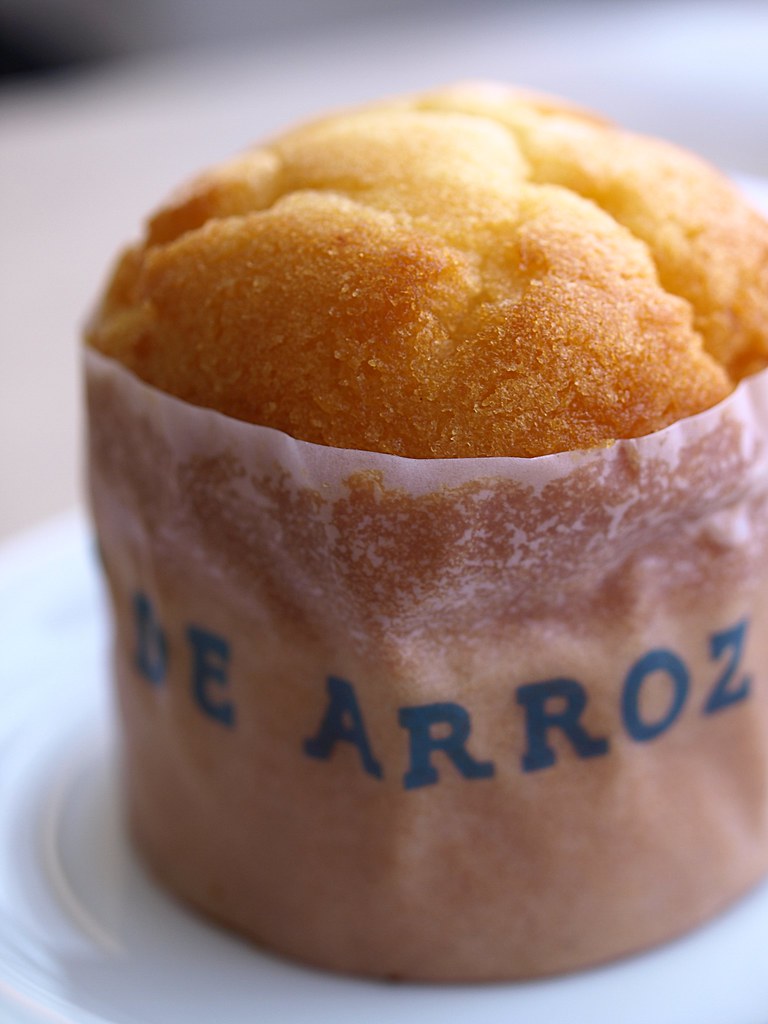
There is an uncredible variety of individual cake, tarts or biscuits. I guess it will still take me a few years to try them all out, which is a challenge i'm gladly facing.
Beside the vey popular Pastéis de Belém, who are worth every bit of their reputation, also called Pastéis de Nata when they are sold elsewhere than from the famous bakery, there's a lot to choose from.
What surprised me in the first place, was the base ingredients of some of the pastries: rice flour, chickpeas or white beans. I actually wrinkled my nose the first time i was told what "Pastéis de Feijão" means, which is a white beans dessert. How wrong was i! This is still my favorit, it's quite sweet with a very moist consistency. A good life lesson: "don't knock it 'till you tried it".
Tease, Lisbon's rock n' roll Bakery

This is of course nothing traditional, but i'm always up to try out muffin, cookies or in this case cupcakes. I found this adress online with what looked to be delicious cupcake, and they did hold their promisses. Tease bakery is located next to the Largo do Camões (metro Baixa-Chiado), rua do Norte. You can take your cupcakes to go, or enjoy them in a cosy environnement.

I would have liked to try their carrot and cinnamon cupcake, but they didn't have them the day i went, so instead i took a lemon and a red velvet one. My preference goes to the red velvet one, but both were very good, a guilty pleasure we should all indulge ourselves with.
O melhor bolo de chocolate do mundo
Litteraly "the best chocolate cake in the world". Now that's presumptuous, isn't it? But it's the name of a shop who sells the previously named chocolate cake. A friend who knows my chocolate addiction took me there a few years ago, and i can only be gratefull for that.
I don't know if it's "the best", but it's pretty darn good! I would say it's a layer cake in a way, because you have different texture in the cake, it's very moist and rich. Which reminds me, i should go back next time!
It's in the Campo de Ourique area, rua Coelho da Rocha, it's in the same street as the "Casa Fernando Pessoa". To make it even more enjoyable, go there using the famous 28 Tram, the "Eléctrico", get off at Igreja Santo Condestável and it's just a couple of minutes walking to there, so you will burn some calories before plunging your fork into the cake.
The Lisbonaire
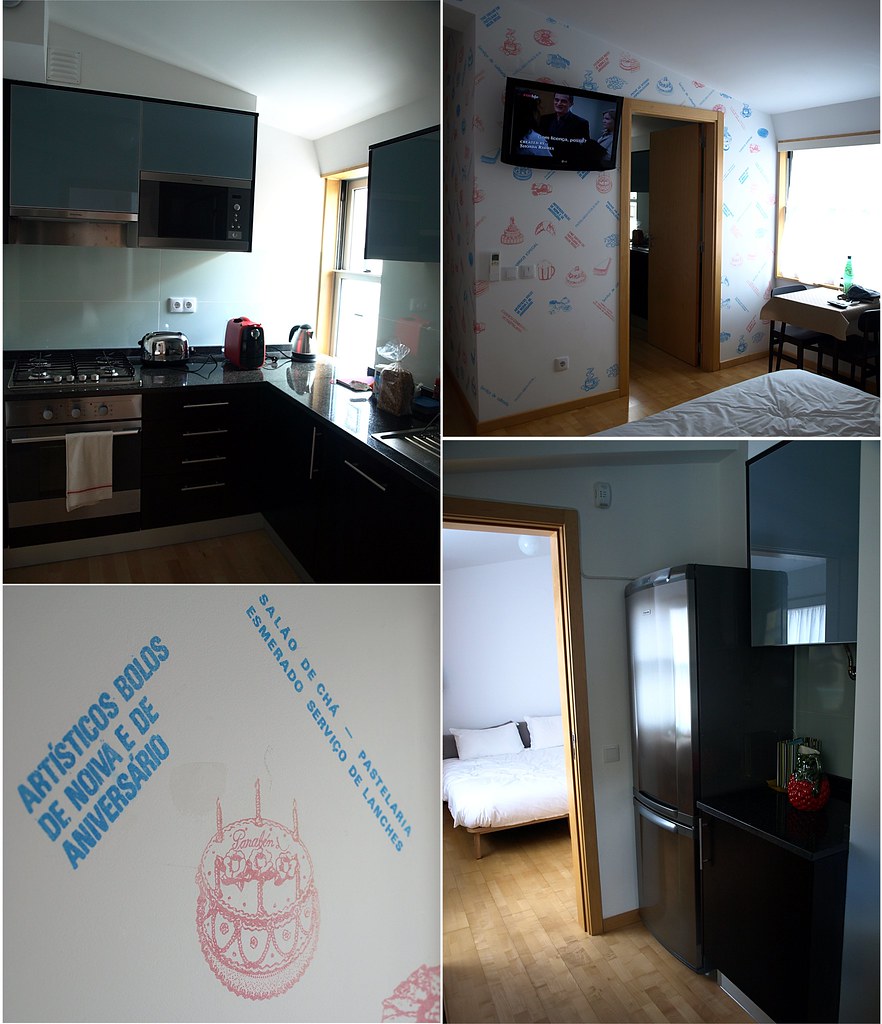
Now this is not food related per say, but it's the lovely place i stayed at this time. It's an appartment hotel, brand new, with a lovely and helpfull crew. And very important to me: a great and functionnal kitchen, so you can try the local specialties yourself :)
Located in the rua da Glória, next to the Restauradores square, very central and easy to find, check them out: http://www.lisbonaire.com/
21/06/2011
19/06/2011
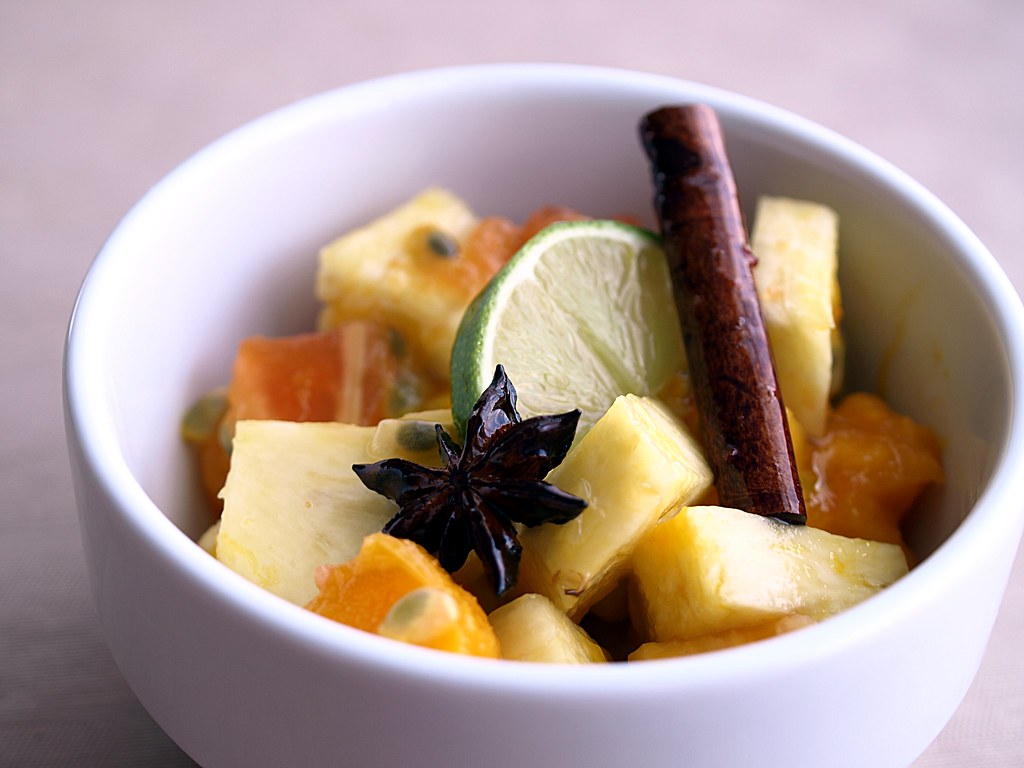
Tropical Fruit Salad with Spice Syrup
Sometimes we get lost in translation, but sometimes it's also where we found ourselves. Life brings us to places we'd never thought we would be, and that's part of its joys.
If 10 years ago, somebody would have asked me about Portugal, sure i could have placed it on the map, told you its capital and a few other basic stuff, and that's about it.
Then Lisbon happened in my life, like a revelation. How could a place so far away, make me feel like i belong there? I feel at home walking around in its narrow streets, aswell as on the big avenues, going up or downhill all the time, stopping for some pastry and a cup of tea, or getting to one of the many gardens to seat on a bench and just read.
A city of contrasts, where traditions meet the modern life, where everybody is in a rush, but still take time to enjoy life.
Maybe it's a trick of my mind because i'm actually in Lisbon, but the tropical fruits seem to taste better there, not to mention how much more choice you have, i even saw some fruits that i had no idea what they were.
Fruit salad is a simple recipe, yet with the right combination of fresh fruits and that extra touch of spicies, it does make a great dessert, specially if you get to share it with a dear friend.
Tropical Fruit Salad with Spice Syrup (from Mighty Spice by John Gregory-Smith)
Serves 4 to 6
1 Pineapple
2 Mangos
1 Papaya
4 Passion Fruits
1 Lime
2 Sticks of Cinnamon
2 Anise Stars
1 Teaspoon of Chili Flakes
1 Cup of Water (about 250ml)
1 Cup of Sugar (about 225gr)
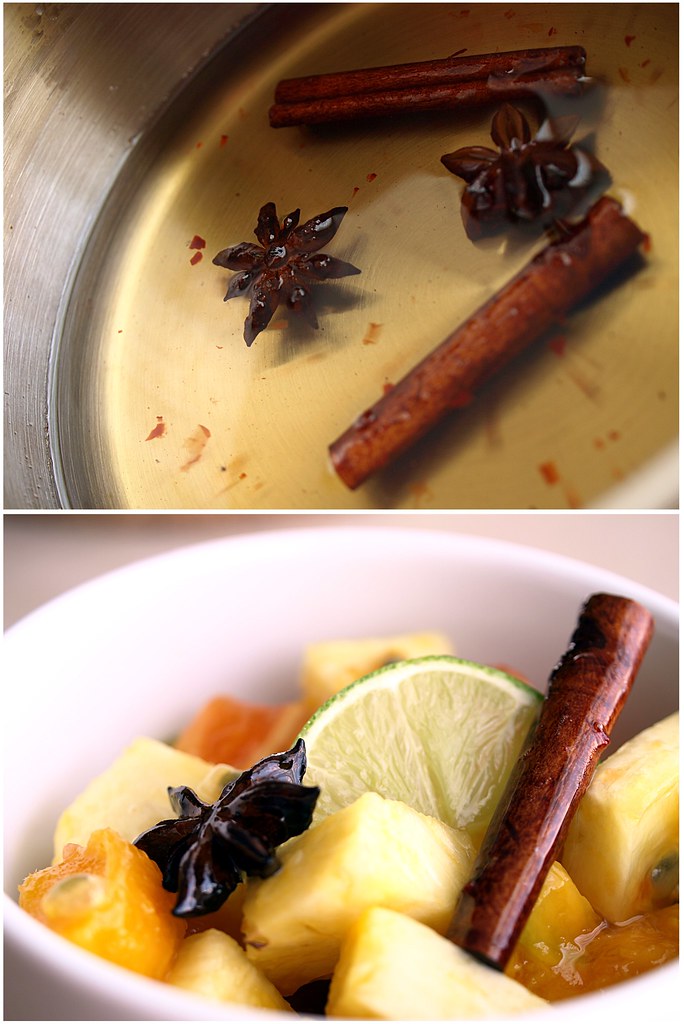
Start with the syrup, put the water and the sugar in a pan, add the cinnamon sticks, the anise stars and the chili flakes. Put the pan on a medium flame, and let it get to a syrupy consistency. I didn't watch the clock, but it takes about 30 minutes and gets a lovely golden color when it's done.
In the meantime you can get your fruits ready. Cut the top and bottom of the pineapple so it stands on the cutting board, and cut around it to get ride of the outside, be carefull not to leave any dark spot. Cut it down in half and quarter it, cut the middle part out as it's a bit hard, and than slice it.
Cut the mango along the pit on both sides in it's length, than around the pit to get as much fruit as possible. Cut long stripes and peel them, than cube your mango.
Cut the papaya in half, take out the dark seeds, cut stripes (like the mango) and peel it before cutting into cubes, pretty much the same size as the mangos.
In a big bowl, mix carefully all the fruits you have cutted so far. Half the passion fruits, and with a spoon, spread the seeds and juice on top of the fruits. Mix again gently, cover it with a cling film and leave to rest in a cool place.
When the syrup is done, let it cool down. To serve, prepare slices of lime, get the cold spice syrup in a small jug if you have one, so everybody can add as much lime juice and syrup they want to.
11/06/2011
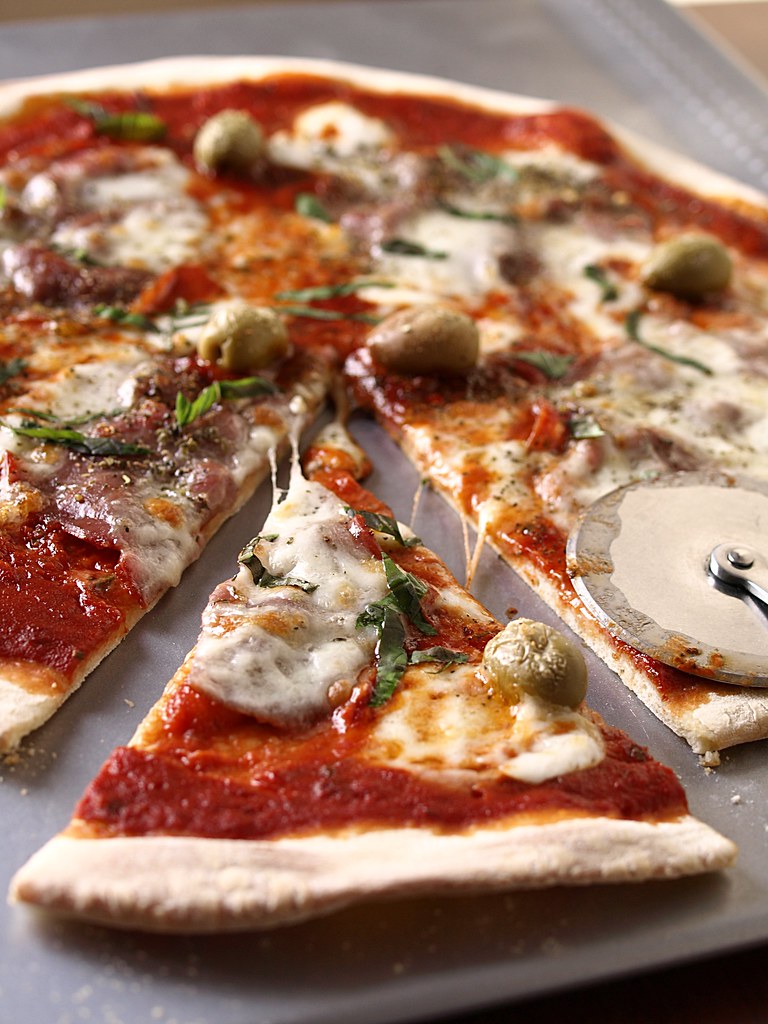
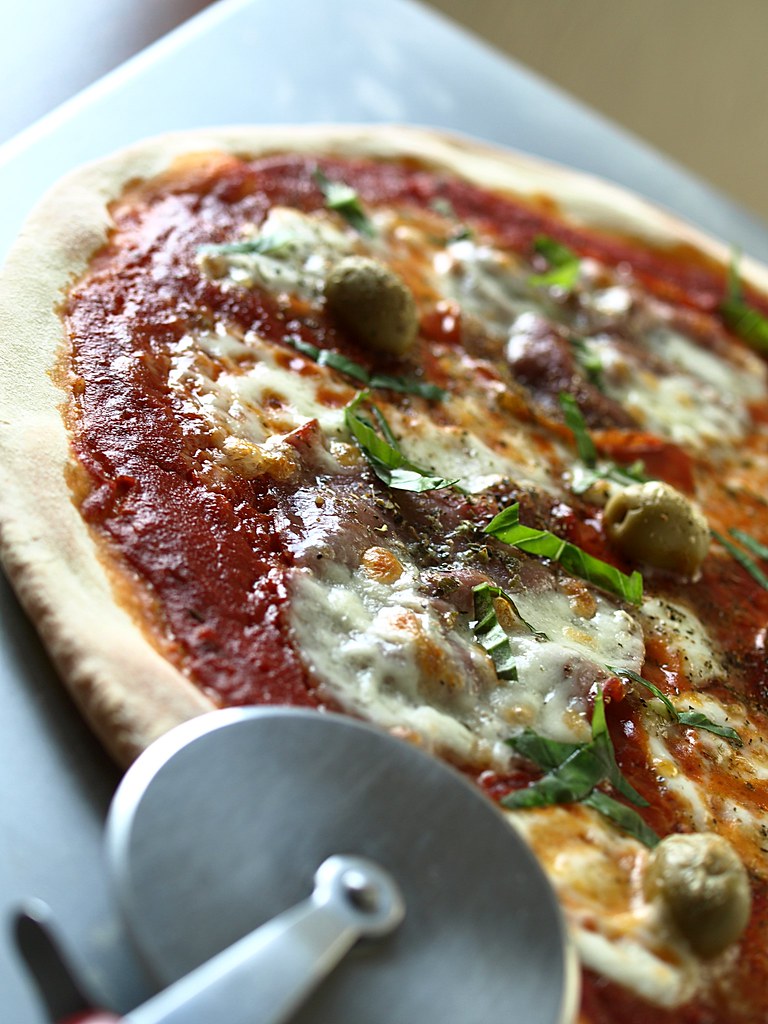
Homemade Pizza
Some like to buy shoes or clothes, i like to shop for food supplies, it always makes me happy. From the tiniest funny spoon, to the expensive, but so usefull and beautifull Kitchenaid. Afterall i have a blog about food ;)
I'm lucky enough to have a kachelofen in the house i live in, something very traditional here, which is basically a central wood heater. The good thing is, it has an oven in it, to make some pizza thru the winter. Even if the heat isn't as easy to handle as in a regular oven, the pizza does have that "ristorante" taste to it.
But in the summer, i'm not going to fire it up when it's 30°C outside. If you know the british Chef Jamie Oliver, you may have seen he uses a marble stone he found in his garden, to bake the pizza in his oven. I don't own any marble, but instead i try to be creative.
IKEA sells a backing tray for cookies that is really thin, so after i saw it on their website, i thought this could work too for the pizza. I've tried it tonight and even if it isn't quite the same as the wood oven, it's still pretty damn good!
Homemade Pizza Dough (from the website http://www.marmiton.org/)
For 3 to 4 pizzas
500gr of Flour
1 Pack of Instant Yeast
1 Teaspoon of Salt
1 Teaspoon of Sugar
1/4 Liter of Tepid Water
1 or 2 Tablespoon of Olive Oil
Put the salt, the sugar and the instant yeast in a bowl, add the tepid water and mix everything well together. Cover the bowl with cling film and leave it for about 10min, you need to see some foam forming at the top.
Put the flour in a big bowl and make a hole in the center. Pour the water/yeast/sugar/salt mix in the middle and mix it in slowly with your hand. When it starts to form a dough, put it on a floured working surface, and work it for about 5 minutes. Add the olive oil in, and keep knitting it until it's smooth and shiny.
Leave it for about an hour under a wet cloth. Afterwards, separate it into 3 to 4 parts. I generally just do one pizza at the time, so i pack the rest individually in and put it into the freezer until my next pizza craving, just think to take it out of the freezer about 5 hours before.
For the topping
for 1 Pizza
Tomato sauce
1 Ball of Mozzarella Di Buffalla
4 Slices of Coppa
6 Olives
A few Leaves of Fresh Basil
Thym, Oregano...
Preheat your oven to 220°C
Obviously, pizza topping is all about what you like, what you have on hand, and even just tomato sauce and mozzarella does it for me.
I like to make my own tomatoe sauce when i can, i cook it for a long time because i like it to be almost a paste on the pizza. Obviously some tomato concentrate would do the trick too, but i would add a bit of garlic to it.
Roll your dough out, or if you like to live dangerously, try it the pizzaiolo way ;). Place the dough on the tray, and don't leave it for too long, you don't want it to rise again.
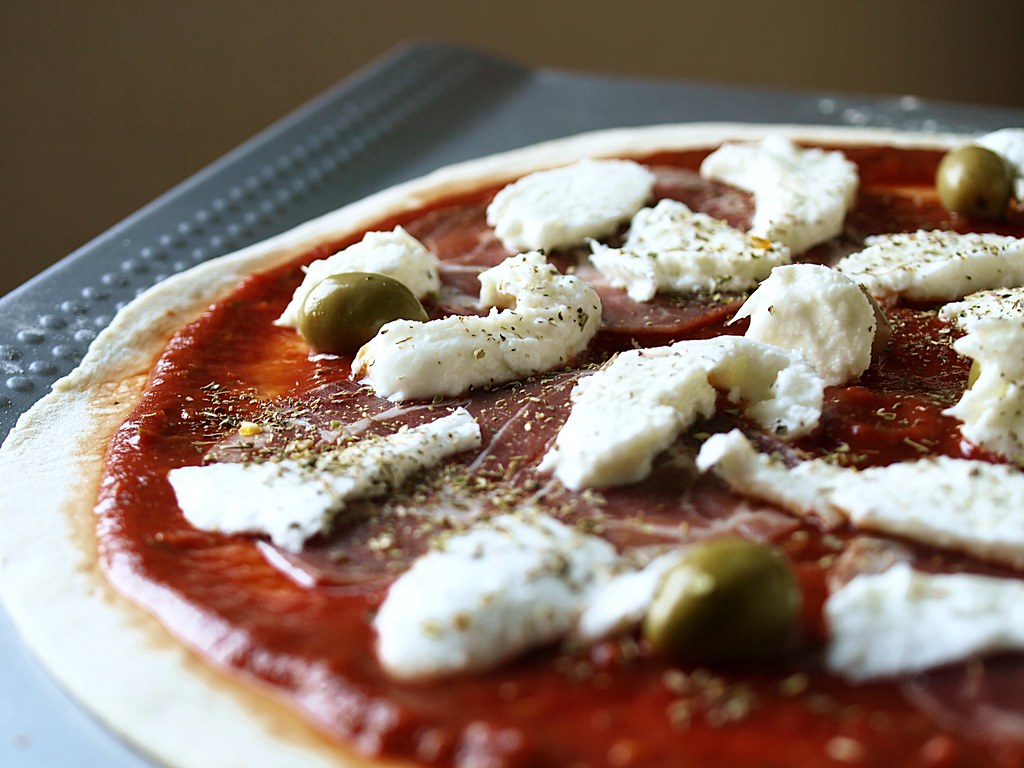
Spread your tomato sauce on it, place the topping, in this case coppa and olives, and spread the pieces of mozzarella on it. Sprinkle some thym, oregano, or any herbs you like.
Put it into the oven for about 10 minutes, but really, keep an eye on it depending how you like it cooked. When it comes out of the oven, sprinkle some freshly chopped basil on it.
This is one of my favorit saturday night dinner, in front of the TV watching some documentary. Yes, i know, i'm a real Party-person ;). And on that note i wish you all a nice week and i'll be back after my week of holiday :)
07/06/2011
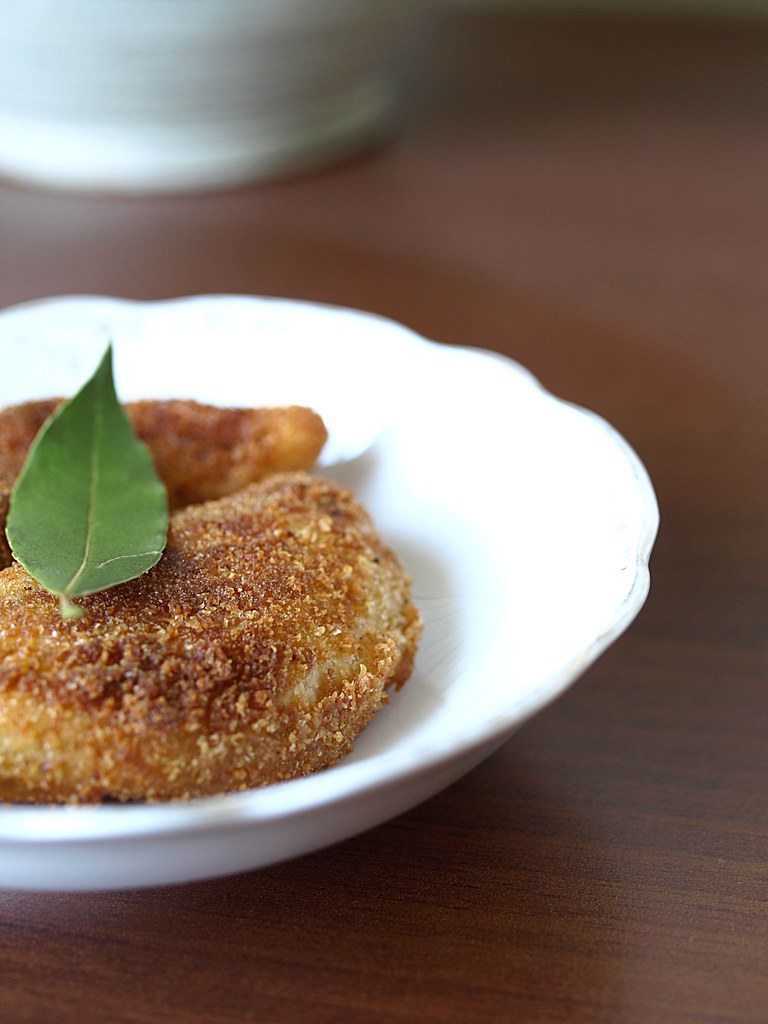
Shrimp Rissoles, in a portuguese way
I love to travel, from planning everything ahead and making lists, to packing my bag, enjoying the trip almost as much as the destination. Unfortunately, i don't travel as often as i'd wish to, so instead i like to travel in my kitchen, with dishes from places i have been, or places i wish to go to.
Lisbon is my favorit destination, and i'm lucky enough to be going again next week (YEAY!). But when i'm away from this city for to long, i like to bring Portugal to my table. Now obvisouly, that includes some cod fish dishes, that will be posted here at some point.
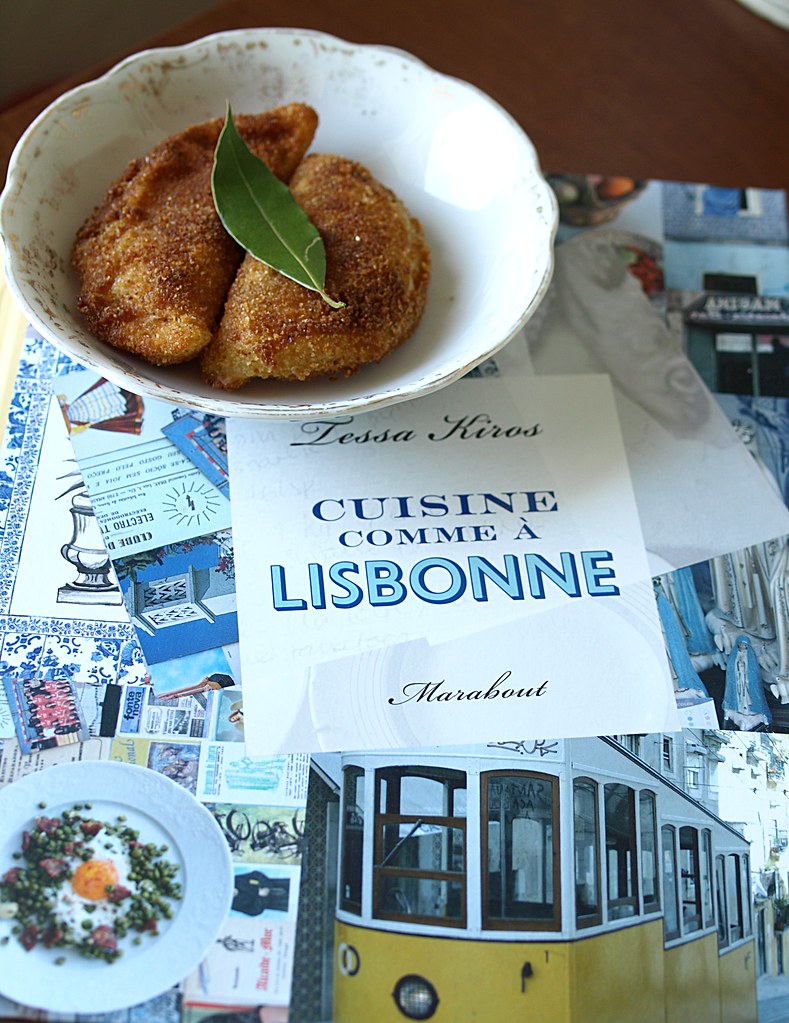
But today's recipe was my mum's choice. I lended her the fantastic book by Tessa Kiros "Piri Piri Starfish", and she wanted to try this one out. So we gathered our ingredients and cooked the recipe together, which made it twice as much fun.
Shrimp Rissoles (by Tessa Kiros "Cuisine comme à Lisbonne")
For 20-24 rissoles
For the dough:
125ml of Milk
1/2 Teaspoon of Salt
50gr of Butter
250gr of Flour
In a pan, pour the milk, add the salt and 150ml of water and bring it to the boil. Just when it starts to boil, take it of the flame and add the flour in one go. Mix it with a wooden spoon until you get a ball of dough. Let it cool.
For the filling:
180gr of Raw Shrimps
1 Bay Leaf
125ml of Milk
50gr of Butter
1 Shallot, finely chopped
1 Small Celery Stick, finely chopped
2 Tablespoon of Parsley, chopped
1 Teaspoon of Piri Piri Sauce (Tabasco will do)
1/2 Teaspoon of Paprika
1 Garlic Clove, chopped
2 Teaspoon of Tomato Paste
2 Tablespoon of Flour
1/2 a Lemon, Zest and Juice
Salt, Pepper
Mix the milk with 125ml of water, add the bay leaf and start to heat it up. When it starts to bubble, put the shrimps in, and cook them for 5 minutes, without boiling them.
Take the shrimps out, but keep the liquid you cooked them in. Peel the shrimps and chopped them roughly.
Put the shallot and the butter in a pan, on a normal flame. When the shallot starts to color, add the celery, the parsley, the garlic, the piri piri and the paprika. When the flavors are combined, add the tomato paste, and after a few minutes add the flour. Stir well before adding a bit of the liquid you cooked the shrimps in. Bring to the boil and let it get more consistant for about 5 minutes, on a lower flame.
Away from the flame, add the shrimps, aswell as the lemon zest and juice. Add salt and pepper to taste. Let it cool.
To make the Rissole:
1 Egg
3 Cups of Breadcrumbs
Olive Oil, for frying
Lemon, quartered to serve with
Put flour on your working surface and on your hands. Roll the dough out, so it's about 2mm thick. Cut out disks of about 10cm diameter.
Put a spoon full of the filling in the middle of the disk, put a bit of water around the edges, and bring in back together, in a half-moon shape. Pinch the edges together to seal the rissole.
Beat the egg with a bit of salt and pepper, put the breadcrumbs in a plate. Put the olive oil in a frying pan, don't heat it too much.
Put the rissole in the beaten egg, than in the breadcrumbs, before going into the oil. Unless you have a very big pan, you're going to need 3 or 4 times to fry them all.
Let them get to a golden color, before turning them carefully around. Once they are cooked, put them on some kitchen paper, to absorb the oil.
This works as an entry, or as a meal with a nice salad. Serve them with some lemon to squeeze on and some salt. If you're seated under the sun, in a nice garden, they even taste better i think ;)
05/06/2011
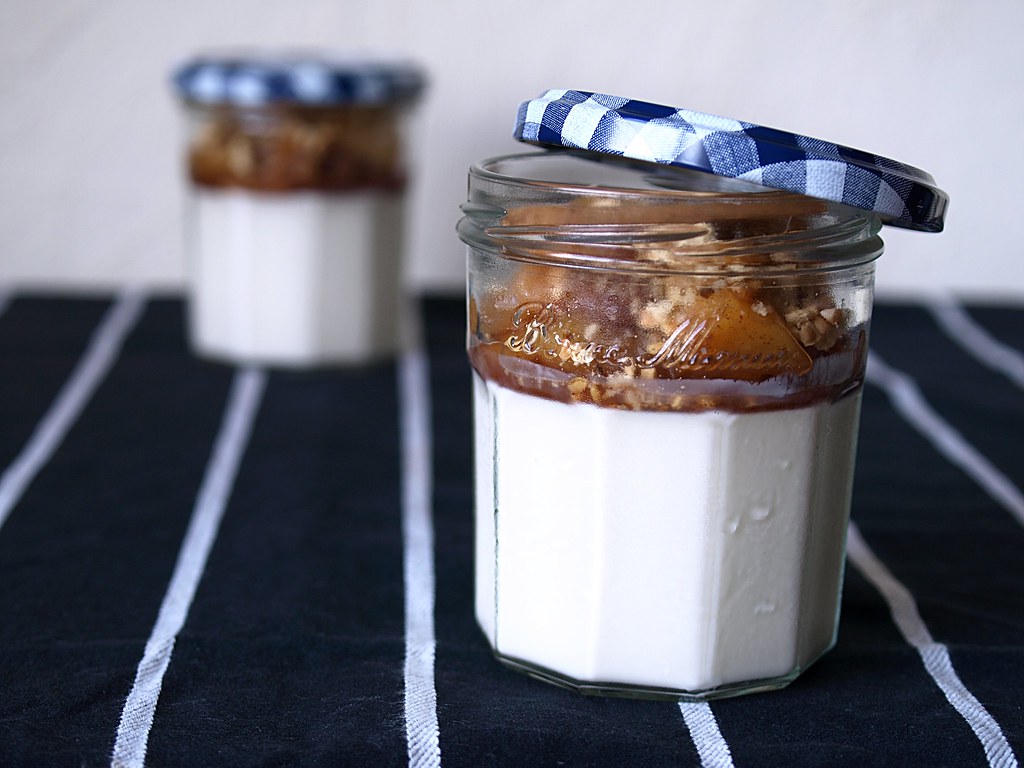
My First Panna Cotta
To celebrate Francesca Schiavone making it to the Roland Garros Final, i decided to make myself a themed week-end with Italian cooking. But i also wanted to try new things out, and Panna Cotta was on my "to do" list for a while.
Unfortunately Franny lost her final, but i still got to enjoy some homemade pasta with a mint pesto. I'm not quite happy with the mint pesto recipe yet, so that will wait for an other try to be posted here. The Panna Cotta worked out much better.
As you may know, i love to bake, so when i read the recipe of the Panna Cotta, i thought "and that's it???", but the italians know how to make the simplest things into something lovely, and this recipe won't be an exception.
Now for the topping, i'm actually on a budget these days, so i tried to come up with something "from the pantry". Apples are always around in my house, matching those with cinnamon is never wrong, and for a bit of crunch some biscuits and nuts.
Panna Cotta with Crunchy Cinnamon Apple Topping
For 6 small glasses or 3 big ones
25cl of Cream
25cl of Milk
2 Tablespoon of Sugar
1 Teaspoon of Vanilla
3 Gelatin Sheets
2 Apples
1/2 Glass of Water
2 Teaspoon of Cinnamon
2 Tablespoon of Golden Dried Raisins
2 Tablespoon of Honey
2 Teaspoon of Lemon Juice
4 Digestive Biscuits
2 Tablespoon of Chopped Almonds
You have to make the Panna Cotta the day before, or in the morning for the evening.
Put the 3 gelatin sheets in cold water to softened them, for about 5 minutes.
Pour the cream and milk in a pan, add the sugar and the vanilla, put a soft flam under it to heat it up, be carefull not to let it boil. When it's hot, add the gelatin sheets that you have pressed in your hand to remove the excess of water. Keep stiring for about 3-4 minutes, then pour the mixture into its container.
Let it cool outside for about an hour, before putting it in the fridge for about 8 hours. It looked very liquid to me, but don't worry it will set.
For the topping, peel the apple and cut them into cubes. In a pan, put the water, the apples, the raisins and the cinnamon, and let it bubble for about 15 minutes with the lid on, so the apples get soft and flavoured. Add the honey and the lemon juice, let it reduce, lid off this time, for about 10 minutes, or until you have very little liquid left. Set aside, and let it cool.
Put the digestive biscuits, such as Graham Cracker or Petit Lu, in a towel or a freezing bag to crush them into little pieces. I used Bolacha Maria to give it a portuguese touch ;) In a pan with no fat, put the chopped almond and let them color to a light brown shade, and mix them with the crushed biscuits.
Before serving, take the Panna Cotta out of the fridge, put the reduce cinnamon apples on top of it, and sprinkle the nuts/biscuits on top. As said, this is yet an other proof that italians know how to enjoy life!
02/06/2011
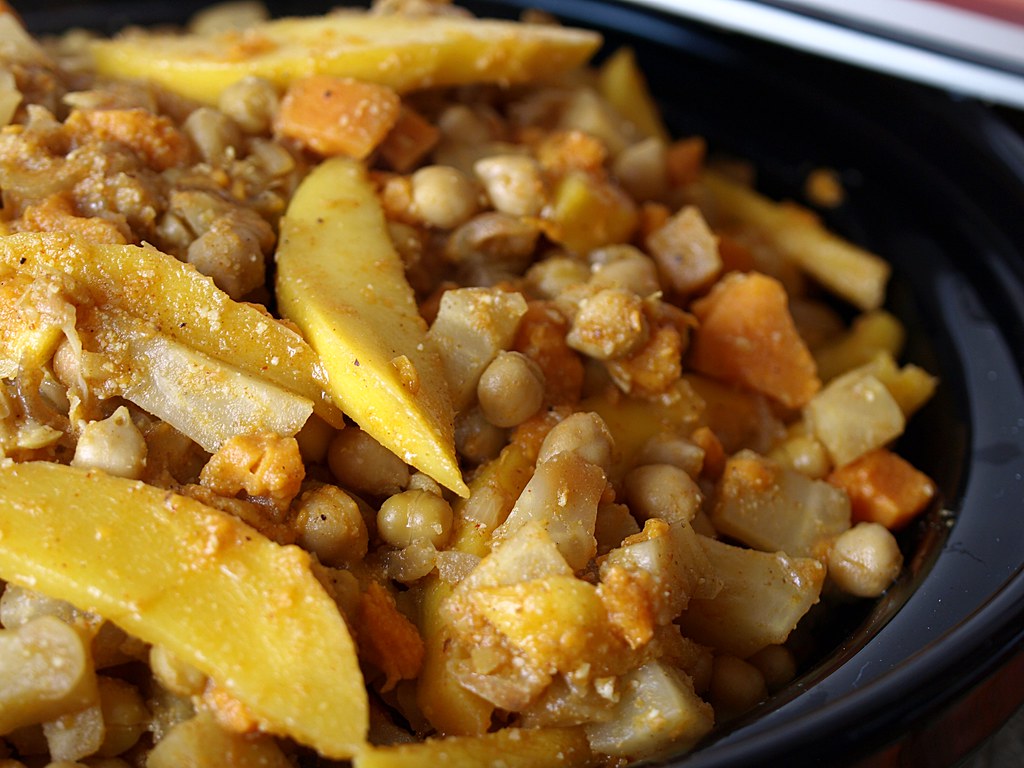
Vegetarian Tajine
I don't know about you guys, but between the killing cucumbers (ok, i know they're actually not the problem), the cellphone that gives us cancer, the world news in general and the grey, cold weather, i could really use something to chear me up.
Today is a holiday where i live, which means, i can stay home all day and take time to cook. So let's switch the TV to the Tennis, get my apron on and let's bring some sun into my kitchen with a Tajine. I've bought a book last week on the subject, so it's the perfect occasion to try one recipe out.
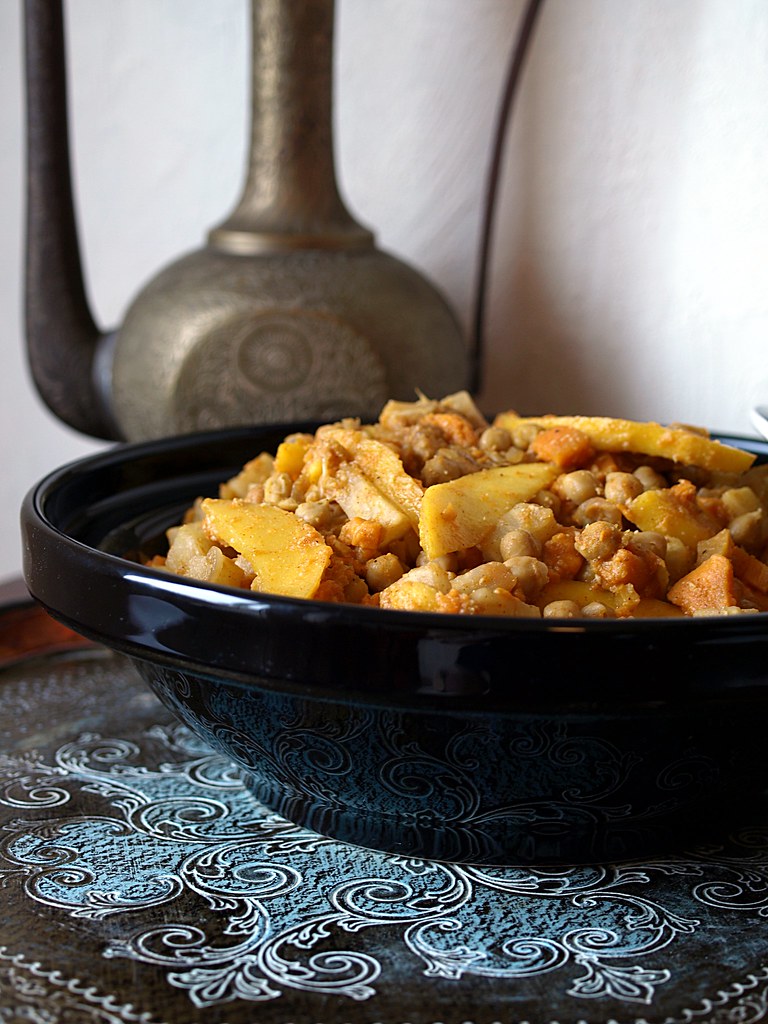
I like making Tajine, it's a slow cooking process, but really rewarding in the end. I don't actually own a tajine, the one you see on the picture has been borrowed from my lovely sister, just for esthetic and serving purpose. I cooked mine in a big Casserole, which is easier when it comes to stiring.
Vegetarian Chickpeas Tajine (based on "Tajine" les tout-petits de Marabout)
Serves 4
500gr of Chickpeas
2 Sweet Potatoes (about 300gr)
300gr of Celery Root
2 Onions
30gr of Fresh Ginger
2 Mangos
2 Tablespoons of Almond Powder
2 Tablespoons of Olive Oil
2 Teaspoons of Sweet Paprika
2 Teaspoons of Ground Coriander
1 Teaspoon of Turmeric (Curcuma)
3 glasses of Water
Salt, Pepper
Cut the onions into cubes, put them into the casserole with the olive oil and the spices (paprika, coriander and turmeric), and heat it gently to get the onions translucent.
Peel the celery root and the sweet potatoes, cut both into same sized cubes. For the chickpeas, if you use canned one, they are ready to go after a wash under fresh water. If you used dried one, you'd need to make them soak into water over night, before using them in the recipe. Peel the fresh ginger and mince it or chop it finely.
When the onion are translucent, add the chickpeas, the celery and the sweet potatoes. Stir well the vegetables, so they are covered with the spices. Add salt and pepper to taste. Then add the ginger and 3 glasses of water (about 75cl). Let it bubble softly, lid on, for about 35 minutes, depending on the size of your vegetables. Check it every now and than to stir.
In the meantime, peel your mangos and cut them into fine slices. After those 35 minutes, add the 2 tablespoons of almond powder and the mango slices, stir gently and let it cook on a gentle flame, for about 10 minutes, lid off this time.
It's ready to serve, if you have some, you can put some fresh coriander leafs on it.
01/06/2011
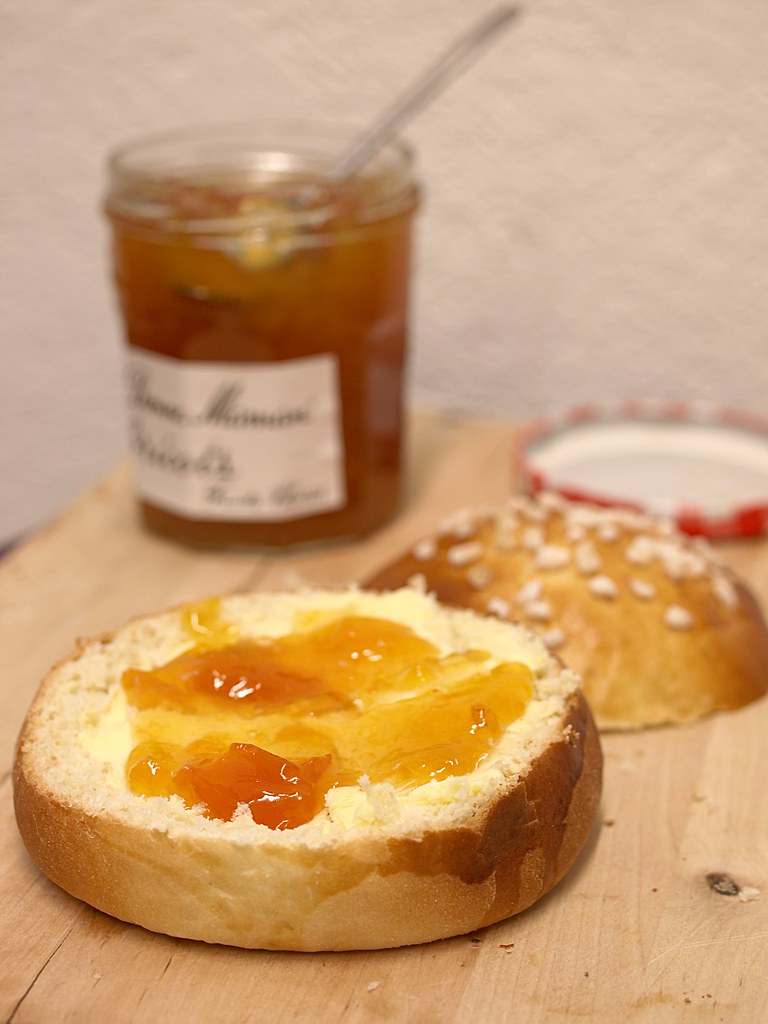
My favorite Brioche
Nothing tastes more like a lazy sunday morning, than a soft, airy brioche. A round comfy bun, coming out of the oven, making the whole place smell like a bakery, is pure joy. But why wait for sunday to make those? The day has been grey and rainy, i feel like i could need some comfort food, and to me brioches fall into that category.
I've been trying brioche recipes for ages, and will keep on doing so, but i always come back to this one, that i adore. It's the kind of recipe that i love, because i got it from a friend that had it from a friend after a trip to Sweden. There's actually suppose to be some kind of swedish spice mix to go in it, but i have no idea what kind, and trully they are lovely as it is.
You can make individual buns or one big brioche, i've also used it to make a 3 kings cake. You can add raisins or chocolate chips in it, put a sugar topping or not... Anything you fancy!
Sliced open with a bit of butter and marmelade, a hot cup of tea next to it, this looks like a nice start to the day.
Brioche
For 6 big individual buns
425gr of Flour
90gr of Butter
75gr of Sugar
1/4 liter of Milk
1 Teaspoon of Salt
25gr of Fresh Baker Yeast
1 Egg
1 Tablespoon of Milk
3 Tablespoon of Sugar Grains
Melt the butter and add the milk to it, use a little bit of that mixture to mix the yeast in. Be carefull that the mixture is not hot, just teppid, or it will kill your yeast.
Mix the flour, sugar and salt together and add slowly the butter/milk to it, and than the milk/butter/yeast mixture. Work until it's combined well and seems elastic. Cover it with a towel and let it rest for one hour in a warm place.
Cover an oven tray with parchement paper. Put a bit of flour on your working surface, aswell as on your hands and form your buns. Place them onto the tray and let them rise for 30 minutes.
Preheat your oven to 225°C.
Beat the egg and the tablespoon of milk well and brush the buns with it. Spread the sugar grains on top and put it into the oven for about 10 minutes or until they have a golden color.
Inscription à :
Articles (Atom)