06/08/2013
A Taste of Holidays: Cannelloni al Pesto
As someone use to sing "All good things come to an end" and so it happens to the holidays too. I know we wouldn't appreciate them as much if we'd be on holidays all the time, but it takes a certain kick in the behind to go back to work after enjoying a couple weeks of rest.
No clock to watch, no appointment to get to, just living on your own rythm, following the sun and your mood, does make your life feel smoother and peacefull.
Hopefully we all keep something from that inner peace and quiet that lives with us during that time, and take it with us to our daily lives. Obviously I need to watch the time again and follow my schedule, but beside that trying not to multi-task all the time, enjoying some time to just do nothing or do what I want instead of what I'm supposed to, is something I will try to apply to my daily life.
Holidays also mean time to cook, not that I don't take time the rest of the year (I have a food blog afterall!!), but cooking in a different place, not having to be finished at a certain time, always makes it a bit different.
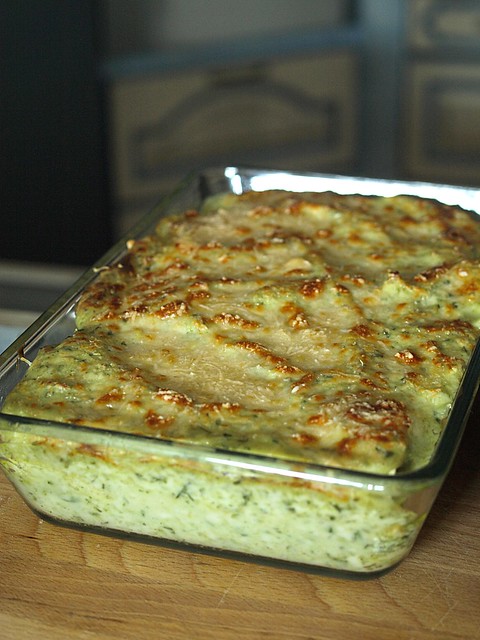
Last month's daring kitchen challenge made us choose from the archive, and this recipe from the daring cook section immediatly sounded appealing: Cannelloni al Pesto! Without my pasta machine, it took a bit of work with the rolling pin, and even if it didn't end up as thin as with the machine, the cannelloni were lovely and tasted like holidays!
Cannelloni al Pesto
EGG PASTA
Ingredients (to make enough cannelloni for 4 persons):
100 grams (2/3 cup plus 2 teaspoons) (170 ml) (3½ oz) plain (all-purpose) flour
1 large egg
Directions: 1. Put the flour and eggs in a food processor and mix. When the dough looks like crumbs, pour it onto the bench top sprinkled with a little flour. Knead well by hand until you obtain a smooth dough. Make it into a ball, wrap it in cling wrap and let it rest for 10-15 minutes.
2. Now you are ready to make your egg pasta. Cut out a piece of egg pasta dough and flatten it into a rectangular shape with your hands. Put a little flour on it and begin passing it though the pasta machine. Turn the dial to the widest setting (#1) and, starting with one of the shorter sides of the rectangle, feed it through the rollers. Now fold one side of the piece of dough into the middle, then fold the other side over that to form 3 layers. Starting with one of the narrower sides of the folded dough, feed the pasta through the machine, again at the widest setting. Repeat the folding and rolling technique on the widest setting for at least a couple of times.
3. Now you can start rolling it thinner, by turning the dial to the next narrowest setting (# 2). Roll the pasta through the machine without folding the dough between settings. Keep reducing the settings until #7 (it is the second last on my machine – about 1 mm thick). If the sheet of pasta gets too long, you can cut it in half with a knife. To make cannelloni, cut out rectangular pasta sheets (10x15 cm) (4”x6”).
BÉCHAMEL SAUCE
Ingredients (enough to make cannelloni for 4 people):
2 cups (500 ml) milk, hot
3½ tablespoons (52½ ml) (50 gm) (1¾ oz) butter
1/3 cup (80 ml) (50 gm) (1¾ oz) all-purpose (plain) flour
1 pinch salt
1 pinch nutmeg
Directions: 1. Put the butter in a non-stick pot and let it melt. Add the flour and whisk constantly until well incorporated: this is the “roux”. Let it cook for a minute or two.
2. Now start adding hot milk little by little, while mixing continuously until the milk is well incorporated. Do not add more milk unless it is well incorporated. Keep doing so until all the milk is incorporated.
3. Add salt and nutmeg and cook it on a low flame for 10 minutes or until it thickens.
4. When ready, cover it to prevent a film to appear on the surface.
CANNELLONI AL PESTO
Ingredients (serves 4)
Cannelloni sheets per recipe above (you should have about 8 sheets)
For pesto (makes about 190 gms/ 1cup)
2 cups (480 ml) (80 gm) (2¾ oz) basil, washed
¼ cup (60 ml) (15 gm) (½ oz) parsley, washed
1 small clove garlic
3 tablespoons (45 ml) (25 gm) (¾ oz) Pecorino Romano, finely grated
1 tablespoons (15 ml) (10 gm) (¼ oz) Parmigiano Reggiano, finely grated
4 to 5 tablespoons (45 to 60 ml) extra virgin olive oil
½ tablespoon (12½ ml) (5 gm) pine nuts
Salt to taste
For the filling
2 cups (480 ml) (500 gm) (18 oz) ricotta
¾ cup (180 ml) (150 gm) (5⅓oz) pesto (from the above recipe)
1½ cups (360 ml) (85 gm/3 oz) Parmigiano Reggiano, finely grated
1 pinch nutmeg
Salt and pepper to taste
1 small potato, boiled and sliced
8 green beans, boiled
To assemble
2 cups (500 ml) béchamel sauce
¼ cup (60 ml) (40 gm) (1½ oz) of pesto (from the above recipe)
½ cup (120 ml) (35 gm/1 oz) Parmigiano Reggiano, finely grated
Directions: 1. Start by making pesto. Simply blend the garlic, pine nuts, salt, basil, parsley and half the extra virgin olive oil together (I use a hand blender to do this) until obtaining a fine paste. Transfer to a bowl, add the grated cheeses and the remaining extra virgin olive oil and mix well. Adjust salt to taste and cover it with a thin layer of extra virgin olive oil to prevent oxidation. Keep it aside.
2. To make the filling, mix the ricotta, ¾ cup (150 gm) of pesto, 1½ cups (85 gm/3 oz) of Parmigiano Reggiano, nutmeg, salt and pepper together until well combined. Refrigerate until ready to use.
3. Mix the béchamel sauce with the remaining pesto.
4. Put a large pot with salty water on the fire and bring to a boil. Cook the pasta sheets in it for 1 minute. Do this in batches (I use a shallow but large pot and I cook them in 1 layer, so I am sure they do not stick together). Remove them with a slotted spoon and put them on a clean tea towel to cool down.
5. Now take one sheet of cooked pasta and put 1/8 of the filling along the long side of the rectangle. Put 1 boiled green bean and 1 or 2 slices of boiled potatoes on top and roll the pasta over to make a cannellone. Do so for the remaining rectangles of pasta.
6. Take a big enough oven dish to fit all your cannelloni tightly. Spray the oven dish with some cooking oil (or melted butter) and pour some béchamel and pesto sauce on the bottom. Spread it well, especially in the corners. Put the cannelloni in the oven dish on 1 layer.
7. Cover the cannelloni with the béchamel and pesto sauce and sprinkle with the remaining ½ cup (120 ml) (35 gm/1 oz) of Parmigiano Reggiano.
8. Bake them in a pre-heated moderate oven 350°F/180°C/gas mark 4 for 20 minutes, then broil (grill) them at 400°F/200°C for another 5 minutes.
9. Serve immediately.
27/07/2013
Daring Baker - July 2013: Eenie Meenie Miney Moe! Mezze it is!
In a "celebration" of past Daring Baker and Daring Cook challenges, Lisa challenged all of us to search through the Daring Kitchen archives and pick any one we'd like! The REAL challenge was picking which delicious recipe(s) to try!
So this month, it was all about choosing, and as we could pick from the daring cook archives aswell, I thought I'd give this a try. I've actually made quite a few recipe from both the daring baker and cook, you'll get to see a few post around here I guess, the previous chocolate cake was one of them for instance.
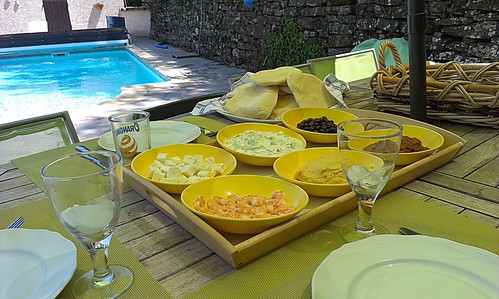
Right now, I'm on holidays (yes, I know, lucky me), so to fit the weather and the mood of this time of year, I picked the february 2010 daring cook challenge "Mezze", the middle eastern version of the spanish tapas.
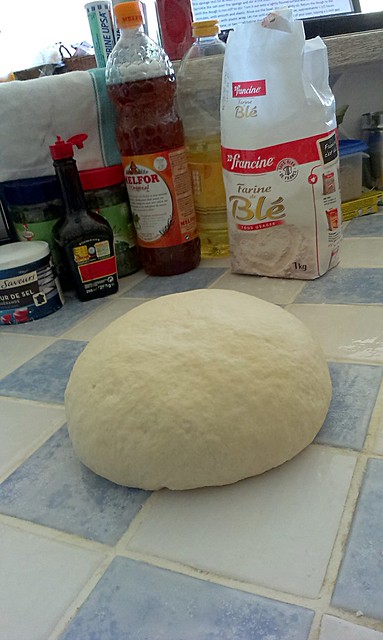
Under some scorching hot sun, eating something cold, or even fresh, seems like a wise choice. And even on holidays, nothing feels more therapeutic than making bread, any kind of bread. I've made Pita Bread before, but from a different recipe.
To go with the lovely pita breads, some hummus, cucumber raita, some eggplant parmeggiano leftover, feta cheese, olives, schrimps... Anything you fancy really, that's the fun of this kind of recipe, and also a great way to use what's left in your fridge.
This is a bit of a "low-fi" recipe, because I have my camera with me, BUT I forgot the cable to transfert my pictures to my computer, so in order to post on time, I decided to take picture with my cell phone instead, aahhh the joy of technology!
Mezze
Pita Bread (Recipe adapted from Flatbreads & Flavors by Jeffrey Alford and Naomi Duguid)
makes about 16 breads
2 teaspoons regular dry yeast (.43 ounces/12.1 grams)
2.5 cups lukewarm water (21 ounces/591 grams)
5-6 cups all-purpose flour (may use a combination of 50% whole wheat and 50% all-purpose, or a combination of alternative flours for gluten free pita) (17.5 -21 ounces/497-596 grams)
1 tablespoon table salt (.50 ounces/15 grams)
2 tablespoons olive oil (.95 ounces/29 ml)
- In a large bread bowl, sprinkle the yeast over the warm water. Stir to dissolve. Stir in 3 cups flour, a cup at a time, and then stir 100 times, about 1 minute, in the same direction to activate the gluten. Let this sponge rest for at least 10 minutes, or as long as 2 hours.
- Sprinkle the salt over the sponge and stir in the olive oil. Mix well. Add more flour, a cup at a time, until the dough is too stiff to stir. Turn it out onto a lightly floured surface and knead for 8 to 10 minutes, until smooth and elastic. Rinse out the bowl, dry, and lightly oil. Return the dough to the bowl and cover with plastic wrap. Let rise until at least doubled in size, approximately 1 1/2 hours.
- Place a pizza stone, or two small baking sheets, on the bottom rack of your oven, leaving a 1-inch gap all around between the stone or sheets and the oven walls to allow heat to circulate. Preheat the oven to 450F (230C).
- Gently punch down the dough. Divide the dough in half, and then set half aside, covered, while you work with the rest. Divide the other half into 8 equal pieces and flatten each piece with lightly floured hands. Roll out each piece to a circle 8 to 9 inches in diameter and less than 1/4 inch thick. Keep the rolled-out breads covered until ready to bake, but do not stack.
- Place 2 breads, or more if your oven is large enough, on the stone or baking sheets, and bake for 2 to 3 minutes, or until each bread has gone into a full balloon. If for some reason your bread doesn't puff up, don't worry it should still taste delicious. Wrap the baked breads together in a large kitchen towel to keep them warm and soft while you bake the remaining rolled-out breads. Then repeat with the rest of the dough.
1.5 cups dried chickpeas, soaked in cold water overnight (or substitute well drained canned chickpeas and omit the cooking) (10 ounces/301 grams)
2-2.5 lemons, juiced (3 ounces/89ml)
2-3 garlic cloves, peeled and crushed
a big pinch of salt
4 tablespoons tahini (sesame paste) OR use peanut butter or any other nut butter—feel free to experiment) (1.5 ounces/45 grams)
additional flavorings (optional) I would use about 1/3 cup or a few ounces to start, and add more to taste
- Drain and boil the soaked chickpeas in fresh water for about 1 ½ hours, or until tender. Drain, but reserve the cooking liquid.
- Puree the beans in a food processor (or you can use a potato masher) adding the cooking water as needed until you have a smooth paste.
- Add the rest of the ingredients and mix well. Adjust the seasonings to taste.
1 medium cucumber, peeled and most of the seeds removed
1 teaspoon cumin seeds (.1 ounce/3 grams) OR use a small pinch of dried cumin—to taste
2 cups plain whole milk or Greek yogurt (17 ounces/473ml)
1 garlic clove, peeled and minced
fresh coriander or mint, chopped, a couple pinches or more to taste
cayenne pepper or paprika, just a pinch to use as a garnish (optional)
- Peel cucumber, de-seed, and dice. Blot off moisture with paper towels.
- Toast cumin seeds for a few seconds in a small, heavy frying pan over high heat.
- In a bowl, stir yogurt until it is smooth.
- Mix it with the cumin, garlic and coriander or mint leaves (I used some grated radish instead).
- Stir in the cucumber and sprinkle with cayenne or paprika, and chill before serving.
08/07/2013
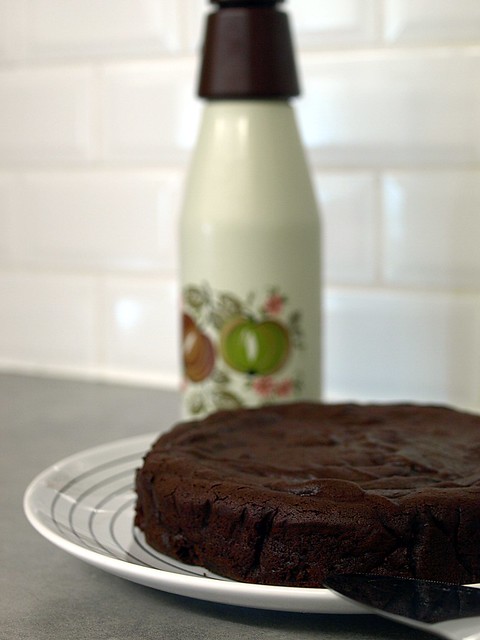
Death by Chocolate: Chocolate Valentino Cake
As stated many times before, my addiction to chocolate knows no boundaries. I don't know where it comes from, or for how long it's been going on, but as far as I can remember, I've been enjoying, seeking, longing for chocolate in one form or an other. And thru difficult times, nothing works quite as good for me as some good dark chocolate.
So yes summer is here, my holidays are around the corner, I'm healthy... bla bla bla... When your mind is not into it, there is just no way of getting it there sometimes. I call that my post birthday depression, once you're over 25, all of the sudden, birthday turn into this big questionning about your achievement, where you're going with your life... All that grown up stuff I don't like. Have I mentioned I'm a cancer before, and that we are all kinds of nutcases?
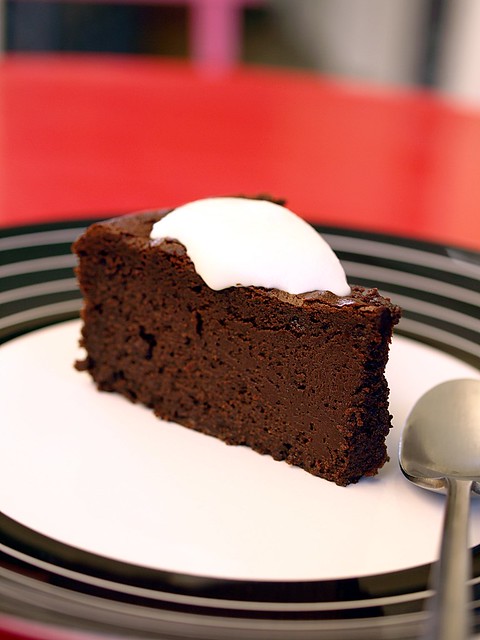
Anyway, I'm going to shake this of, and one good way is heading to the kitchen and baking something. This chocolate cake is ridiculously delicious, is only for true chocolate lovers, because it just taste like pure chocolate... Choose your favorit chocolate for this recipe, and remember chocolate is the answer!
Chocolate Valentino Cake (From Chef Wan's Sweet Treats)
450gr of Black Chocolate (I used Meunier)
150gr of Butter
5 Eggs
Preheat the oven to 190°C. Grease a 20cm oven dish, line it with parchement paper and butter it again.
Break the chocolate into small bits, add the butter into cubes into a heatproof bowl. You can melt this over a "bain-marie", meaning over simmering water, or the lazy way: in the microwave. On low power, never over 30 seconds each time and whisk in between, this should be done in 3 or 4 times. Leave to cool a little.
Separate the egg white and yolk, whip the egg white to a stiff peak and seat aside. Beat the egg yolk a little to add some air to them and whisk them in the cooled chocolate/butter mixture.
Using a spatula, fold in a third of the egg white to soften the batter, than add the rest of the egg white, carefull fold until it's well combined.
Pour the batter into the greased dish and place it in the oven for 25-30minutes, the top should be like a brownie and a cake tester should come out wet.
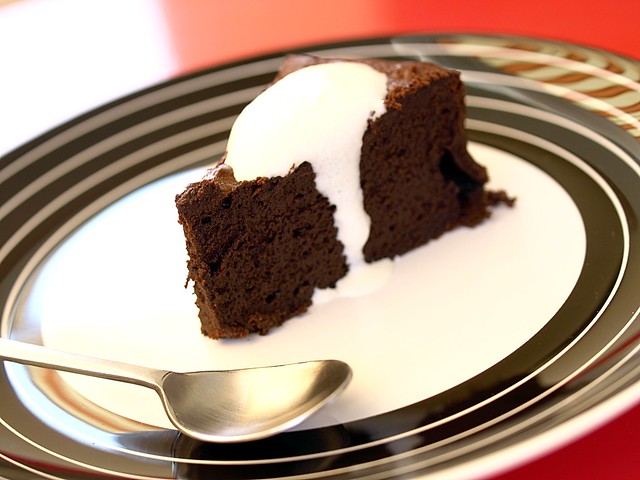
Leave it to cool for at least 10 minutes then unmold. You can enjoy this with a bit of whipped cream flavored with vanilla sugar.
30/06/2013
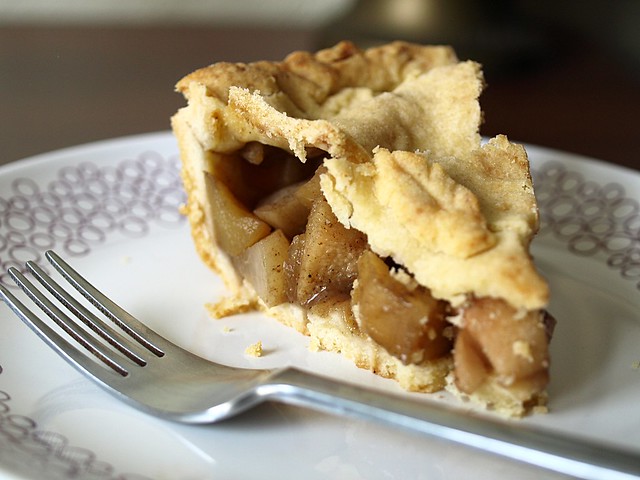
Life of Pie, episod 2: American Apple Pie
I have unfortunately never been to the USA, so my (most likely mis-) conception of it comes from the movies and TV shows I've seen or from the books I've read. Considering the size of the country aswell as the number of states, this vision must be about as accurate as summing up France by just talking about Paris.
But some images, or should I even say clichés, seem just as american as can be. One of those is the apple pie. I guess I have this on my mind from some "Tom and Jerry" cartoon I watched growing up, with Mammy two Shoes backing a pie and leaving it to cool on the window counter, before Tom and Jerry start doing some kind of mayhem involving that pie.
Then, there is also that song "American Pie", which I shamefully admit, that I got to know this song from Madonna's version of (it's not an excuse, but I wasn't born in 1971). I catched up in the meantime, but I still like Madonna's version and video.
On a side note it's also a song that I really enjoy, because it's one of the few I can kinda play on my guitar and badly sing along to it, all the more fun (for me).
As I had a lot of fun with this month daring baker challenge, I used the week end to make the double crust apple pie. My only addition to the original recipe given below is that I did about half apple and half pears and added a bit of cinnamom to the filling.
So as the 4th of July is upon us, aswell as I wanted to chear americans on the historic week they've been thru, let's all be a little bit american today.
Double Crust Apple Pie:
Servings: 8
Active time: 45 minutes altogether
Baking time: 50 minutes
Chilling time: 1 hour
Ingredients
Flaky pastry
2/3 cup (160 ml) (150 gm) (5-1/3 oz) unsalted butter
1¾ cups (420 ml) (250 gm) (8-2/3 oz) all-purpose flour
2 teaspoon (10 ml) (10 gm) (1/3 oz) sugar
1/4 teaspoon (1½ gm) salt
3-8 tablespoons (45-120 ml) cold water
Filling
1 – 1½ kg (2¼ to 3-1/3 pounds) apples (depending on the depth of your pie dish)
1 cup (240 ml) (200 gm) (7 oz) light brown sugar, lightly packed (more or less to taste)
1 tsp ground cinnamon
pinch of ground cloves, nutmeg and/or ginger (optional)
1 - 2 teaspoons (5-10 ml) (5-10 gm) white sugar for sprinkling (optional)
Glaze
either 1 egg beaten with 1/2 teaspoon water, or 1 tablespoon milk
Directions:
Flaky pastry
1. Weigh/measure out the correct amount of butter, wrap it in foil and freeze it for at least 30 minutes.
2. Sift the flour, sugar and salt into a large bowl.
3. Using the large holes on a box grater, grate the frozen butter directly over the flour in the bowl. Hold the butter by the foil to avoid warming it up too much and work as quickly as possible.
Using a table fork, toss the grated butter in the flour until it's all coated.
Alternatively, finely chop the butter and rub in with your fingertips, working quickly to avoid warming it. This is best left to those lucky folk with cool hands!
4. Sprinkle 3 tablespoons (45 ml) of cold water over the mixture and mix together with the fork. Add more water, spoon by spoon, as needed - it will depend on temperature, humidity and a million other factors, but the finished dough should be moist and starting to come together, but not wet. I used 7 tablespoons (315 ml). Use your fingertips to test if it's sticking together.
5. Finish by using your hands to quickly bring the dough together into a ball. Just press, don't knead.
6. Wrap dough in plastic and refrigerate for at least 30 minutes.
Pie
1. Preheat oven to hot 220°C/425°F/gas mark 7 . Lightly grease a deep 9"/24cm ceramic or metal pie dish. Note that a dish this size results in quite a thin top crust - if you want a sturdier top which cuts more cleanly, then you should use a smaller dish so you don't need to roll it out so thinly.
2. Take 2/3 of the pastry dough (I weighed my dough and 2/3 was about 12oz/340g) and roll out to fit pie dish, right up to the rim. Line the pie dish with it, prick all over the bottom with a fork and set aside.
3. Peel, quarter, core and slice the apples and place in a bowl. How tightly you can pack them into the pie depends on how thinly they are sliced - I like them chunky, but you will get a firmer filling if they are very thin.
4. Sprinkle the brown sugar and spice(s) over the apples and toss well to coat.
5. Pack the apples tightly into the lined pie dish. The filling can come up above the rim of the dish in a mound.
6. Roll out the remaining pastry dough to fit over the apples.
7. With a wet finger, moisten the edge of the pastry in the dish. Place the dough lid on the pie and press the edges together. Trim the edges as necessary and crimp the seam closed with your fingers or the back of a fork.
8. With a pair of kitchen scissors, cut three vents in the top of the dough. You can either cut leaf-shaped vents and use the pieces you removed to fashion decorative leaves, or you can cut straight vents and use any pastry trimmings to fashion decorations as desired. Moisten the back of the decorations with a wet finger and gently press onto the top of the pie.
9. Glaze the top of the pie with a beaten egg or milk, then sprinkle the top with a little white sugar.
10. Place pie dish on a baking sheet and put it into the center of the oven. Bake for 20 minutes, then reduce heat to moderate 180°C/350°F/gas mark 4 and bake for a further 30 minutes. The top should be light golden brown.
11. Serve hot, warm or cold.
27/06/2013
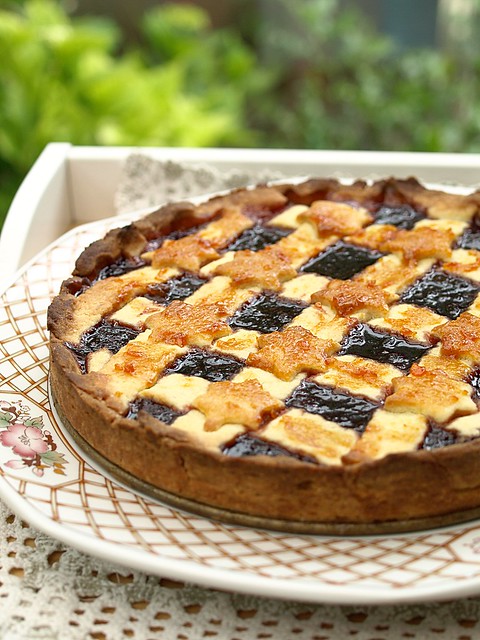
Daring Baker - June 2013: Life of Pie
Rachael from pizzarossa was our lovely June 2013 Daring Bakers’ host and she had us whipping up delicious pies in our kitchens! Cream pies, fruit pies, chocolate pies, even crack pies! There’s nothing like pie!
Summer is here! And one of my "go to" dessert during those hot days is pies. We have so many gorgeous fruits during this time of the year, it would be a shame not to use them some way or an other for dessert.
I'm also lucky enough to have farmers in my family, so when I got a call a few weeks ago, and got asked "Do you want some strawberries?" of course I said yes! Little did I know that "some" meant about 4 kilos!! So I spend my day off making jam, which is always a fun day and with the oh-so-satifying feeling of having those pretty jar aligned on the kitchen counter. A job well done!
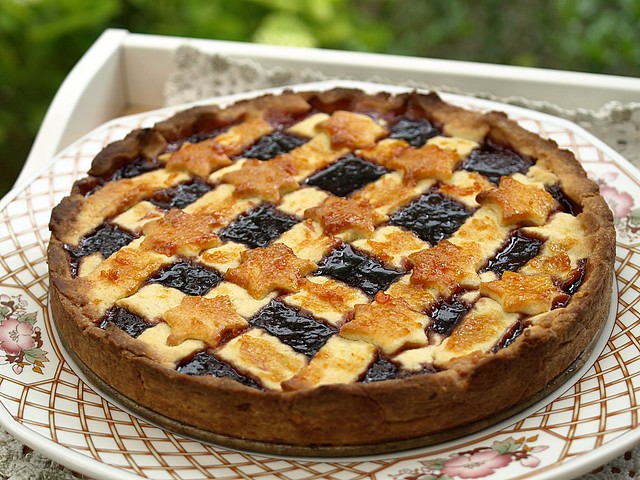
Although Rachael offered many different recipes, which I would try out in the future, I went for the crostata di marmellata, an italian pie with a jam filling. Around here, we have something similar, called Linzertorte, a raspberries filled pie with a spices and almonds crust, which is one of my favorit dessert.
So between the freshly made strawberry jam and the expectation of trying this pie, my choice was obvious. And I'm really pleased with the result, where the linzertorte is more a winter dessert, for its rich dough, this one really feels like summer. I loved the lemon flavored dough that makes a soft and crumbly crust, I will used it again in many more pies to come.
Crostata di marmellata:
Servings: 8
Active time: 1 hour altogether
Baking time: 30 minutes altogether
Chilling and resting: 2 hours altogether
Cooling time: 3 hours altogether
Ingredients
Filling
3-1/3 cups (800 ml) 500 gm strawberries, washed, hulled and quartered
250 gm 2:1 gelling sugar (or 500 gm of 1:1 gelling sugar, or as much white sugar (1 to 2 cups) as desired + pectin according to manufacturer's quantities)
2 tablespoons (45 ml) freshly squeezed lemon juice
Pasta Frolla (basic Italian pie pastry)
2/3 cup (160 ml) (150 gm) (5-1/3 oz) unsalted butter, room temperature
1/3 cup (80 ml) (75 gm) (2-2/3 oz) sugar
1 large egg, room temperature
1 teaspoon (5 ml) vanilla extract
grated zest of 1 medium lemon
1-2/3 cups (400 ml) (225 gm) (8 oz) all-purpose (plain) flour
pinch salt
Glaze
¼ cup (60 ml) (75 gm) (2-2/3 oz) apricot jam
1-2 teaspoons (5-10 ml) freshly squeezed lemon juice
Directions:
Filling
1. Stir everything together in a heavy-based saucepan and heat slowly over medium-low heat, stirring constantly.
2. When the strawberries have released their juice and the mixture comes to a boil, allow to boil for the time given in the gelling sugar/pectin manufacturer's directions.
3. Allow mixture to cool to room temperature.
4. Can be made ahead and refrigerated, covered, for up to a week until needed.
Pastry
1. Using a paddle attachment on a stand mixer or an electric hand mixer or whisk, cream the butter and sugar until pale and fluffy, 2 - 5 minutes. The amount of time you cream the butter will affect the final dough - longer means lighter which in turn means a softer, more fragile dough which is less easy to work, but I prefer the texture of the cooked pastry this way because it's lighter too. If you want to do a more intricate lattice, I'd recommend a shorter creaming time so you have a firmer dough.
2. Add the egg, vanilla and lemon zest, one at a time, mixing thoroughly after each addition.
3. Add the flour and salt and mix until the dough comes together but remains soft, about 1 minute using a stand or electric mixer or a wooden spoon if mixing by hand. Don't over-mix.
4. Wrap dough in plastic wrap and refrigerate for 30 minutes to one hour.
5. When getting ready to bake, rest dough at room temperature for about 30 minutes.
6. Lightly grease a shallow 9"/24cm metal pie dish.
7. On either a piece of parchment or a lightly floured surface, roll 2/3 of the dough (I weighed my dough and 2/3 was about 12oz/340g) out to a circle to generously line the pie dish. I prefer to use parchment with a circle traced on it so I can roll it as quickly as possible, before the dough gets too soft to handle, then use the parchment to transfer it to the dish.
8. Transfer the dough to the pie dish, press in gently and roll the edges to form a good surface for attaching the lattice later. Prick all over the bottom with a fork.
9. Refrigerate the dough-lined pie dish for 30 minutes to reduce shrinkage during baking.
10. Preheat oven to moderate 350°F/180°C/gas mark 4..
11. Line pastry with parchment and fill with dry beans or pie weights. Bake until set, around 15 minutes.
12. Remove the weights and parchment and allow to cool. If using a springform or loose based pie dish, remove the side of the pan.
13. Preheat oven to moderately hot 400°F/200°C/gas mark 6.
14. Roll the remaining dough to fit the pie dish and cut it into roughly half inch/1.5cm-wide strips.
15. Spread the filling over the par-baked crust.
16. Arrange the strips of dough in a lattice over the filling (see links below for some how-to guides - you can do an intricate intertwined lattice or a very simple overlay one like I've done), trim as needed and lightly pinch the ends onto the rolled edge of the bottom crust.
17. Place pie dish on a baking sheet and place in center of oven. Bake until lattice is golden, around 20 minutes. Meanwhile, prepare the glaze.
Glaze
1. Heat the jam and water in a small saucepan over medium heat until mixture comes to a boil. Alternatively, you can heat it on medium-high in a bowl in the microwave for about 2 minutes, stirring halfway.
2. Strain through a fine mesh sieve if it's chunky.
3. While glaze and pie are both still warm, brush over lattice crust.
4. Allow pie to cool completely before serving.
20/06/2013
Retro cooking: Curried Egg Sandwiches
Some strange thing happened to me the over day: as you may already know, I'm a bit of a TV show junkie and have many DVD (never enough to my taste though) that I enjoy to watch. I tend to wait for a serie to come to it's end, so that I can buy the boxset and marathon myself thru it. Yes, I'm strange in many ways.
So, I just went thru the absolutely brilliant second season of Sherlock, thinking what to watch next? A rerun of the Gilmore Girls or Buffy, a few Big Bang Theory or Friends episods... Than I just sat down to have lunch instead. And all the sudden there's a song in my head:
"I've been down this road.
Walking the line that's painted by pride.
And i have made mistakes in my life that i just can't hide."
It took me a few seconds to realise that's the theme song from Ally McBeal! Which is weird, I do have the DVDs, but I haven't watched it in so long, it wasn't even in my thought process of the moment.
Maybe our brains and body try to tell us stuff sometimes, and we just don't listen to them, or are too busy doing something else on top of something else. Or maybe I'm just crazy, and my brain goes coucou from all the things that are stored in it. Either way, I'm enjoying Ally McBeal, and it's great fun.
This recipe is long overdue, or at least the use of the book it came in. One of the good thing about having real friends, is that they still like you, even when they really know you and also that they know you well enough to get you cool gift, like this awesome cookbooks.
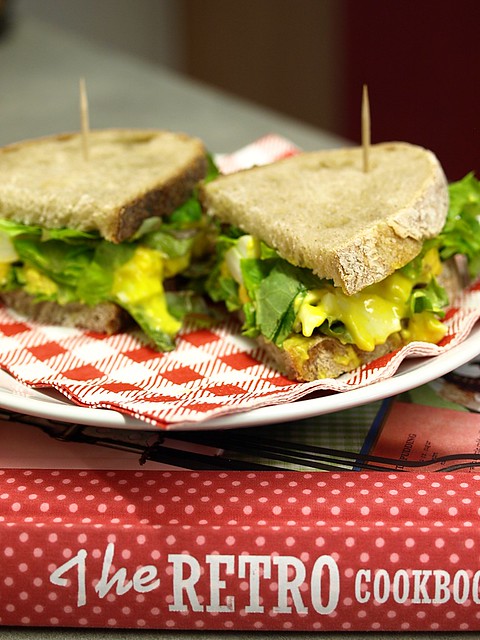
The retro cookbook has been on my shelves for almost a year now, and I pick it up quite often to get ideas, but today I finally channeled the 50's housewife in me (that took a lot of effort, believe me) to make this easy and summerish recipe.
Curried Egg Sandwich (based on the Retro Cookbook)
Serves 2
1 Egg Yolk
1/2 a Tablespoon of Mustard
Salt, Pepper
1/2 a Tablespoon Whine Honey Vinegar (such as Melfor)
3-4 Tablespoon Sunflower Oil
2 Teaspoon of Curry powder
4 Eggs, boiled
A Handfull of Salad
2 small Pickled Cucumber
Bread
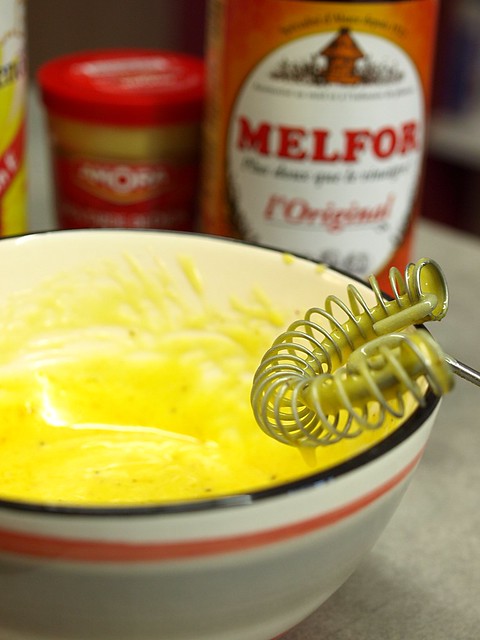
Let's start with the mayonnaise, using a whip (if you have one like the picture, they work very well for mayonnaise) combine in a small bowl, the egg yolk, the mustard, the salt and pepper. Than start adding slowly the oil until you have the consistency you wish. Add the vinegar and the curry powder, whip it a bit more and taste to check the seasoning, correct if necessary. Place in the fridge.
Boil the eggs and leave them in cold water once they are cooked. Peel them and chop them up with a knife. Using a fork, mash the eggs and mayonnaise together, add the pickled cucumber that you have thinly chopped. Set in the fridge for a few minutes, it's better cold.
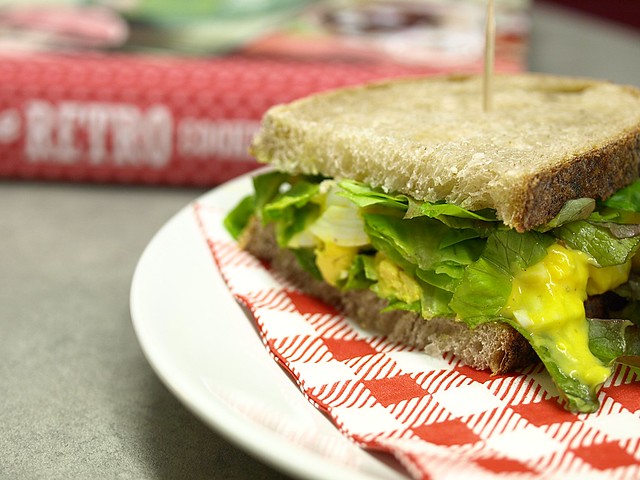
In the meantime, cut your bread (this should do for 2 to 3 big sandwiches) and shred your salad. On the bread, place a bit of salad, than the curried egg mixture, than a bit more salad and the other slice of bread. Cut the sandwich in two and add a toothpick so it holds better.
13/06/2013
Cheesy New York Cheesecake
Have you noticed that life is a lot about expectations? We hope for the weather to improve, for the unemployement rate to get better, for a parking space to open when we arrive at our destination, for our problems to be solved, for love to be around the corner or for a miracle to happen (like a healthy diet based on Nutella).
But isn't the problem with expectations, that we just "expect" them? Seated on our behinds, complaining nothing ever happens. Because it's safer, because that way you can blame everyone but yourself, because if you don't do anything, how could you do something wrong?
And if we may not do anything wrong, we might not do anything right either. So here's to the brave ones, who take decisions at the blink of an eye or to the sound of a heartbeat, who dare doing something different than everybody else, who might success or might fail, but at least had the courage to try.
I do not belong to the brave ones, I can get myself to brave moments every now and than though, and that's a start. For trying is always better than regretting.
What does this have to do with cheesecake? Not much to be honest, beside the hope for it to meet the expectations of your guests, or the promise to make you travel to New York just with a spoonfull.
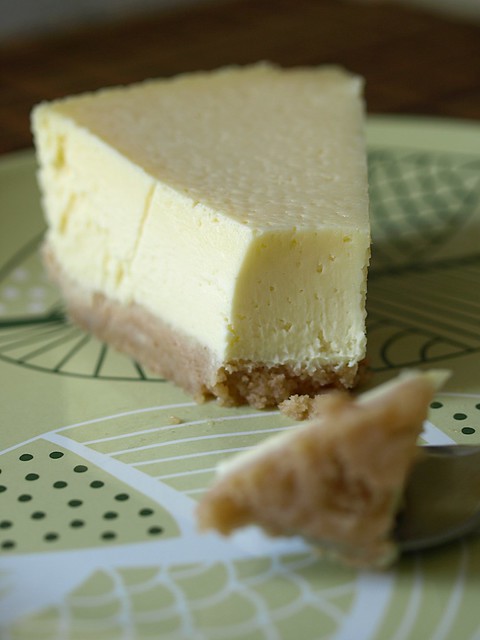
New York Cheesecake (based on Marcus Wareing, Cozinhar na Perfeição...)
For a 10 slices pie
60gr of Butter
135gr of Graham Crackers
500gr of Cream Cheese (Philadelphia)
150gr of Sugar
5 Tablespoons of Cream
30gr of Flour
4 Eggs
Preheat the oven 110°C with the fan. Butter a 20cm springform or cake pan.
Melt the butter in a small sauce pan or in the microwave (10-20seconds steps only). Blitz or break the graham crackers to have some sand. Pour the melted butter on the crackers and combine, than pour that in your pan and using a spoon, press down the mixture to evenly coat the bottom of your pan.
Have the cream cheese at room temperature and pour in the sugar to start mixing with a spatula. Now add the the cream and the flour and keep mixing.
Crack your eggs in an other jar, beat them lightly, before adding them to the creamcheese. Carefully whisk until everything is combined and smooth.
Pour this mixture on top of the cracker layer, try to smooth the top for the air bubbles to disappear. Place in the oven for 1h30min. The middle should still be a bit shaky went you take it out of the oven.
Leave it to cool at room temperature. Even if it's not adviced in the book, I like to have my cheesecake in the fridge, makes the texture denser and is nicer on a hot day.
Inscription à :
Articles (Atom)