27/09/2013

Daring Baker - September 2013: Pastel de Tres Leches


Inma of la Galletika was our Sept. 2013 Daring Bakers’ hostess and WOW did she bring us something decadent and delicious! Pastel de Tres Leches or Three Milk Cake, creamy yet airy, super moist but not soggy.. just plain delish!

Another baking travel thanks to the daring baker, this time to south America, with the Pastel de Tres Leches. I never heard of it and at first I thought it might have something to do with the dolce de leches.
The sponge cake recipe is great, and will be used again, as many I was worried the cake might be soggy but it turned out great (ok, I admit I didn't use the whole syrup, because it seemed an awfull lot).
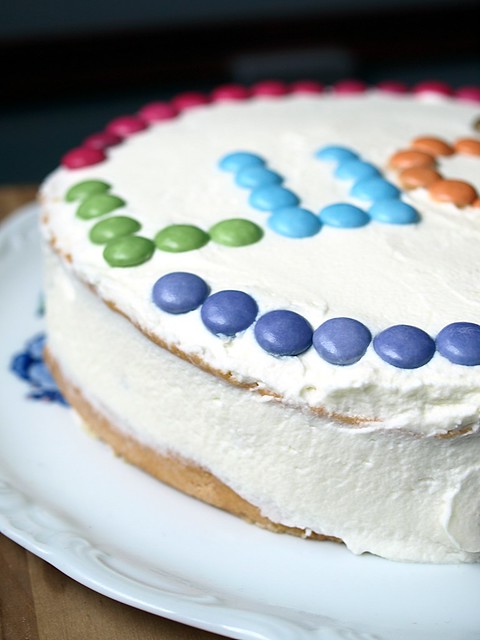
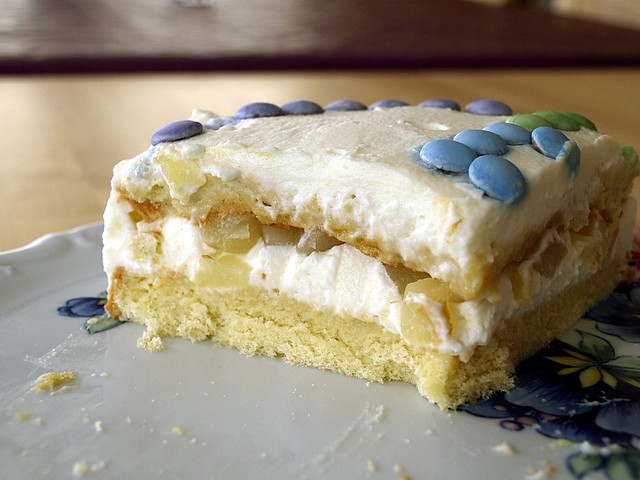
I matched this cake with my smallest niece's birthday, hence the colored chocolate chips decoration, and I choose to go with pears in the filling. It's nice and fresh with the whipped cream and is always a good match with chocolate.

Classic Three Milks Cake

Servings: 12

Ingredients for the vanilla sponge cake
5 large eggs (separated)
½ cup (120 ml) (4 oz) (125 gm) sugar
2 teaspoons (10 ml) of vanilla extract
1 cup (240 ml) (5 oz) (140gm) all-purpose (plain) flour (sifted)

For three milks syrup
1 can (14 oz) (400 gm) sweetened condensed milk
1 can (12 oz) (340 gm) evaporated milk
1 cup (240 ml) heavy cream (about 35% fat) or 1 cup of half & half or 1 cup milk
1 cinnamon stick
2 teaspoons (10 ml) rum (or other flavoring)

Topping and filling
2 cups (500 ml) of whipping cream (about 30% fat)
½ cup (120 ml) (4 oz) (125 gm) sugar
Canned or fresh fruit (to fill and decorate the cake)

Directions For the Sponge Cake:
  1. Preheat oven to moderate 180°C/350°F/gas mark 4. Prepare a square 9”x9” (23cmx23 cm) pan or 9” (23 cm) round cake pan
  2. Separate the egg whites from the yolks.
  3. Beat the egg whites on medium speed, 3 - 5 minutes.
  4. When soft peaks form slowly add the sugar in small batches.
  5. Whip until stiff peaks form about 5 minutes. Set aside.
  6. In a medium bowl beat egg yolks at medium-high speed for about 5 to 6 minutes, or until the egg yolks become pale colored, creamy and puffy. Stir in vanilla.
  7. Pour the egg yolks over the egg whites, gently fold until just combined trying not to lose any volume from the mixture.
  8. Fold in the flour little by little in the form of rain. Mix until just combined (over-beating will result in a denser, flatter cake).
  9. Pour the batter into the prepared 9”x9” (23cmx23 cm) square cake pan or 9” (23 cm) round cake pan.
  10. Bake in the preheated moderate oven for 25 minutes or until the toothpick comes out clean
  11. Let it cool
  12. Once cool, split the cake in half, flip the top of the cake and place it on a base. Poke using a fork holes all over the cake to better absorb the three milk soaking liquid.
Three milks syrup

  1. In a saucepan add the sweetened condensed milk, evaporated milk, heavy cream and cinnamon stick, bring to a boil, reduce the heat and continue boiling for 5 minutes. Remove it and let it cool.
  2. Once it is cool, add the rum or any other flavoring you are using
  3. Gradually brush all the milk soaking liquid into all sides of the cake (including the cut surfaces) until all absorbed. Best to rest the cake in the fridge overnight to complete the soaking process.
Topping
  1. Layer some whipped cream on the bottom layer and cover with canned or fresh fruit and decorate the top layer with whipped cream and the fresh or canned fruit.
19/09/2013

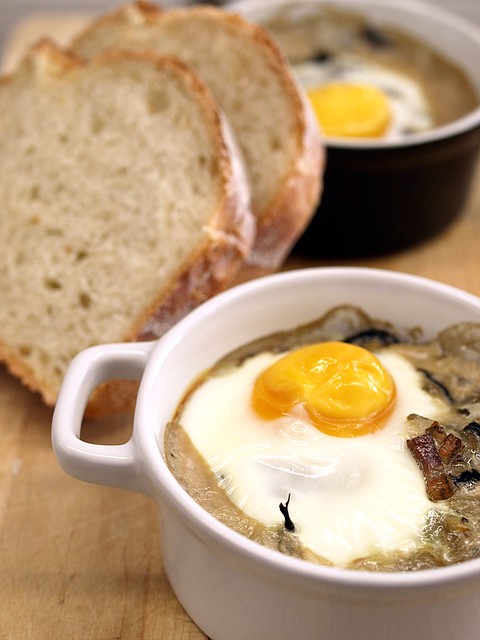
Cocotte Egg with Mushroom


So let's check: 3 layers of clothes, a big blanket on the bed, temperatures below 10°C at night, yeap, it looks like autumn is coming in early this year. Not that I mind, it's one of my favorit time of the year, but it always takes some adjustement, because I'm a girl and I'm almost always cold, so bring on the big socks, polar jacket and blankets to watch TV.

Because of the (too) many concerts booked, the travels that are planned and some upcoming expenses I know I will have until the the end of the year, I'm mostly cooking out of my pantry these days. Which, once again, proves that it is important to have a well stocked pantry.
This simple recipe is done under 30 minutes (even if you are slow like me) and fits perfectly these early autumn days, for a decent budget.

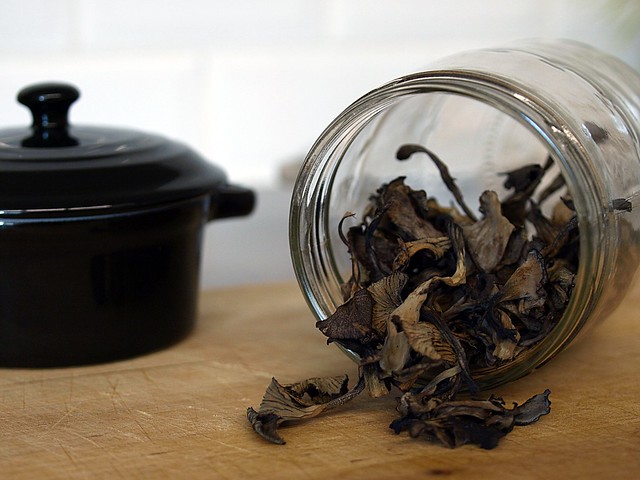
The mushroom are still from last year's hunting, dried up and stored properly, you can keep them easily. Onions and garlic have to be in every house, I used dried up parsley (obviously fresh would be better, but as said, I'm cooking out of the pantry), a small piece of speck leftover, some cream or soja cream and you're good to go. Enjoy your autumn!

Cocotte Egg with Mushroom


for 2 Cocottes

1 Handfull of dried up Mushrooms (I used trumpets of death)
1 Onion
1 Clove of Garlic
1 Tablespoon of Parsley (dried)
10cl of Cream
50gr of Speck
2 Eggs
Olive Oil
Salt, Pepper

Preheat the oven to 180°C.

Put the dried up mushroom in some hot water and let them sit there for about 15 minutes. In the meantime, peel and dice the onion aswell as the garlic clove.

In a non sticky frying pan, heat up some olive oil and add the onions with a bit of salt and cook them for about 5 minutes. Add the dried up parsley, the garlic and the diced speck, lower the heat.

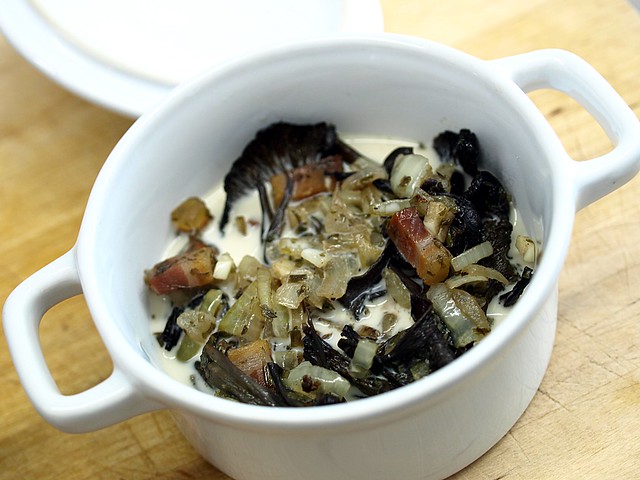
Drain the mushroom (but keep some of the water aside) and add them to the onion and garlic mixture.
Pour the water you kept in the sauce pan and reduce it on a high heat, when there is about 3 or 4 spoonfull left, add those spoonfull to the cream, it will add a nice mushroom flavor to it, add a bit of pepper.

In your cocotte, place the mushroom, onion and garlic mixture first, than poor over the cream/mushroom sauce on it and top it with a raw egg. Place in the oven for 12 to 15 minutes, depending how you like your yolk to be.

Serve with some toasted bread if you want, but if you have a nice fresh loaf of good bread no need to toast it first.

12/09/2013

One track mind: Patty Melts


Not that I particularly believe in astrology, at least when it says something bad is going to happen to me, but I often "blame" my quirkiest behaviour on the fact that I am a cancer (ascendant cancer, because I never do things by half) and I really think we are the most adorable weirdos in the whole zodiac!
I believe we are very constant in our affections, once we love something or someone, it's there to stay (unless they run away -fearing the crazy- obviously). This works for TV shows, clothes, leisures... or music and bands for instance, because seeing the same band 15 times in 6 months is borderline insane (and I'm not even exagerating for dramatical purpose, this is really happening).

Food is no different, I love trying new things, experiencing ingredients, new spices...etc. But some recipes will just always do, no matter how many time you ate them. My mum's lamb is one of those for instance or anything including good dark chocolate.
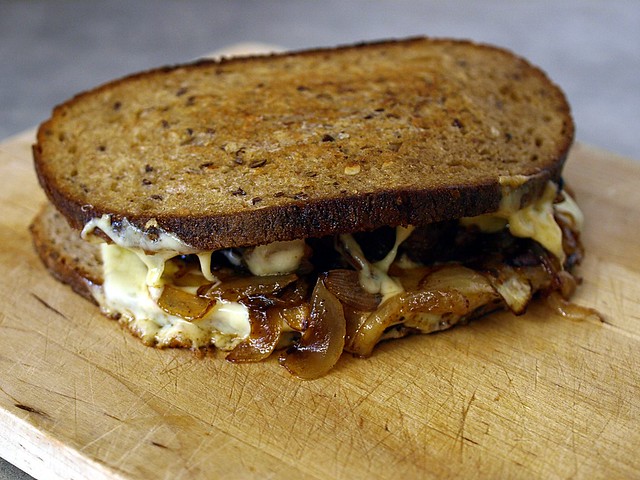
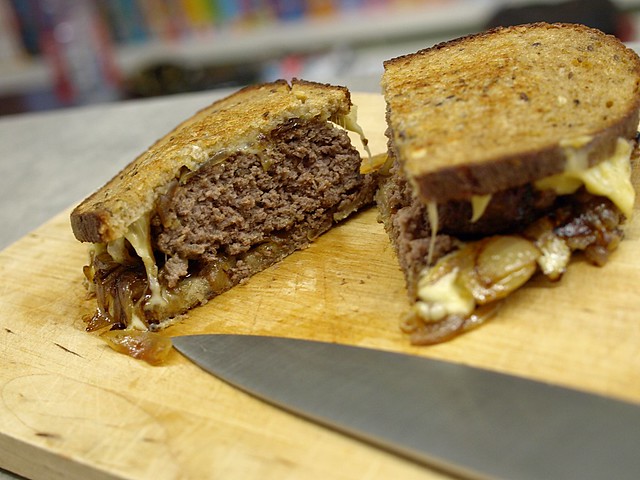
My latest craving is the patty melt. I love a good burger, but I often don't plan soon enough to make the buns, so when I read about this recipe using rye bread on David Lebovitz's page, I knew I had to try it out. This was about a month ago, ever since I kept trying this in so many different ways: with different cheese or bread, vegetarian, with sausages... and I liked them all.

Here's the more classic version of the recipe, with a lot of butter. I have to say that it's nice, every once in a while, to cook with butter, I'm an olive oil kinda of girl, but this is just the way to go for this recipe. Don't bother to make fries with that one, it's rich enough, even a salad seems too much to add to this lovely rich burger. I would just advice to go for a walk afterwards!

Patty Melt (from the Pioneer Woman)


Serves 1

2 Slices of Rye Bread
2-3 Small Onions
150-200gr of Ground Beef
2 Slices of Cheese (I used Gouda)
Butter (about 75gr)
Salt, Pepper
Worchester Sauce

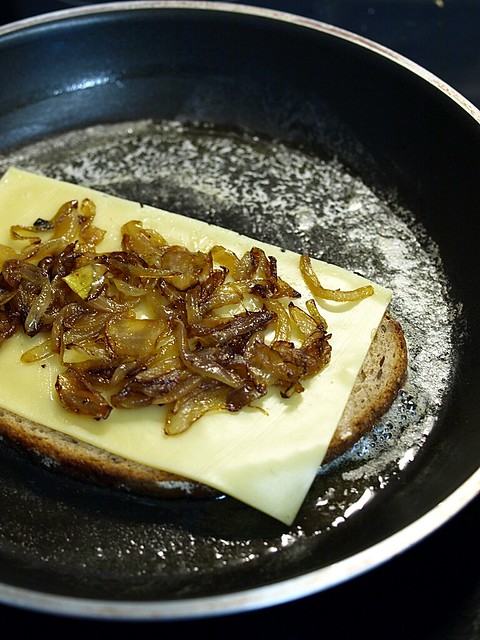
Peel and cut the onions in half moons, put a bit of butter in a non-sticky frying pan and add the onions. Add salt and pepper and cook on a medium heat for about 15 minutes, stiring often so it doesn't attach, they should be soft and golden.

Season you ground beef with salt, pepper and some worchester sauce, form a patty that is bout the size of the slice of bread you are using.
In a non-sticky frying pan, heat up some butter and cook your patty the way you like it.

In an other pan, heat up some butter and place one slice of bread in it and top it with one slice of cheese. When the cheese starts to melt a little, add half the onions on the cheese, place your burger on top and add the remaining onions. Now place the second slice of cheese on the onions, aswell as the second slice of bread on top of all that.
Press down a little on your burger, than carefull flip in to color the other slice of bread to a nice golden brown.

Slice in half and enjoy!

27/08/2013

Daring Baker - August 2013: A Cake and Two Cookies


Aparna of My Diverse Kitchen was our August 2013 Daring Bakers’ hostess and she challenged us to make some amazing regional Indian desserts. The Mawa Cake, the Bolinhas de Coco cookies and the Masala cookies – beautifully spiced and delicious! Smile

This month's Daring Baker challenge is making me travel to India. A country I don't know much about, except it's touristic clichés, Rajesh Koothrappali, and whose cooking is more famous for it's spicy savory recipes, but I had no idea what's in store for the sweet tooth in India.

I choose to make the mawa cake aswell as the bolinhas de coco, for I love coconuts and also I couldn't get a hold on curry leaves that where necessary for the masala cookies. Plus the name clearly stated it's portuguese history, and that's always a plus in my book!
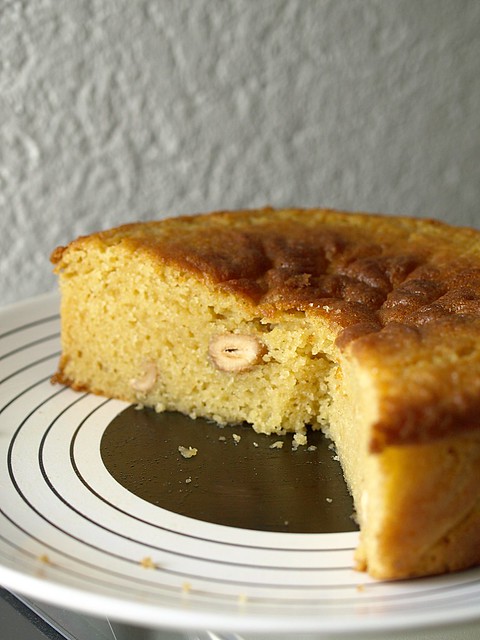
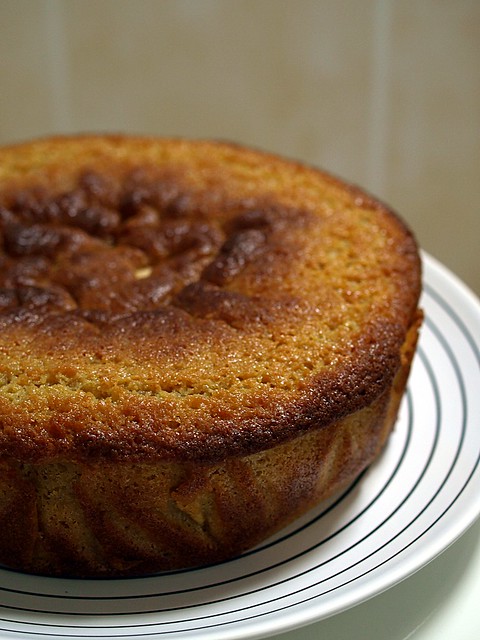
Making the mawa was a whole new experience, it almost felt like making some kind of cheese, and in the end it gives the cake a nice moist texture. The use of cardamom in both recipe gives them an exotic touch, it's a spicy that I love, but don't get to use it so often.

MAWA CAKE (Cardamom Flavoured Milk Cake):


Servings: Serves 8 to 10

Ingredients

For the Mawa:
1 litre (4 cups) full fat milk

For the cake:
1/2 cup (1 stick) (120 ml) (4 oz) (115 gm) unsalted Butter (soft at room temperature)
3/4 cup (180 ml) packed crumbled mawa
1-1/4 cups (300 ml) (10 oz) (280 gm) castor sugar
3 large eggs
5 to 6 cardamom pods, powdered, (about 1-1/2 tsp powdered cardamom)
2 cups (500ml) (9 oz) (260 gm) cake flour
1 teaspoon (5 ml) (5 gm) baking powder
1/4 teaspoon salt
1/2 cup (120 ml) milk
1 teaspoon (5ml) vanilla extract (optional)
Cashewnuts (or blanched almonds) to decorate (about 18 to 20)


Directions:

1. First make the “Mawa”. Pour the milk into a heavy bottomed saucepan, preferably a non-stick one. Bring the milk to a boil, stirring it on and off, making sure it doesn’t stick to the bottom.
Turn down the heat to medium and keep cooking the milk until reduces to about a quarter of its original volume. This should take about an hour to an hour and a half.
2. The important thing during this process is to watch the milk and stir it frequently to make sure it doesn’t stick to the sides or bottom of the pan and get burnt. The danger of this happening increases as the milk reduces and gets thicker.
3. Once the milk it has reduced to about one fourth, 1/4 quantity, lower the heat to low and let cook for a little while longer. Keep stirring regularly, until the milk solids (mawa) take on a lumpy appearance. There should be no visible liquid left in the pan, but the mawa should be moist and not stick to the sides of the pan.
4. Remove the pan from heat and transfer the mawa to a bowl and let it cool completely. Then cover and refrigerate it for a day or two (not more) till you’re ready to make the cake. It will harden in the fridge so let it come to room temperature before using it.
You should get about 3/4 to 1 cup of mawa from 1 litre (4 cups) of full-fat milk.
5. Now start preparations for the cake by pre-heating your oven to moderate 180°C/350°F/gas mark 4. Beat the butter, the crumbled mawa and the sugar in a largish bowl, using a hand held electric beater, on high speed until soft and fluffy.
6. Add the eggs, one at a time, and beat on medium speed till well incorporated. Add the vanilla and milk and beat till mixed well.
7. Sift the cake flour, baking powder, cardamom, and salt onto the batter and beat at medium speed and well blended. If you cannot find cake flour, place 2 tablespoon of cornstarch in the bottom of your 1-cup measure and then fill it with all-purpose (plain) flour to make up to 1 cup.
8. Grease and line only the bottom of an 8 inch (20 cm) spring form pan. Pour the batter into this and lightly smooth the top. Place the cashew nuts (or blanched almonds) on top of the batter randomly. Do not press the nuts down into the batter. A Mawa Cake always has a rustic finished look rather than a decorated look.
9. Bake in a preheated moderate oven for about 1 hour until the cake is a golden brown and a skewer pushed into the centre comes out clean. Do not over bake the cake or it will dry out. If the cake seems to be browning too quickly, cover it will aluminium foil hallway through the baking time.
10. Remove from oven and allow it to cool for 10 min in the tin. Release the cake, peel off the parchment from the base and let it cool completely.

BOLINHAS DE COCO (Cardamom Flavored Coconut Biscuits/ Cookies):


 Servings: Makes about 4 dozen cookies

Ingredients:

2 cups (500 ml) (5-1/3 oz) (150 gm) fresh grated coconut, packed
1-1/2 cups (360 ml) (9 oz) (250 gm) semolina
1-1/4 cups (300 ml) (8-3/4 oz) (250 gm) granulated sugar
3/4 cup water (180ml) (6 oz) (175 gm) water
A pinch of salt
2 tablespoons (30 ml) (1 oz) (30 gm) ghee (clarified butter) or melted unsalted butter
2 large eggs
8 to 10 pods cardamom, powdered (about 1-1/2 teaspoon)


Directions:

1. Run the grated coconut in your processor or the small jar of your blender a couple of times so that the flakes are smaller and uniform in texture. Do not grind into a paste. Keep aside.
2. Put the semolina in a pan and toast/ roast it, over low to medium heat, until it starts giving off an aroma, and looks like it’s about to start changing colour. This should take a couple of minutes. Do not brown. Transfer the semolina into a bowl and keep aside.
3. In the same pan, pour the water and add the sugar to it. Place it on medium heat and keep stirring until the sugar dissolves completely. Once the sugar has dissolved, keep stirring the solution and let it cook for about 2 minutes. Turn off the heat. The sugar solution should just begin to start forming a syrup but is still watery. Do not cook until it forms a thick syrup.
4. Add the toasted/ roasted semolina and mix well. Then add the coconut, salt and ghee (or melted butter) and mix well. Put the pan back on the stove, and over medium heat stir the coconut mixture until it is really hot and easily forms a thick clump. This should take about 2 to 3 minutes.
5. Take the pan off the heat and let the semolina coconut mixture cool to room temperature. Transfer this into a bowl or container, cover and refrigerate for at least 8 hours, ideally overnight. For really fluffy biscuits/ cookies, the overnight rest is recommended.
6. The next day, take the dough out of the fridge and let it come to room temperature. Separate the yolks from the egg whites. Lightly beat the yolks with a fork to break them and add to the dough. Also add the powdered cardamom and mix well with a wooden spoon or fork.
7. Whisk the egg whites by hand until frothy and add to the dough. Mix well till incorporated.
8. You will now have a slightly moist and sticky dough. Refrigerate this dough for about half an hour so it firms up a bit.
9. Pre-heat your oven to moderate 180°C/350°F/gas mark 4. Line your baking trays with parchment or grease them well with some ghee or melted butter.
10. Take the dough out and pinch off walnut sized bits of dough. The dough should be firm enough to handle without difficulty. If the dough is sticking to your palms, lightly dust your palms with flour before shaping the dough. Roll the bits of dough into balls and then flatten them very slightly.
11. Decorate the top by marking criss-crosses (3 equidistant lines one way and another 3 crossing them at right angles), with a table knife. Press down a bit but not too deep or right through the biscuit/ cookie. Use up all the dough this way.
12. Place the shaped dough on the baking trays leaving a little space between them. Bake in a preheated moderate oven for about 20 to 25 minutes until they’re a golden brown and done. Let them cool on the sheets for about 5 minutes and then transfer to racks to cool completely.
13. Store the biscuits/ cookies in airtight containers. This recipe makes about 4 dozen Bolinhas de Coco.

25/08/2013

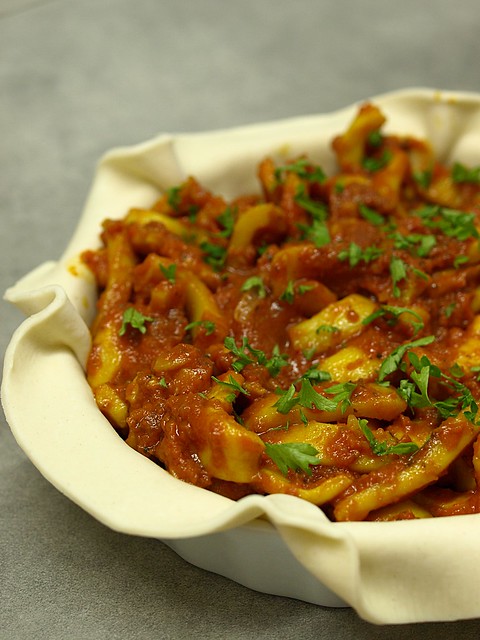
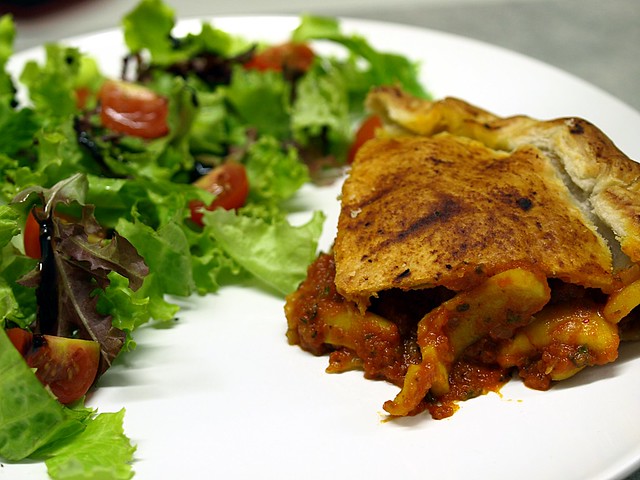
Squid Fish Pie or "Tielle à la Sétoise"


I know, it's only the end of August, but somehow it feels like the end of summer, maybe because vacations are coming to an end for most people, that kids are getting their school bag ready for the beginning of classes, or maybe just because the weather isn't quite playing along anymore.
This is a time of year I always enjoyed, I was one of those geeks kids who liked going to school and I enjoyed the anticipation of the start into a new school year. Even now, it always feels like a good time to do things differently, some other kind of "new year resolutions" if you will.

But slowly walking towards autumn, it is nice to take something with us from this time of year we all enjoy and wait for. It could be the memory of a clear blue sky, the quiet we felt resting in the middle of the afternoon with a good book, the pride of walking your way up a mountain (a very small one in my case) or just the taste of a dish that feels like holidays.


Every year I come back with a dish (or two) that really feels like summer to me, and everytime I make it again, it won't fail to remind me of the holidays that are linked to it. So even on a gray day, I can bring back some sunny days I've experienced during the time away.
This year dish includes squids, which I love and have loved ever since I was a kid (there is a picture of a six year old me shovelling in "fristo misto di mare" during a vacation in Italy to prove it), there something about this chewy consistency that works for me.

Nothing fancy of complicated in this dish, just buy some good ingredients, and take your time to cook the filling, because with squids, whether you cook them very quickly or for a long time, everything in between just won't work.

Tielle à la Sétoise (from "Cuisine du Sud")


Serves 2

400gr Puff Pastry
500gr Squid Fish (or Octopus)
1 Onion
1 Clove of Garlic
300gr of Tomato Sauce
2 Stigmas of Saffron
Olive Oil
Thym, Oregano, Marjoran...
Piment d'Espelette
Salt, Pepper
Parsley

Peel and cut the onion. In a big pain heat up some olive oil and add the onion, cook until soften. Add the squid fish cut into rings and cook for at least 10 minutes, add salt and pepper.

Add the crushed clove of garlic, the piment d'espelette, thym, oregano and marjoran (to your taste). Pour the tomato sauce and add the safran, cook until the sauce thickens and leave to cool down.

Roll out the puff pastry, and cut out two circle, one the size of your dish (in this case 20cm) and one a bit bigger.

Preheat the oven to 180°C. Place the bigger circle of puff pastry in your oiled pie dish, pour in the squid tomato filling and add a bit of freshly chopped parsley.
Place the second circle of puff pastry on top and seal the two circles together using your fingers.

With a brush, use a bit of the remaining tomato sauce from the filling to brush the top of the pie. Place it in the oven and cook for 35 minutes. Serve with a salad.

06/08/2013

A Taste of Holidays: Cannelloni al Pesto


As someone use to sing "All good things come to an end" and so it happens to the holidays too. I know we wouldn't appreciate them as much if we'd be on holidays all the time, but it takes a certain kick in the behind to go back to work after enjoying a couple weeks of rest.
No clock to watch, no appointment to get to, just living on your own rythm, following the sun and your mood, does make your life feel smoother and peacefull.

Hopefully we all keep something from that inner peace and quiet that lives with us during that time, and take it with us to our daily lives. Obviously I need to watch the time again and follow my schedule, but beside that trying not to multi-task all the time, enjoying some time to just do nothing or do what I want instead of what I'm supposed to, is something I will try to apply to my daily life.

Holidays also mean time to cook, not that I don't take time the rest of the year (I have a food blog afterall!!), but cooking in a different place, not having to be finished at a certain time, always makes it a bit different.
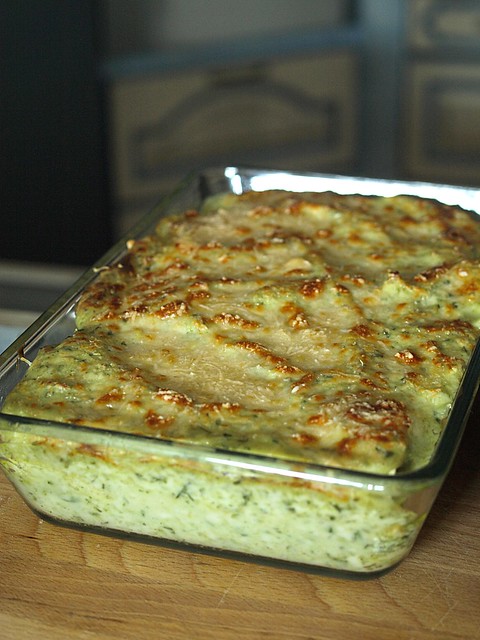
Last month's daring kitchen challenge made us choose from the archive, and this recipe from the daring cook section immediatly sounded appealing: Cannelloni al Pesto! Without my pasta machine, it took a bit of work with the rolling pin, and even if it didn't end up as thin as with the machine, the cannelloni were lovely and tasted like holidays!

Cannelloni al Pesto


EGG PASTA

Ingredients (to make enough cannelloni for 4 persons):
100 grams (2/3 cup plus 2 teaspoons) (170 ml) (3½ oz) plain (all-purpose) flour
1 large egg

Directions: 1. Put the flour and eggs in a food processor and mix. When the dough looks like crumbs, pour it onto the bench top sprinkled with a little flour. Knead well by hand until you obtain a smooth dough. Make it into a ball, wrap it in cling wrap and let it rest for 10-15 minutes.
2. Now you are ready to make your egg pasta. Cut out a piece of egg pasta dough and flatten it into a rectangular shape with your hands. Put a little flour on it and begin passing it though the pasta machine. Turn the dial to the widest setting (#1) and, starting with one of the shorter sides of the rectangle, feed it through the rollers. Now fold one side of the piece of dough into the middle, then fold the other side over that to form 3 layers. Starting with one of the narrower sides of the folded dough, feed the pasta through the machine, again at the widest setting. Repeat the folding and rolling technique on the widest setting for at least a couple of times.
3. Now you can start rolling it thinner, by turning the dial to the next narrowest setting (# 2). Roll the pasta through the machine without folding the dough between settings. Keep reducing the settings until #7 (it is the second last on my machine – about 1 mm thick). If the sheet of pasta gets too long, you can cut it in half with a knife. To make cannelloni, cut out rectangular pasta sheets (10x15 cm) (4”x6”).

BÉCHAMEL SAUCE

Ingredients (enough to make cannelloni for 4 people):
2 cups (500 ml) milk, hot
3½ tablespoons (52½ ml) (50 gm) (1¾ oz) butter
1/3 cup (80 ml) (50 gm) (1¾ oz) all-purpose (plain) flour
1 pinch salt
1 pinch nutmeg

Directions: 1. Put the butter in a non-stick pot and let it melt. Add the flour and whisk constantly until well incorporated: this is the “roux”. Let it cook for a minute or two.
2. Now start adding hot milk little by little, while mixing continuously until the milk is well incorporated. Do not add more milk unless it is well incorporated. Keep doing so until all the milk is incorporated.
3. Add salt and nutmeg and cook it on a low flame for 10 minutes or until it thickens.
4. When ready, cover it to prevent a film to appear on the surface.

CANNELLONI AL PESTO

Ingredients (serves 4)
Cannelloni sheets per recipe above (you should have about 8 sheets)

For pesto (makes about 190 gms/ 1cup)
2 cups (480 ml) (80 gm) (2¾ oz) basil, washed
¼ cup (60 ml) (15 gm) (½ oz) parsley, washed
1 small clove garlic
3 tablespoons (45 ml) (25 gm) (¾ oz) Pecorino Romano, finely grated
1 tablespoons (15 ml) (10 gm) (¼ oz) Parmigiano Reggiano, finely grated
4 to 5 tablespoons (45 to 60 ml) extra virgin olive oil
½ tablespoon (12½ ml) (5 gm) pine nuts
Salt to taste

For the filling
2 cups (480 ml) (500 gm) (18 oz) ricotta
¾ cup (180 ml) (150 gm) (5⅓oz) pesto (from the above recipe)
1½ cups (360 ml) (85 gm/3 oz) Parmigiano Reggiano, finely grated
1 pinch nutmeg
Salt and pepper to taste
1 small potato, boiled and sliced
8 green beans, boiled

To assemble
2 cups (500 ml) béchamel sauce
¼ cup (60 ml) (40 gm) (1½ oz) of pesto (from the above recipe)
½ cup (120 ml) (35 gm/1 oz) Parmigiano Reggiano, finely grated

Directions: 1. Start by making pesto. Simply blend the garlic, pine nuts, salt, basil, parsley and half the extra virgin olive oil together (I use a hand blender to do this) until obtaining a fine paste. Transfer to a bowl, add the grated cheeses and the remaining extra virgin olive oil and mix well. Adjust salt to taste and cover it with a thin layer of extra virgin olive oil to prevent oxidation. Keep it aside.
2. To make the filling, mix the ricotta, ¾ cup (150 gm) of pesto, 1½ cups (85 gm/3 oz) of Parmigiano Reggiano, nutmeg, salt and pepper together until well combined. Refrigerate until ready to use.
3. Mix the béchamel sauce with the remaining pesto.
4. Put a large pot with salty water on the fire and bring to a boil. Cook the pasta sheets in it for 1 minute. Do this in batches (I use a shallow but large pot and I cook them in 1 layer, so I am sure they do not stick together). Remove them with a slotted spoon and put them on a clean tea towel to cool down.
5. Now take one sheet of cooked pasta and put 1/8 of the filling along the long side of the rectangle. Put 1 boiled green bean and 1 or 2 slices of boiled potatoes on top and roll the pasta over to make a cannellone. Do so for the remaining rectangles of pasta.
6. Take a big enough oven dish to fit all your cannelloni tightly. Spray the oven dish with some cooking oil (or melted butter) and pour some béchamel and pesto sauce on the bottom. Spread it well, especially in the corners. Put the cannelloni in the oven dish on 1 layer.
7. Cover the cannelloni with the béchamel and pesto sauce and sprinkle with the remaining ½ cup (120 ml) (35 gm/1 oz) of Parmigiano Reggiano.
8. Bake them in a pre-heated moderate oven 350°F/180°C/gas mark 4 for 20 minutes, then broil (grill) them at 400°F/200°C for another 5 minutes.
9. Serve immediately.

27/07/2013

Daring Baker - July 2013: Eenie Meenie Miney Moe! Mezze it is!


In a "celebration" of past Daring Baker and Daring Cook challenges, Lisa challenged all of us to search through the Daring Kitchen archives and pick any one we'd like! The REAL challenge was picking which delicious recipe(s) to try!

So this month, it was all about choosing, and as we could pick from the daring cook archives aswell, I thought I'd give this a try. I've actually made quite a few recipe from both the daring baker and cook, you'll get to see a few post around here I guess, the previous chocolate cake was one of them for instance.

Right now, I'm on holidays (yes, I know, lucky me), so to fit the weather and the mood of this time of year, I picked the february 2010 daring cook challenge "Mezze", the middle eastern version of the spanish tapas.
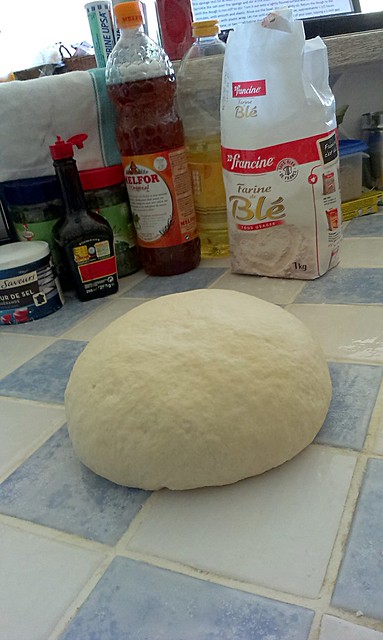
Under some scorching hot sun, eating something cold, or even fresh, seems like a wise choice. And even on holidays, nothing feels more therapeutic than making bread, any kind of bread. I've made Pita Bread before, but from a different recipe.

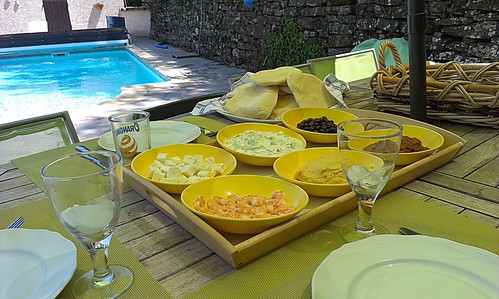
To go with the lovely pita breads, some hummus, cucumber raita, some eggplant parmeggiano leftover, feta cheese, olives, schrimps... Anything you fancy really, that's the fun of this kind of recipe, and also a great way to use what's left in your fridge.

This is a bit of a "low-fi" recipe, because I have my camera with me, BUT I forgot the cable to transfert my pictures to my computer, so in order to post on time, I decided to take picture with my cell phone instead, aahhh the joy of technology!

Mezze


Pita Bread (Recipe adapted from Flatbreads & Flavors by Jeffrey Alford and Naomi Duguid)

makes about 16 breads

2 teaspoons regular dry yeast (.43 ounces/12.1 grams)
2.5 cups lukewarm water (21 ounces/591 grams)
5-6 cups all-purpose flour (may use a combination of 50% whole wheat and 50% all-purpose, or a combination of alternative flours for gluten free pita) (17.5 -21 ounces/497-596 grams)
1 tablespoon table salt (.50 ounces/15 grams)
2 tablespoons olive oil (.95 ounces/29 ml)


  1. In a large bread bowl, sprinkle the yeast over the warm water. Stir to dissolve. Stir in 3 cups flour, a cup at a time, and then stir 100 times, about 1 minute, in the same direction to activate the gluten. Let this sponge rest for at least 10 minutes, or as long as 2 hours.
  2. Sprinkle the salt over the sponge and stir in the olive oil. Mix well. Add more flour, a cup at a time, until the dough is too stiff to stir. Turn it out onto a lightly floured surface and knead for 8 to 10 minutes, until smooth and elastic. Rinse out the bowl, dry, and lightly oil. Return the dough to the bowl and cover with plastic wrap. Let rise until at least doubled in size, approximately 1 1/2 hours.
  3. Place a pizza stone, or two small baking sheets, on the bottom rack of your oven, leaving a 1-inch gap all around between the stone or sheets and the oven walls to allow heat to circulate. Preheat the oven to 450F (230C).
  4. Gently punch down the dough. Divide the dough in half, and then set half aside, covered, while you work with the rest. Divide the other half into 8 equal pieces and flatten each piece with lightly floured hands. Roll out each piece to a circle 8 to 9 inches in diameter and less than 1/4 inch thick. Keep the rolled-out breads covered until ready to bake, but do not stack.
  5. Place 2 breads, or more if your oven is large enough, on the stone or baking sheets, and bake for 2 to 3 minutes, or until each bread has gone into a full balloon. If for some reason your bread doesn't puff up, don't worry it should still taste delicious. Wrap the baked breads together in a large kitchen towel to keep them warm and soft while you bake the remaining rolled-out breads. Then repeat with the rest of the dough.
Hummus (Recipe adapted from The New Book of Middle Eastern Food by Claudia Roden)

1.5 cups dried chickpeas, soaked in cold water overnight (or substitute well drained canned chickpeas and omit the cooking) (10 ounces/301 grams)
2-2.5 lemons, juiced (3 ounces/89ml)
2-3 garlic cloves, peeled and crushed
a big pinch of salt
4 tablespoons tahini (sesame paste) OR use peanut butter or any other nut butter—feel free to experiment) (1.5 ounces/45 grams)
additional flavorings (optional) I would use about 1/3 cup or a few ounces to start, and add more to taste


  1. Drain and boil the soaked chickpeas in fresh water for about 1 ½ hours, or until tender. Drain, but reserve the cooking liquid.
  2. Puree the beans in a food processor (or you can use a potato masher) adding the cooking water as needed until you have a smooth paste.
  3. Add the rest of the ingredients and mix well. Adjust the seasonings to taste.
Cucumber Raita (Recipe adapted from The Indian Grocery Store Demystified by Linda Bladholm)

1 medium cucumber, peeled and most of the seeds removed
1 teaspoon cumin seeds (.1 ounce/3 grams) OR use a small pinch of dried cumin—to taste
2 cups plain whole milk or Greek yogurt (17 ounces/473ml)
1 garlic clove, peeled and minced
fresh coriander or mint, chopped, a couple pinches or more to taste
cayenne pepper or paprika, just a pinch to use as a garnish (optional)


  1. Peel cucumber, de-seed, and dice. Blot off moisture with paper towels.
  2. Toast cumin seeds for a few seconds in a small, heavy frying pan over high heat.
  3. In a bowl, stir yogurt until it is smooth.
  4. Mix it with the cumin, garlic and coriander or mint leaves (I used some grated radish instead).
  5. Stir in the cucumber and sprinkle with cayenne or paprika, and chill before serving.