21/11/2013

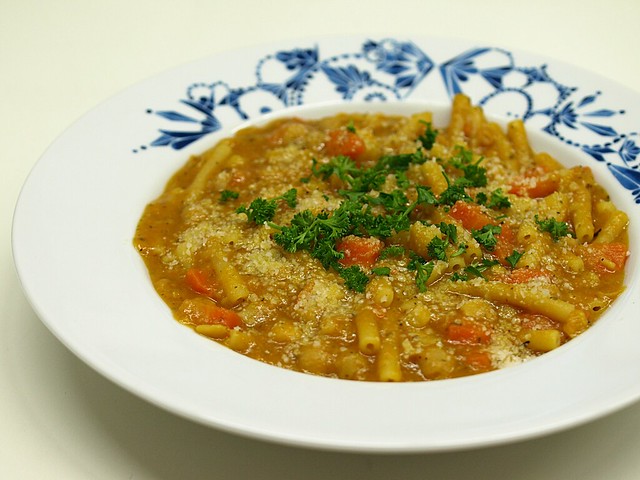
Pasta e Ceci, a hearty soup with chickpeas


Today I bought thermal underwear, got domestic heating fuel delivered, switch to my winter tires and we had the first snow of the season, can you all sense a theme here? Though it is not technically winter yet, it really does feel like it!
I've have been running around Europe a lot lately, which has been an absolut blast aswell as a tiring time, with very little time to blog. There will be a final trip next week, to Scotland (hence the thermal underwear) before enjoying the end of the year at home.

Though I'm over the board happy to finally go to Scotland, I'm slightly worried about the food. Their national dish, the Haggis, is served in a sheep's stomack, not to mentionned that they invented the "deep-fried Mars bar"... Uhmm, let's see how that will turn out, I'll keep you posted. On that subject I had a great fish and chip in London last week at the Blue Anchor, thanks to my friend Mieke for finding that one! ;)

Let's go back to cooking, tonight was all about feeling a bit warm, and this italian dish works amazingly well. It's a very hearty and thick soup with pastas and chickpeas, I used the recipe from the blog Tasca da Elvira, but did a vegetarian version of it. Like all good recipes, this one can be adapted to your taste, and warm you up from the inside out!

Pasta e Ceci


Serves 2

1 Onion
3 Cloves of Garlic
1 Carrot
1/4 of Celery Root
400gr of Chickpeas (I used canned ones)
1 Liter of Vegetable Broth
2 Tablespoons of Tomato Paste
2 Bay Leaves
100gr of Pasta (I used Macaroni)
Rosmarin and Thym
Salt and Pepper
Olive Oil
Fresh Parsley
Freshly Gratted Parmegiano

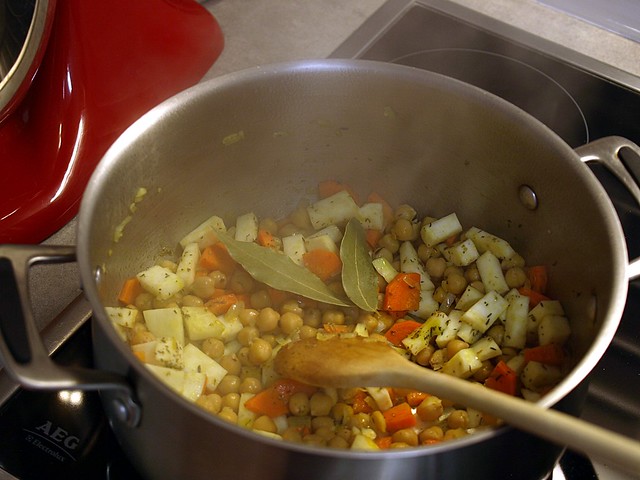
Diced the onion and garlic, heat up a big pan with some olive oil and add the onion and garlic. Stir for a couple of minutes until soft.

Clean, peel and dice the carrot and celery (you should have the same amount of both) and add them in the pan, keep stiring, at this point you can add the thym, rosmarin and the 2 bay leaves.

In an other pan, heat up the vegetable broth, while you wash the chickpeas thoroughly (again I used canned one, if you use fresh one you'll need to soak them overnight and cook them longer). Add the chickpeas to the big pan with the other vegetables and add half of the broth with the tomato paste, let it cook slowly for 30 minutes.

Take out about 2/3 of the vegetables and set them aside, using a plunging mixer, turn the rest into a creamy soup. Pour the vegetables back into the soup and add the pasta at this point.

Now, like with a risotto, you'll need to stir all the time, adding the broth as you go. The pasta should take a bit longer to cook than what's written on the box, but try and keep them a bit "al dente". Taste for seasoning, add salt and pepper if needed.

Serve immediatly with some fresh parsley and sprinkle some parmegiano on top, enjoy!


27/10/2013

Daring Baker - October 2013: Savory Pot Pies


Hannah of Rise and Shine was our October 2013 Daring Bakers’ hostess and she challenged us to bake our own double crusted savory pot pies. Using any from-scratch crust and filling we choose, we were allowed to get completely creative with our recipe, showing off the savory flavors and fillings from our own home or region.

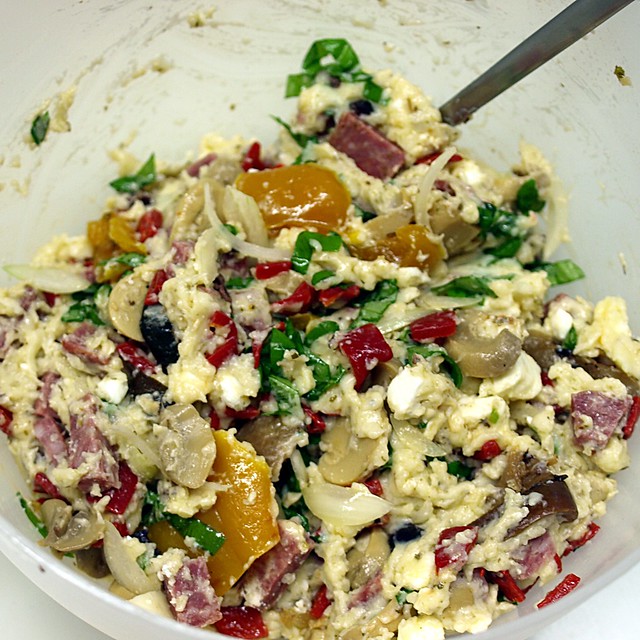
Some food is really delicious, though not "pretty", which doesn't always make it the first choice when you have a food blog, unfortunatly I would said, because I love stews for instance, but you can't really make it look gorgeous, unless you're a professional, which I'm not.

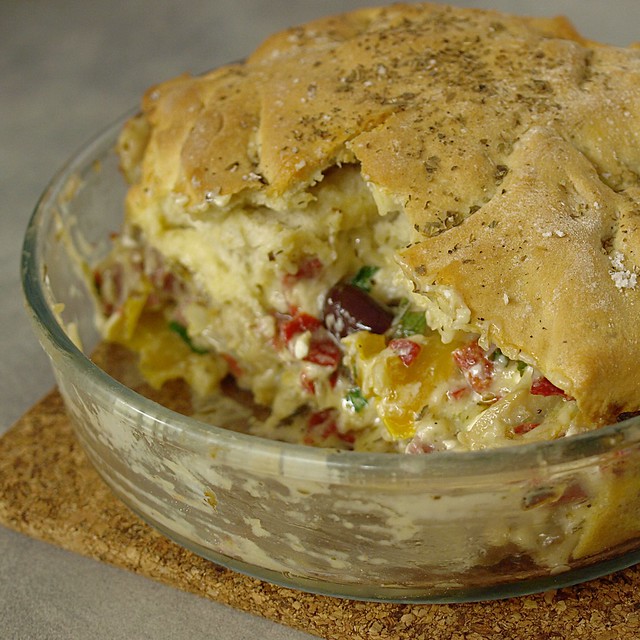
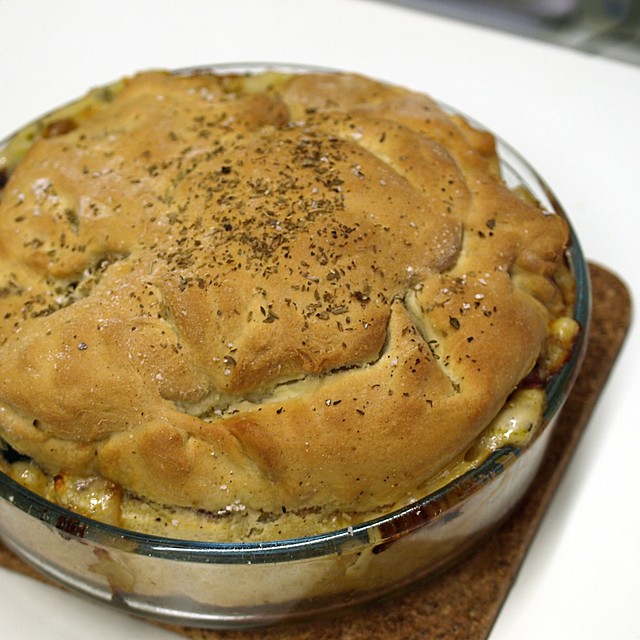
This pot pie, kind of belongs to that category, it was scrumptious, tasty, great to warm you up on a colder evening, but I couldn't make it look as good as it tasted. Nevertheless you should try this one, it has been a big hit around here.

I but down the original recipe, mine was slighty adapted, I didn't have any chicken, but I used mushroom instead (in the quattro stagioni spirit) aswell as a bit of salami/pepperoni, just because I like it! Substituted the spinach with basil and provolone with gorgonzola. The dough got a bit too thin in some places and opened up during cooking, it was still delicious!

Mediterranean Pizza Pot Pie:


Servings: about 8 (one 10 inch (25 cm) pie)

Ingredients
Tender Pizza Pot Pie Crust:
2 tablespoons (30 ml) (¾ oz) (21 gm) active dry yeast
1 teaspoon (5 ml) (5 gm) sugar
3/4 cup (180 ml) warm water
1/2 teaspoon (3 gm) salt
1 tablespoon (15 ml) oil
1 1/2 cups (360 ml) (7 ½ oz) (210 gm) bread flour, plus more for dusting


Creamy Garlic Gravy:
3 tablespoons (45 ml) (1-2/3 oz) (45 ml) butter
3 tablespoons (45 ml) (1 oz) (26 gm) flour
1 cup (240 ml) milk (I use 2 percent)
1/4 teaspoon salt
1/4 teaspoon black pepper
4 garlic cloves, minced
1/2 cup (120 ml) (1½ oz) (45 gm) shredded Parmigiano-Reggiano cheese


Filling:
2 cups (500 ml) (280gm) (10 oz) cooked chicken, chopped
1 small onion, sliced into thin wedges
2 medium tomatoes, seeded and diced
1/2 cup (120 ml) (2 oz) (60 gm) shredded provolone cheese
1/2 cup (120 ml) (2 oz) (60 gm) crumbled feta cheese
1/2 cup (120 ml) (½ oz) (15 gm) tightly packed fresh spinach leaves, slivered
4 medium-large artichoke hearts, diced
1/3 cup (80 ml) (2 oz) (60 gm) kalamata olives, roughly chopped
1 teaspoon (5 ml) fresh oregano leaves
Pinch of salt, black pepper, dried oregano (for topping)


Directions:

1. Mix together yeast, sugar and warm water in a medium bowl. Let it rest several minutes until foamy.
2. Add salt, oil and up to 1 1/2 cups of bread flour, one half cup at a time, mixing with a wooden spoon until the dough picks up most of the flour and pulls together in a wad around the spoon. Turn the dough onto a lightly floured surface.
3. Sprinkle the dough with flour and knead for several minutes or until the dough is smooth and not sticking badly to clean hands as you knead (add sprinkles of flour as you knead until the stickiness subsides).
4. Place the dough in a lightly oiled bowl and cover with lightly greased plastic wrap. Place in the refrigerator overnight or prepare dough in the morning and leave it in the fridge until dinner. An hour before you start prepping the pizza, punch down the dough in the bowl. Leave it in the bowl to rest at room temperature for an hour.
5. Melt your butter over medium heat in a medium saucepan. Sprinkle flour over the butter and whisk together. Cook for a short minute as it bubbles, then pour in the milk. Whisk and bring it to boil, then stir in salt, pepper and garlic. Whisk until it’s as thick as honey, which should take about a minute. Remove from the heat and stir in cheese. Set aside while you prepare the components for your filling.
6. Preheat the oven to hot 220°C/425°F/gas mark 7.
7. Lightly grease a 10-inch (25-cm) cast iron skillet or similar sized baking dish. Roll out your pizza dough on a floured surface with flour sprinkled on the top of the dough, so it spreads six inches beyond the edges of your pan on all sides. You will need plenty of flour under the dough and on the top surface to keep it from sticking to itself and the counter. Lay the dough into your pan, without pulling it, so it fits into the pan with the extra dough hanging over the edges. Repair any holes that may have appeared.
8. In a large bowl, stir together the garlic sauce and filling, reserving the salt, pepper and dried oregano for the top of the crust. Pile all of the filling into your pan.
9. Wrap the dough up over the top of the filling. Seal tightly in the middle by pinching the dough together. Using kitchen scissors, snip away any large sections of excess dough. Sprinkle a bit of salt, pepper and dried oregano onto the top of the dough.
10. Bake for 30 to 35 minutes in the lower third of your oven, until the crust is golden brown. Serve immediately while warm.

17/10/2013

Swiss Apple Pie


They say "time flies when you're having fun", well apparently it also rushes by when you're really busy. I can't believe we're in October already, that I'm getting christmas toys catalogues in the mail and the annual letter for paying the rest of my taxes (yeah, it's all about the fun, isn't it). I feel like I'm talking like my grandma, complaining about the world spinning around way too fast.

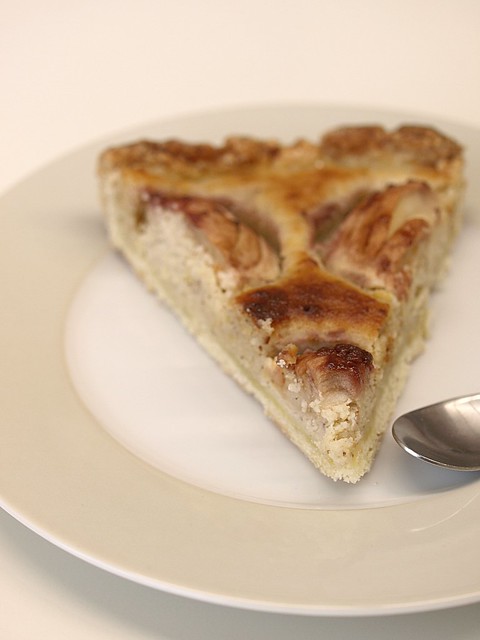
So let's dig into on of my grandma's book for the sunday family lunch, maybe it will help us slow down things a bit, or take us back in time. This is a swiss apple pie, original name: Zürcher Pfarrhaustorte (gesundheit!) for those of you who want to practise some swiss-german food vocabulary. The picture in the book looked good, the pie tasted even better, what else do we need. Let's go for a slice of old-fashioned apple pie.

Swiss Apple Pie (From Betti Bossi)


For a 27cm pie dish

for the crust
250gr Flour
25gr Sugar
1 Teaspoon of Salt
125gr Butter
1 Egg
2-3 Tablespoon Cream

for the filling
150gr Ground Almonds
2 Eggs
1 Teaspoon of Cinnamon
100gr Sugar
5-6 Apples
1 Lemon, juiced
2 Tablespoon of Jam (Raspberry)

Start with the pie crust: In bowl, mix the flour, the sugar and the salt. Cut the butter into little cubes and add to the bowl. Using your hand rub the butter into the flour mixture.

When well combined, add the egg and the cream. Using a wooden spoon try to make it into a dough without working it too much. Place in the fridge for 15 minutes.

Preheat the oven to 220°C.

Now we can work on the filling: in a large bowl, pour the ground almonds, the egg yolks (save the whites for after), the cinnamon and the sugar and combine.
Take 1 of the apple, peal it and using a cheese grater, grate it into the almonds mixture with the lemon juice.
Beat the 2 egg whites to a soft peak and add gently to the rest of the mixture.

Take you pie dough out of the fridge and roll it out to fit your pan. With a spoon, make a layer of your almond mixture on top of the pie crust.
Now clean, peal, cut in half and core your apples. Before placing them on top of the almond mixture, slice the top carefully (not all the way thru, see picture).

Heat up the jam for a couple of minutes, than brush the apples with the jam. Place it in the oven for about 35minutes.

This can made a day in advance and you can sprinkle some icing sugar on top before serving it.

27/09/2013

Daring Baker - September 2013: Pastel de Tres Leches


Inma of la Galletika was our Sept. 2013 Daring Bakers’ hostess and WOW did she bring us something decadent and delicious! Pastel de Tres Leches or Three Milk Cake, creamy yet airy, super moist but not soggy.. just plain delish!

Another baking travel thanks to the daring baker, this time to south America, with the Pastel de Tres Leches. I never heard of it and at first I thought it might have something to do with the dolce de leches.
The sponge cake recipe is great, and will be used again, as many I was worried the cake might be soggy but it turned out great (ok, I admit I didn't use the whole syrup, because it seemed an awfull lot).
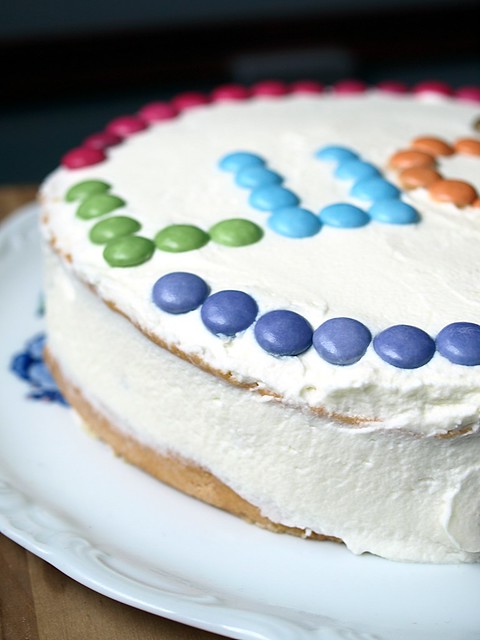
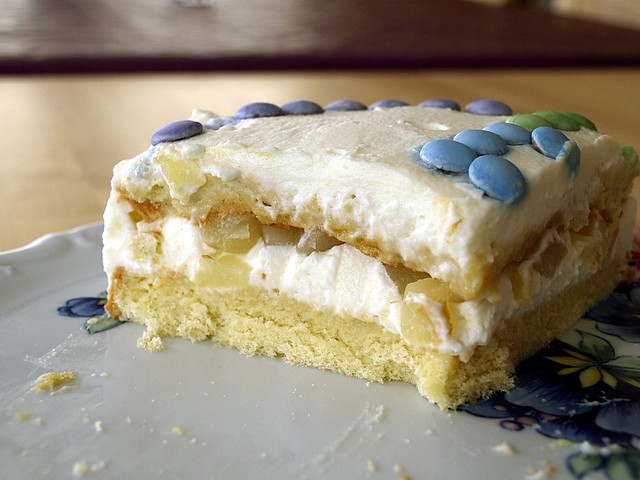
I matched this cake with my smallest niece's birthday, hence the colored chocolate chips decoration, and I choose to go with pears in the filling. It's nice and fresh with the whipped cream and is always a good match with chocolate.

Classic Three Milks Cake


Servings: 12

Ingredients for the vanilla sponge cake
5 large eggs (separated)
½ cup (120 ml) (4 oz) (125 gm) sugar
2 teaspoons (10 ml) of vanilla extract
1 cup (240 ml) (5 oz) (140gm) all-purpose (plain) flour (sifted)

For three milks syrup
1 can (14 oz) (400 gm) sweetened condensed milk
1 can (12 oz) (340 gm) evaporated milk
1 cup (240 ml) heavy cream (about 35% fat) or 1 cup of half & half or 1 cup milk
1 cinnamon stick
2 teaspoons (10 ml) rum (or other flavoring)

Topping and filling
2 cups (500 ml) of whipping cream (about 30% fat)
½ cup (120 ml) (4 oz) (125 gm) sugar
Canned or fresh fruit (to fill and decorate the cake)

Directions For the Sponge Cake:
  1. Preheat oven to moderate 180°C/350°F/gas mark 4. Prepare a square 9”x9” (23cmx23 cm) pan or 9” (23 cm) round cake pan
  2. Separate the egg whites from the yolks.
  3. Beat the egg whites on medium speed, 3 - 5 minutes.
  4. When soft peaks form slowly add the sugar in small batches.
  5. Whip until stiff peaks form about 5 minutes. Set aside.
  6. In a medium bowl beat egg yolks at medium-high speed for about 5 to 6 minutes, or until the egg yolks become pale colored, creamy and puffy. Stir in vanilla.
  7. Pour the egg yolks over the egg whites, gently fold until just combined trying not to lose any volume from the mixture.
  8. Fold in the flour little by little in the form of rain. Mix until just combined (over-beating will result in a denser, flatter cake).
  9. Pour the batter into the prepared 9”x9” (23cmx23 cm) square cake pan or 9” (23 cm) round cake pan.
  10. Bake in the preheated moderate oven for 25 minutes or until the toothpick comes out clean
  11. Let it cool
  12. Once cool, split the cake in half, flip the top of the cake and place it on a base. Poke using a fork holes all over the cake to better absorb the three milk soaking liquid.
Three milks syrup

  1. In a saucepan add the sweetened condensed milk, evaporated milk, heavy cream and cinnamon stick, bring to a boil, reduce the heat and continue boiling for 5 minutes. Remove it and let it cool.
  2. Once it is cool, add the rum or any other flavoring you are using
  3. Gradually brush all the milk soaking liquid into all sides of the cake (including the cut surfaces) until all absorbed. Best to rest the cake in the fridge overnight to complete the soaking process.
Topping
  1. Layer some whipped cream on the bottom layer and cover with canned or fresh fruit and decorate the top layer with whipped cream and the fresh or canned fruit.

19/09/2013

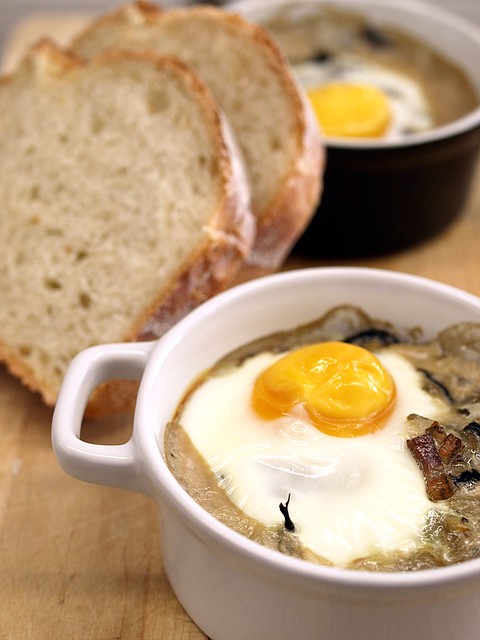
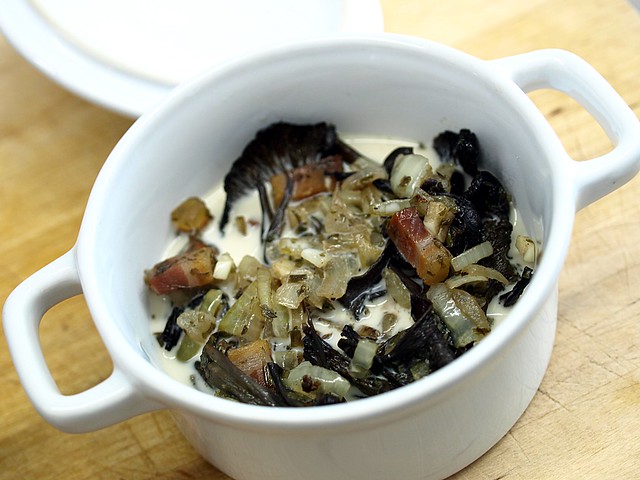
Cocotte Egg with Mushroom


So let's check: 3 layers of clothes, a big blanket on the bed, temperatures below 10°C at night, yeap, it looks like autumn is coming in early this year. Not that I mind, it's one of my favorit time of the year, but it always takes some adjustement, because I'm a girl and I'm almost always cold, so bring on the big socks, polar jacket and blankets to watch TV.

Because of the (too) many concerts booked, the travels that are planned and some upcoming expenses I know I will have until the the end of the year, I'm mostly cooking out of my pantry these days. Which, once again, proves that it is important to have a well stocked pantry.
This simple recipe is done under 30 minutes (even if you are slow like me) and fits perfectly these early autumn days, for a decent budget.

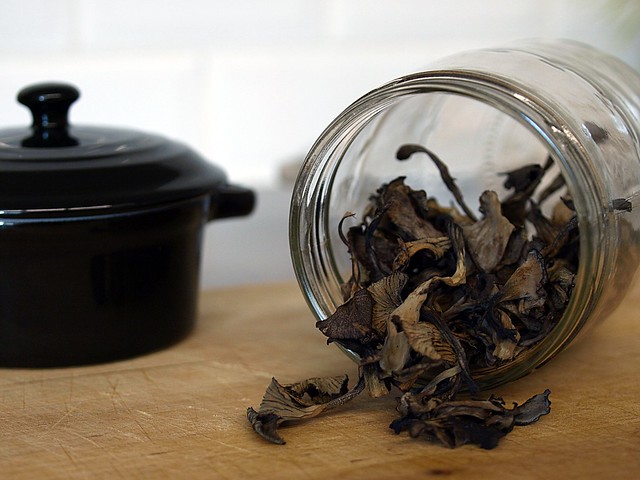
The mushroom are still from last year's hunting, dried up and stored properly, you can keep them easily. Onions and garlic have to be in every house, I used dried up parsley (obviously fresh would be better, but as said, I'm cooking out of the pantry), a small piece of speck leftover, some cream or soja cream and you're good to go. Enjoy your autumn!

Cocotte Egg with Mushroom


for 2 Cocottes

1 Handfull of dried up Mushrooms (I used trumpets of death)
1 Onion
1 Clove of Garlic
1 Tablespoon of Parsley (dried)
10cl of Cream
50gr of Speck
2 Eggs
Olive Oil
Salt, Pepper

Preheat the oven to 180°C.

Put the dried up mushroom in some hot water and let them sit there for about 15 minutes. In the meantime, peel and dice the onion aswell as the garlic clove.

In a non sticky frying pan, heat up some olive oil and add the onions with a bit of salt and cook them for about 5 minutes. Add the dried up parsley, the garlic and the diced speck, lower the heat.

Drain the mushroom (but keep some of the water aside) and add them to the onion and garlic mixture.
Pour the water you kept in the sauce pan and reduce it on a high heat, when there is about 3 or 4 spoonfull left, add those spoonfull to the cream, it will add a nice mushroom flavor to it, add a bit of pepper.

In your cocotte, place the mushroom, onion and garlic mixture first, than poor over the cream/mushroom sauce on it and top it with a raw egg. Place in the oven for 12 to 15 minutes, depending how you like your yolk to be.

Serve with some toasted bread if you want, but if you have a nice fresh loaf of good bread no need to toast it first.

12/09/2013

One track mind: Patty Melts


Not that I particularly believe in astrology, at least when it says something bad is going to happen to me, but I often "blame" my quirkiest behaviour on the fact that I am a cancer (ascendant cancer, because I never do things by half) and I really think we are the most adorable weirdos in the whole zodiac!
I believe we are very constant in our affections, once we love something or someone, it's there to stay (unless they run away -fearing the crazy- obviously). This works for TV shows, clothes, leisures... or music and bands for instance, because seeing the same band 15 times in 6 months is borderline insane (and I'm not even exagerating for dramatical purpose, this is really happening).

Food is no different, I love trying new things, experiencing ingredients, new spices...etc. But some recipes will just always do, no matter how many time you ate them. My mum's lamb is one of those for instance or anything including good dark chocolate.
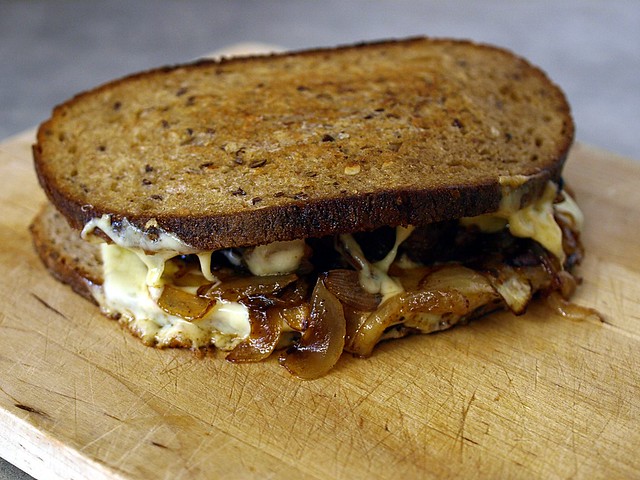
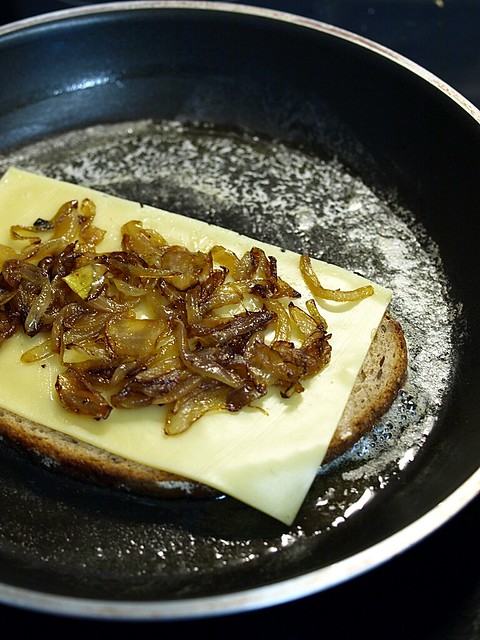
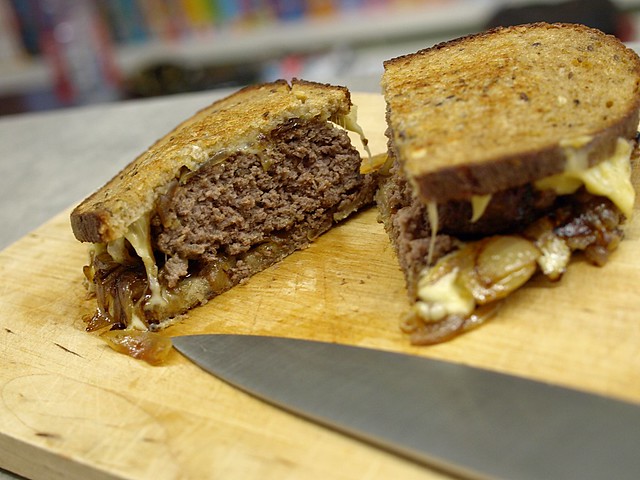
My latest craving is the patty melt. I love a good burger, but I often don't plan soon enough to make the buns, so when I read about this recipe using rye bread on David Lebovitz's page, I knew I had to try it out. This was about a month ago, ever since I kept trying this in so many different ways: with different cheese or bread, vegetarian, with sausages... and I liked them all.

Here's the more classic version of the recipe, with a lot of butter. I have to say that it's nice, every once in a while, to cook with butter, I'm an olive oil kinda of girl, but this is just the way to go for this recipe. Don't bother to make fries with that one, it's rich enough, even a salad seems too much to add to this lovely rich burger. I would just advice to go for a walk afterwards!

Patty Melt (from the Pioneer Woman)


Serves 1

2 Slices of Rye Bread
2-3 Small Onions
150-200gr of Ground Beef
2 Slices of Cheese (I used Gouda)
Butter (about 75gr)
Salt, Pepper
Worchester Sauce

Peel and cut the onions in half moons, put a bit of butter in a non-sticky frying pan and add the onions. Add salt and pepper and cook on a medium heat for about 15 minutes, stiring often so it doesn't attach, they should be soft and golden.

Season you ground beef with salt, pepper and some worchester sauce, form a patty that is bout the size of the slice of bread you are using.
In a non-sticky frying pan, heat up some butter and cook your patty the way you like it.

In an other pan, heat up some butter and place one slice of bread in it and top it with one slice of cheese. When the cheese starts to melt a little, add half the onions on the cheese, place your burger on top and add the remaining onions. Now place the second slice of cheese on the onions, aswell as the second slice of bread on top of all that.
Press down a little on your burger, than carefull flip in to color the other slice of bread to a nice golden brown.

Slice in half and enjoy!

27/08/2013

Daring Baker - August 2013: A Cake and Two Cookies


Aparna of My Diverse Kitchen was our August 2013 Daring Bakers’ hostess and she challenged us to make some amazing regional Indian desserts. The Mawa Cake, the Bolinhas de Coco cookies and the Masala cookies – beautifully spiced and delicious! Smile

This month's Daring Baker challenge is making me travel to India. A country I don't know much about, except it's touristic clichés, Rajesh Koothrappali, and whose cooking is more famous for it's spicy savory recipes, but I had no idea what's in store for the sweet tooth in India.

I choose to make the mawa cake aswell as the bolinhas de coco, for I love coconuts and also I couldn't get a hold on curry leaves that where necessary for the masala cookies. Plus the name clearly stated it's portuguese history, and that's always a plus in my book!
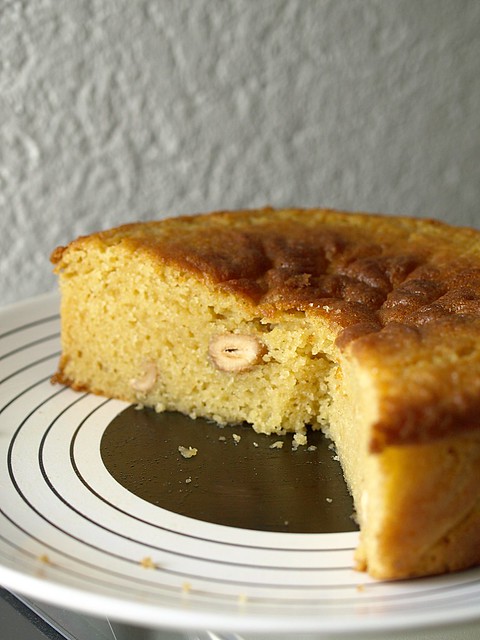
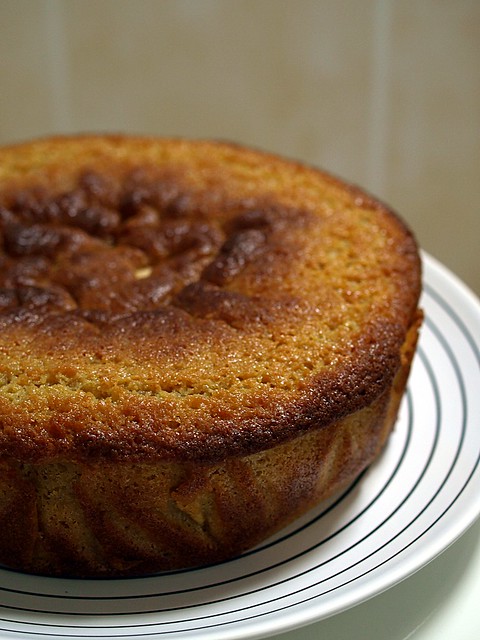
Making the mawa was a whole new experience, it almost felt like making some kind of cheese, and in the end it gives the cake a nice moist texture. The use of cardamom in both recipe gives them an exotic touch, it's a spicy that I love, but don't get to use it so often.

MAWA CAKE (Cardamom Flavoured Milk Cake):


Servings: Serves 8 to 10

Ingredients

For the Mawa:
1 litre (4 cups) full fat milk

For the cake:
1/2 cup (1 stick) (120 ml) (4 oz) (115 gm) unsalted Butter (soft at room temperature)
3/4 cup (180 ml) packed crumbled mawa
1-1/4 cups (300 ml) (10 oz) (280 gm) castor sugar
3 large eggs
5 to 6 cardamom pods, powdered, (about 1-1/2 tsp powdered cardamom)
2 cups (500ml) (9 oz) (260 gm) cake flour
1 teaspoon (5 ml) (5 gm) baking powder
1/4 teaspoon salt
1/2 cup (120 ml) milk
1 teaspoon (5ml) vanilla extract (optional)
Cashewnuts (or blanched almonds) to decorate (about 18 to 20)


Directions:

1. First make the “Mawa”. Pour the milk into a heavy bottomed saucepan, preferably a non-stick one. Bring the milk to a boil, stirring it on and off, making sure it doesn’t stick to the bottom.
Turn down the heat to medium and keep cooking the milk until reduces to about a quarter of its original volume. This should take about an hour to an hour and a half.
2. The important thing during this process is to watch the milk and stir it frequently to make sure it doesn’t stick to the sides or bottom of the pan and get burnt. The danger of this happening increases as the milk reduces and gets thicker.
3. Once the milk it has reduced to about one fourth, 1/4 quantity, lower the heat to low and let cook for a little while longer. Keep stirring regularly, until the milk solids (mawa) take on a lumpy appearance. There should be no visible liquid left in the pan, but the mawa should be moist and not stick to the sides of the pan.
4. Remove the pan from heat and transfer the mawa to a bowl and let it cool completely. Then cover and refrigerate it for a day or two (not more) till you’re ready to make the cake. It will harden in the fridge so let it come to room temperature before using it.
You should get about 3/4 to 1 cup of mawa from 1 litre (4 cups) of full-fat milk.
5. Now start preparations for the cake by pre-heating your oven to moderate 180°C/350°F/gas mark 4. Beat the butter, the crumbled mawa and the sugar in a largish bowl, using a hand held electric beater, on high speed until soft and fluffy.
6. Add the eggs, one at a time, and beat on medium speed till well incorporated. Add the vanilla and milk and beat till mixed well.
7. Sift the cake flour, baking powder, cardamom, and salt onto the batter and beat at medium speed and well blended. If you cannot find cake flour, place 2 tablespoon of cornstarch in the bottom of your 1-cup measure and then fill it with all-purpose (plain) flour to make up to 1 cup.
8. Grease and line only the bottom of an 8 inch (20 cm) spring form pan. Pour the batter into this and lightly smooth the top. Place the cashew nuts (or blanched almonds) on top of the batter randomly. Do not press the nuts down into the batter. A Mawa Cake always has a rustic finished look rather than a decorated look.
9. Bake in a preheated moderate oven for about 1 hour until the cake is a golden brown and a skewer pushed into the centre comes out clean. Do not over bake the cake or it will dry out. If the cake seems to be browning too quickly, cover it will aluminium foil hallway through the baking time.
10. Remove from oven and allow it to cool for 10 min in the tin. Release the cake, peel off the parchment from the base and let it cool completely.

BOLINHAS DE COCO (Cardamom Flavored Coconut Biscuits/ Cookies):


 Servings: Makes about 4 dozen cookies

Ingredients:

2 cups (500 ml) (5-1/3 oz) (150 gm) fresh grated coconut, packed
1-1/2 cups (360 ml) (9 oz) (250 gm) semolina
1-1/4 cups (300 ml) (8-3/4 oz) (250 gm) granulated sugar
3/4 cup water (180ml) (6 oz) (175 gm) water
A pinch of salt
2 tablespoons (30 ml) (1 oz) (30 gm) ghee (clarified butter) or melted unsalted butter
2 large eggs
8 to 10 pods cardamom, powdered (about 1-1/2 teaspoon)


Directions:

1. Run the grated coconut in your processor or the small jar of your blender a couple of times so that the flakes are smaller and uniform in texture. Do not grind into a paste. Keep aside.
2. Put the semolina in a pan and toast/ roast it, over low to medium heat, until it starts giving off an aroma, and looks like it’s about to start changing colour. This should take a couple of minutes. Do not brown. Transfer the semolina into a bowl and keep aside.
3. In the same pan, pour the water and add the sugar to it. Place it on medium heat and keep stirring until the sugar dissolves completely. Once the sugar has dissolved, keep stirring the solution and let it cook for about 2 minutes. Turn off the heat. The sugar solution should just begin to start forming a syrup but is still watery. Do not cook until it forms a thick syrup.
4. Add the toasted/ roasted semolina and mix well. Then add the coconut, salt and ghee (or melted butter) and mix well. Put the pan back on the stove, and over medium heat stir the coconut mixture until it is really hot and easily forms a thick clump. This should take about 2 to 3 minutes.
5. Take the pan off the heat and let the semolina coconut mixture cool to room temperature. Transfer this into a bowl or container, cover and refrigerate for at least 8 hours, ideally overnight. For really fluffy biscuits/ cookies, the overnight rest is recommended.
6. The next day, take the dough out of the fridge and let it come to room temperature. Separate the yolks from the egg whites. Lightly beat the yolks with a fork to break them and add to the dough. Also add the powdered cardamom and mix well with a wooden spoon or fork.
7. Whisk the egg whites by hand until frothy and add to the dough. Mix well till incorporated.
8. You will now have a slightly moist and sticky dough. Refrigerate this dough for about half an hour so it firms up a bit.
9. Pre-heat your oven to moderate 180°C/350°F/gas mark 4. Line your baking trays with parchment or grease them well with some ghee or melted butter.
10. Take the dough out and pinch off walnut sized bits of dough. The dough should be firm enough to handle without difficulty. If the dough is sticking to your palms, lightly dust your palms with flour before shaping the dough. Roll the bits of dough into balls and then flatten them very slightly.
11. Decorate the top by marking criss-crosses (3 equidistant lines one way and another 3 crossing them at right angles), with a table knife. Press down a bit but not too deep or right through the biscuit/ cookie. Use up all the dough this way.
12. Place the shaped dough on the baking trays leaving a little space between them. Bake in a preheated moderate oven for about 20 to 25 minutes until they’re a golden brown and done. Let them cool on the sheets for about 5 minutes and then transfer to racks to cool completely.
13. Store the biscuits/ cookies in airtight containers. This recipe makes about 4 dozen Bolinhas de Coco.