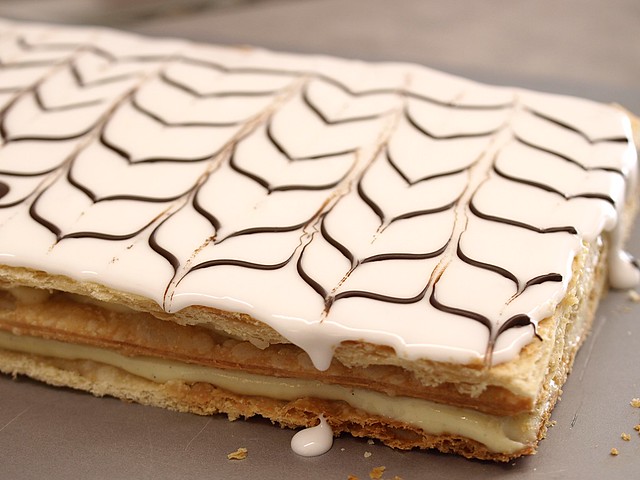
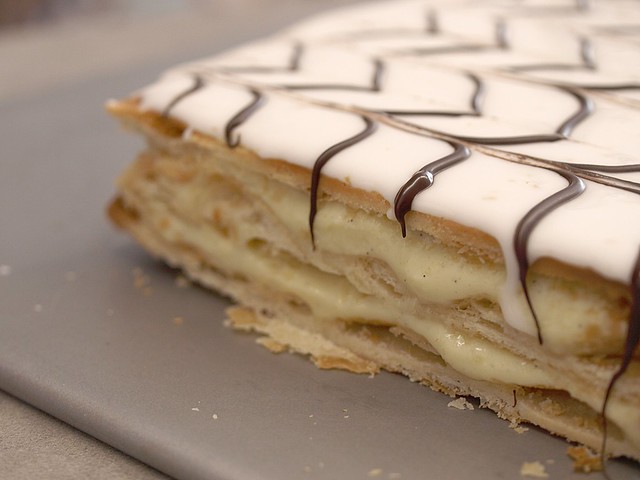
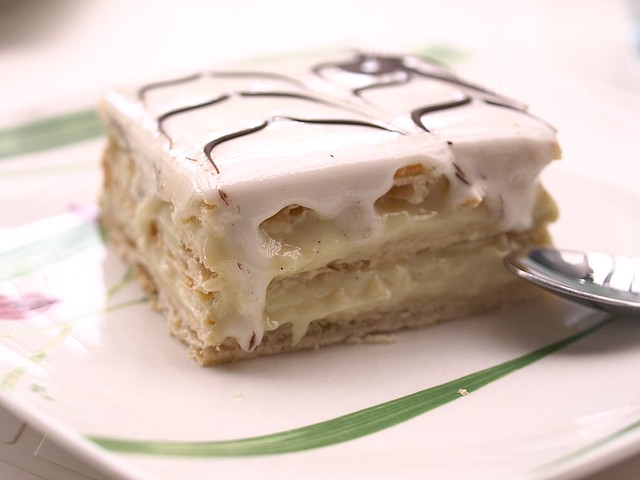
Our October 2012 Daring Bakers’ challenge was hosted by Suz of Serenely Full. Suz challenged us to not only tackle buttery and flaky puff pastry, but then take it step further and create a sinfully delicious Mille Feuille dessert with it!
And this one was quite challenging! Making a Mille Feuille was on my list for a long time, and the good thing about participating in a challenge like this, is that it gives you the final push to actually make it. No excuse about time or missing ingredients, you have almost a month to get set and ready to got.
Now time is actually the key to this recipe, because making puff pastry is not that complicated, it's just time consuming. The result is worth it, and I think making some a couple of times a year and freezing it, might be a valuable option.
I was pleased with the results, but in my opinion the icing should really be made as thin as possible, whereas the quantity of crème patissière should be increased. I used Suz recipe for the puff pastry, I just baked it a bit differently, but for the pastry cream I only rely on one recipe: the one from
Chef Simon, I've tried many, and this one never fails on me.
Pâte feuilletée / Puff Pastry
Servings: Makes 8-10 mille-feuille (yields: 675g pastry)
Ingredients
250g plain/all-purpose flour
50g unsalted butter, chilled and cubed
1 teaspoon salt
150 ml cold water
200g butter (for the beurrage), room temperature
30g plain flour (for the beurrage)
Additional flour for rolling/turning
Directions:
1. Cut the larger quantity of butter into smallish pieces and set aside at room temperature.
2. Put the larger quantity of flour into a bowl with the salt and the cold, cubed butter.
3. Lightly rub the butter and flour between your fingertips until it forms a mealy breadcrumb texture.
4. Add the cold water and bring together with a fork or spoon until the mixture starts to cohere and come away from the sides of the bowl.
5. As the dough begins to come together, you can use your hands to start kneading and incorporating all the remaining loose bits. If the dough’s a little dry, you can add a touch more water.
6. Knead for three minutes on a floured surface until the dough is smooth.
7. Wrap in clingfilm and refrigerate for at least 30 minutes.
8. While the dough is chilling, take your room temperature butter and mix with the smaller amount of plain flour until it forms a paste.
9. Place the butter paste between two sheets of clingfilm, and either with a rolling pin or your hands (I found hands easiest) shape it into a 12cm square. You can use a ruler (or similar) to neaten the edges.
10. Refrigerate for about 10-15 minutes so the butter firms up slightly. If it’s still soft, leave it a bit longer. If it’s too hard and inflexible, leave it out to soften a touch. You want it to be solid but still malleable.
11. Once the dough has chilled, roll it out on a floured surface into a 15cm square. Place the square of butter in the middle, with each corner touching the centre of the square’s sides.
12. Fold each corner of dough over the butter so they meet the centre (you might have to stretch them a little) and it resembles an envelope, and seal up the edges with your fingers. You’ll be left with a little square parcel.
13. Turn the dough parcel over and tap the length of it with your rolling pan to flatten it slightly.
14. Keeping the work surface well floured, roll the dough carefully into a rectangle 6 mm in thickness.
15. With the longest side facing you, fold one third (on the right) inwards, so it’s covering the middle section, and ensure that it is lined up.
16. Then, fold the remaining flap of dough (on the left) inwards, so you’re left with a narrow three-layered strip.
17. Repeat steps 14, 15, 16.
18. Wrap up in clingfilm and chill for at least 30 minutes.
19. Repeat steps 14, 15, 16 twice.
20. Wrap up in clingfilm and chill again for at least 30 minutes.
21. Repeat steps 14, 15, 16 two final times.
22. Wrap up in clingfilm and refrigerate until needed. The dough keeps a couple of days in the fridge.
Crème Patissière
1/2 a Liter Milk (half or full fat)
5 Egg Yolks
1 Vanilla Bean
1 Pinch of Salt
80gr of Sugar
40gr of Flour
30gr of Cornstarch
a bit of butter
1. Pour the milk in a medium size sauce pan. Cut the vanilla bean in two and scrape out the seeds, add the seeds and the bean to the milk. Heat the milk up on a medium flame, keep an eye on it.
2. In a bowl, whisk the egg yolks with the sugar until they are well combined, a pale yellow and form a ribbon at the end of your whisk.
3. Now add the flour and cornstarch, that you have sieved, to the egg and sugar mixture. Whisk to combine well
4. The milk should be away from the flame for a few minutes, before you pour half of it in the egg mixture. Using a whisk, combine slowly and progessivly, try not to make any foam.
5. Now pour that in the sauce pan where the other half of the milk remained (take away the vanilla bean at this point) and bring it back slowly to bubble on a middle flame. Whisk all the time, special in the bottom and side of the pan, so it doesn't stick.
6. This will take a few minute, until the cream reaches the right thickness and consistency.
7. Once done, pour the cream in a clean bowl and in order not to have a "skin" forms on top, when the cream is still hot, pass some butter on top. Cover with clingfilm and place in the fridge.
Mille-Feuille
Servings: Makes 8- 10
Ingredients
1 x batch pâte feuilletée/puff pastry (see above)
1 x batch crème pâtissière/pastry cream (see above)
350gm icing sugar
2 teaspoons lemon juice
2 large egg whites
80gm dark chocolate
Directions:
1. Preheat oven to moderately hot 200°C.
2. Lightly dust your work space with flour and remove your dough from the fridge.
3. Roll into a large rectangle, the thickness of cardboard.
4. Cut into three equal pieces and place on a baking tray. If you don’t have space for all three, you can bake them separately.
5. Prick the pastry sheets all over with a fork. Sprinkle some sugar on them.
6. Place a wire rack on top of the pastry
7. Bake each sheet for about 15 minutes, the rack allows the pastry to color, once it's a nice golden color, take it out of the oven, if the over side is too pale, turn it around and cook it for few minutes and this side, still with the wire rack on it.
8. Remove the baked sheets from the oven and leave on a wire rack to cool.
9. Once the pastry has cooled, you’re ready to assemble your mille-feuille. Get a sturdy flat board, your pastry and the chilled crème pâtissière from the fridge.
10. Lay one sheet on the board and spread half the crème patisserie evenly over the top.
11. Take the second sheet and place it on top, pressing down lightly with your hands to ensure that it sticks to the filling.
12. Spread the remaining crème pâtissière and place the last sheet of pastry on top, pressing down again. (Don’t worry if there’s some oozing at the sides. That can be neatened later.)
13. Pop in the fridge while you prepare the icing / chocolate.
14. Melt the chocolate in a bain marie, stirring periodically. Once melted, transfer to a piping bag (or plastic bag with end snipped), resting nozzle side down in a glass or other tall container.
15. To make the icing, whisk 2 egg whites with 2 teaspoons lemon juice until lightly frothy.
16. Whisk in about (2 cups) 300gm of the icing sugar on a low setting until smooth and combined. The mixture should be thick enough to leave trails on the surface. If it’s too thin, whisk in a bit more icing sugar.
17. Once ready, immediately pour over the top of the mille-feuille and spread evenly and thinly! I found that I didn’t quite need all of the icing.
18. Still working quickly, pipe a row of thin chocolate lines along the widest length of your pastry sheet. You can make them as far apart/close together as you like.
19. STILL working quickly (phew), take a sharp knife and lightly draw it down (from top to bottom) through the rows of chocolate. A centimeter or so further across, draw the knife up the way this time, from bottom to top. Move along, draw it down again. Then up. And so on, moving along the rows of chocolate until the top is covered in a pretty swirly pattern.
This (
http://moroccanfood.about.com/od/tipsandtechniques/ss/How-To-Make-Millef...) is a better idea of what you should do.
20. Once you’ve decorated your mille-feuille, with a clean knife mark out where you’re going to cut your slices, depending on how big you want them to be and leaving space to trim the edges.
21. Chill for a couple of hours to give the icing (etc.) time to set.
22. With a sharp knife, trim the edges and cut your slices.
23. Dig in!