27/10/2012
Daring Baker - October 2012 Challenge: Mille-Feuille
Our October 2012 Daring Bakers’ challenge was hosted by Suz of Serenely Full. Suz challenged us to not only tackle buttery and flaky puff pastry, but then take it step further and create a sinfully delicious Mille Feuille dessert with it!
And this one was quite challenging! Making a Mille Feuille was on my list for a long time, and the good thing about participating in a challenge like this, is that it gives you the final push to actually make it. No excuse about time or missing ingredients, you have almost a month to get set and ready to got.
Now time is actually the key to this recipe, because making puff pastry is not that complicated, it's just time consuming. The result is worth it, and I think making some a couple of times a year and freezing it, might be a valuable option.
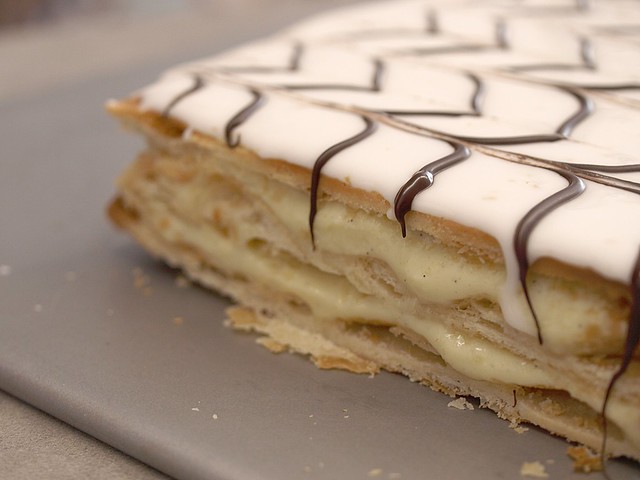
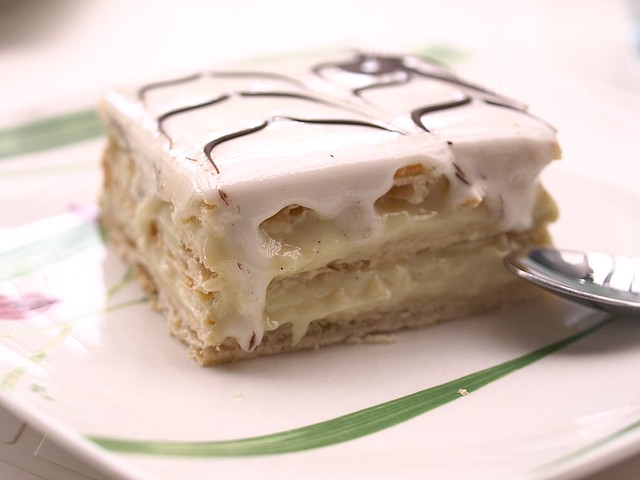
I was pleased with the results, but in my opinion the icing should really be made as thin as possible, whereas the quantity of crème patissière should be increased. I used Suz recipe for the puff pastry, I just baked it a bit differently, but for the pastry cream I only rely on one recipe: the one from Chef Simon, I've tried many, and this one never fails on me.
Pâte feuilletée / Puff Pastry
Servings: Makes 8-10 mille-feuille (yields: 675g pastry)
Ingredients
250g plain/all-purpose flour
50g unsalted butter, chilled and cubed
1 teaspoon salt
150 ml cold water
200g butter (for the beurrage), room temperature
30g plain flour (for the beurrage)
Additional flour for rolling/turning
Directions:
1. Cut the larger quantity of butter into smallish pieces and set aside at room temperature.
2. Put the larger quantity of flour into a bowl with the salt and the cold, cubed butter.
3. Lightly rub the butter and flour between your fingertips until it forms a mealy breadcrumb texture.
4. Add the cold water and bring together with a fork or spoon until the mixture starts to cohere and come away from the sides of the bowl.
5. As the dough begins to come together, you can use your hands to start kneading and incorporating all the remaining loose bits. If the dough’s a little dry, you can add a touch more water.
6. Knead for three minutes on a floured surface until the dough is smooth.
7. Wrap in clingfilm and refrigerate for at least 30 minutes.
8. While the dough is chilling, take your room temperature butter and mix with the smaller amount of plain flour until it forms a paste.
9. Place the butter paste between two sheets of clingfilm, and either with a rolling pin or your hands (I found hands easiest) shape it into a 12cm square. You can use a ruler (or similar) to neaten the edges.
10. Refrigerate for about 10-15 minutes so the butter firms up slightly. If it’s still soft, leave it a bit longer. If it’s too hard and inflexible, leave it out to soften a touch. You want it to be solid but still malleable.
11. Once the dough has chilled, roll it out on a floured surface into a 15cm square. Place the square of butter in the middle, with each corner touching the centre of the square’s sides.
12. Fold each corner of dough over the butter so they meet the centre (you might have to stretch them a little) and it resembles an envelope, and seal up the edges with your fingers. You’ll be left with a little square parcel.
13. Turn the dough parcel over and tap the length of it with your rolling pan to flatten it slightly.
14. Keeping the work surface well floured, roll the dough carefully into a rectangle 6 mm in thickness.
15. With the longest side facing you, fold one third (on the right) inwards, so it’s covering the middle section, and ensure that it is lined up.
16. Then, fold the remaining flap of dough (on the left) inwards, so you’re left with a narrow three-layered strip.
17. Repeat steps 14, 15, 16.
18. Wrap up in clingfilm and chill for at least 30 minutes.
19. Repeat steps 14, 15, 16 twice.
20. Wrap up in clingfilm and chill again for at least 30 minutes.
21. Repeat steps 14, 15, 16 two final times.
22. Wrap up in clingfilm and refrigerate until needed. The dough keeps a couple of days in the fridge.
Crème Patissière
1/2 a Liter Milk (half or full fat)
5 Egg Yolks
1 Vanilla Bean
1 Pinch of Salt
80gr of Sugar
40gr of Flour
30gr of Cornstarch
a bit of butter
1. Pour the milk in a medium size sauce pan. Cut the vanilla bean in two and scrape out the seeds, add the seeds and the bean to the milk. Heat the milk up on a medium flame, keep an eye on it.
2. In a bowl, whisk the egg yolks with the sugar until they are well combined, a pale yellow and form a ribbon at the end of your whisk.
3. Now add the flour and cornstarch, that you have sieved, to the egg and sugar mixture. Whisk to combine well
4. The milk should be away from the flame for a few minutes, before you pour half of it in the egg mixture. Using a whisk, combine slowly and progessivly, try not to make any foam.
5. Now pour that in the sauce pan where the other half of the milk remained (take away the vanilla bean at this point) and bring it back slowly to bubble on a middle flame. Whisk all the time, special in the bottom and side of the pan, so it doesn't stick.
6. This will take a few minute, until the cream reaches the right thickness and consistency.
7. Once done, pour the cream in a clean bowl and in order not to have a "skin" forms on top, when the cream is still hot, pass some butter on top. Cover with clingfilm and place in the fridge.
Mille-Feuille
Servings: Makes 8- 10
Ingredients
1 x batch pâte feuilletée/puff pastry (see above)
1 x batch crème pâtissière/pastry cream (see above)
350gm icing sugar
2 teaspoons lemon juice
2 large egg whites
80gm dark chocolate
Directions:
1. Preheat oven to moderately hot 200°C.
2. Lightly dust your work space with flour and remove your dough from the fridge.
3. Roll into a large rectangle, the thickness of cardboard.
4. Cut into three equal pieces and place on a baking tray. If you don’t have space for all three, you can bake them separately.
5. Prick the pastry sheets all over with a fork. Sprinkle some sugar on them.
6. Place a wire rack on top of the pastry
7. Bake each sheet for about 15 minutes, the rack allows the pastry to color, once it's a nice golden color, take it out of the oven, if the over side is too pale, turn it around and cook it for few minutes and this side, still with the wire rack on it.
8. Remove the baked sheets from the oven and leave on a wire rack to cool.
9. Once the pastry has cooled, you’re ready to assemble your mille-feuille. Get a sturdy flat board, your pastry and the chilled crème pâtissière from the fridge.
10. Lay one sheet on the board and spread half the crème patisserie evenly over the top.
11. Take the second sheet and place it on top, pressing down lightly with your hands to ensure that it sticks to the filling.
12. Spread the remaining crème pâtissière and place the last sheet of pastry on top, pressing down again. (Don’t worry if there’s some oozing at the sides. That can be neatened later.)
13. Pop in the fridge while you prepare the icing / chocolate.
14. Melt the chocolate in a bain marie, stirring periodically. Once melted, transfer to a piping bag (or plastic bag with end snipped), resting nozzle side down in a glass or other tall container.
15. To make the icing, whisk 2 egg whites with 2 teaspoons lemon juice until lightly frothy.
16. Whisk in about (2 cups) 300gm of the icing sugar on a low setting until smooth and combined. The mixture should be thick enough to leave trails on the surface. If it’s too thin, whisk in a bit more icing sugar.
17. Once ready, immediately pour over the top of the mille-feuille and spread evenly and thinly! I found that I didn’t quite need all of the icing.
18. Still working quickly, pipe a row of thin chocolate lines along the widest length of your pastry sheet. You can make them as far apart/close together as you like.
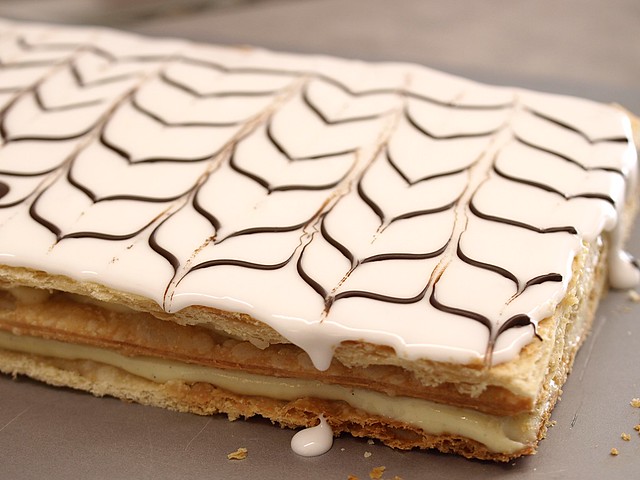
19. STILL working quickly (phew), take a sharp knife and lightly draw it down (from top to bottom) through the rows of chocolate. A centimeter or so further across, draw the knife up the way this time, from bottom to top. Move along, draw it down again. Then up. And so on, moving along the rows of chocolate until the top is covered in a pretty swirly pattern.
This (http://moroccanfood.about.com/od/tipsandtechniques/ss/How-To-Make-Millef...) is a better idea of what you should do.
20. Once you’ve decorated your mille-feuille, with a clean knife mark out where you’re going to cut your slices, depending on how big you want them to be and leaving space to trim the edges.
21. Chill for a couple of hours to give the icing (etc.) time to set.
22. With a sharp knife, trim the edges and cut your slices.
23. Dig in!
18/10/2012
Cold days salad, Yes there is such a thing!
Today, I don't want to be a grown-up. I've been doing the grown-up thing for weeks now: working a lot, paying the bills, planning ahead, being reasonnable... So to keep the balance with my inner-child, I'm hanging around in my pyjama's at 11 in the morning (don't judge me), catching up on all the TV shows I haven't had time to watch for a while. Feeling decadent feels good, every once in a while.
All the working got a little in the way of the cooking these days, even if this week end was dedicated to baking, but that will remain a secret until the daring baker date arrives.
In the meantime, the days got shorter and colder, and all you want to do is find a blanket to crawl under. Unlike summer, it doesn't feel like a "salad weather", but as I tend to do things my own way, here's one of my favorit autumn/winter salad, because there's no reason to skip the greens!
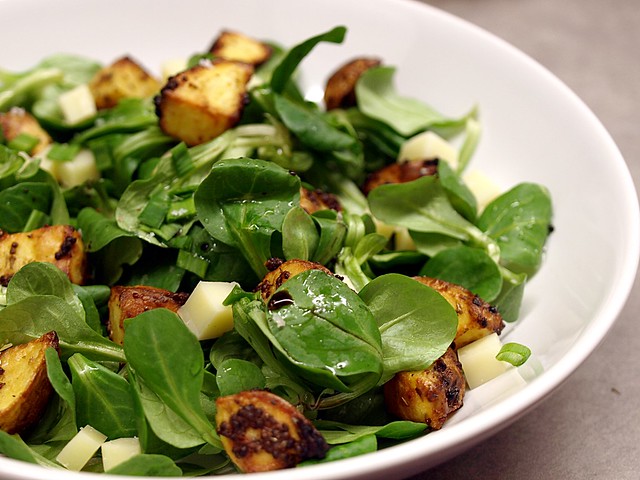
So this is not much of cooking, I give you that, but I think it works well together, Corn salad is my favorit one. It makes a nice dinner to get on the table, without taking too much time. You can choose how you prefer your potatoes, if I have more time I even prefer them to be boiled before I roast them, but that includes more dishes to wash, so I'm not always up for it. This is my version, make it your own!
Corn Salad with Roasted Mustard Potatoes
Serves 1
2 Medium Potatoes
1 Tablespoon of Whole Grain Mustard
2 Tablespoon of Olive Oil
1/2 a Lemon, Zested
2 Cloves of Garlic
2 Handfull of Corn Salad
2 Tablespoons of Fresh Chives, chopped
50gr of Comté Cheese, diced into cubes
Walnut Oil
Balsamic Vinegar
"Fleur de sel" Salt, Pepper
Preheat the oven to 220°C.
Clean and brush the potatoes thoroughly, as I prefer to leave the skin. Cut the potatoes into cubes, about 2-3cm wide. Place them in a bowl and add the mustard, the olive oil and the lemon zest. Combine well so the potatoes are all seasonned.
In an oven dish, place the potatoes with 2 crushed cloves of garlic and put in the oven for about 30 minutes. But check regularly and turn them around, they should be golden and crispy, and that depends on your oven.
In the meantime, clean the corn salad in cold water, at least twice, or until the water seems clear. If you have a salad spinner, this is the time to use it!
When the potatoes are done, leave them to cool for just 5 minutes. To serve, in a bowl or a soup plate, on top of the salad, sprinkle the cheese, and the potatoes (carefull it's hot), than season with the walnut oil and the balsamic vinegar and finish with the fresh chives (add even more if you like it) and the salt and pepper.
04/10/2012
Red Kuri Squash Gnocchi
Yes it's autumn people, and I happen to like this season, not particularly when the days are turning shorter, but there are some gorgeous colors out there for us to see, before nature goes to sleep. Too bad we can't follow nature and go to sleep aswell, but instead we get to spend more time inside, around a nice fire or (less romantic) close to the radiator, with some hearty dishes and recipe to help us get thru.
But I'm already a bit ahead, right now it's october, with it's fair share of nice days and beautiful light. October is also the month for breast cancer awareness, which is a topic I've blogged about before here, and most likely will again as long as this blog keeps going. This year in particular I feel like it's a duty to spread the word around, because I had my first mammography.
Before anyone asks, all is fine, thank you very much. I'm in my early 30's, but with a family history of cancer, so the doc prefered to make sure everything was ok. It wasn't the most fun day I ever had, but all the doc and nurses have been really nice. So all you women outhere, go and show your breasts for the good cause, if you have any doubts. And just for encouragement, let me show you mine:
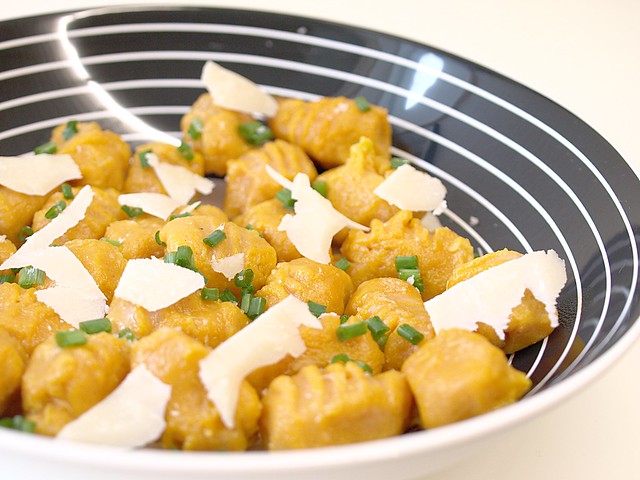
So maybe a pink dish would have fitted this post better, but I happened to make those today. I love red kuri or Hokkaido squash, in soup or roasted, so I thought I'd do something different for a change. My gnocchi shaping skills still need to be perfected, but the combination with fresh chive, fleur de sel and parmesan is great, give it a try!
Red Kuri Squash Gnocchi
Serves 2
1 Red Kuri Squash
5 Heaped Tablespoons of Flour, plus extra for dusting
1 Egg
1/2 a Teaspoon of Ground Cloves
2 Tablespoons of Fresh Chive
1 Liter of Vegetable Broth
Freshly Shaved Parmesan
Salt, fleur de sel
Preheat you oven to 180°C.
Clean and then cut your squash in half, with a spoon remove all the seeds from it. Wrap each half in an aluminium foil and place them both in a dish going into the oven. Cook them for about 45 minutes.
When you take the dish out of the oven, leave the squash in the foil for a few minutes, it will be easier to peel. Once peeled, using a potato masher or a sieve, turn the squash flesh into a purée.
In a bowl, add an egg to the purée and start adding the flour, start with 3 tablespoons, and than add more if needed, it will depend on how much water there is in. You need to have something ressembling a brioche dough.
Flour generously your working surface and your hands. Take 1/4 of the dough and roll it out until it's about as thick as your thumb. using a sharp knife, cut the gnocchis out, about 2cm each.
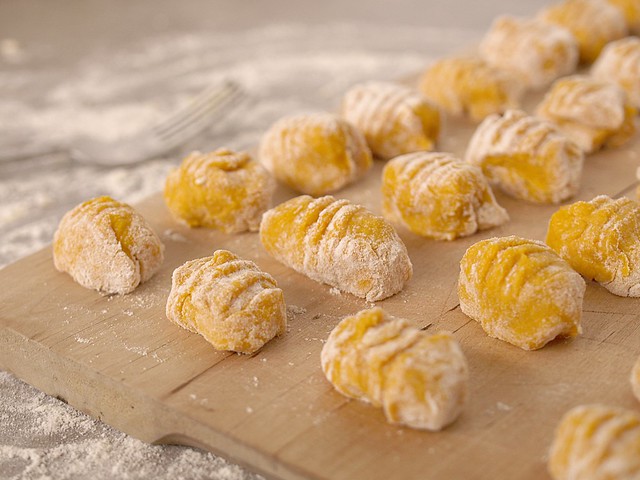
Again using some extra flour, take each gnocchi, place it on a fork and press it down a little with your thumb to mark it, then roll it together in the shape of a miniature bread loaf. Place the gnocchi on a floured tray. Do the same with the whole dough.
In a pan, heat up the vegetable broth, and when it starts to bubble you can place, carefully, the gnocchi in the pan. Depending on its size you might need to make several batch. The gnocchis are done when they rise to the surface of the broth, drain them carefully and set aside.
You can reheat them in a non sticky frying pan, then to serve, sprinkle with the fresh chive, the fleur de sel and the shaved parmesan.
27/09/2012
Daring Baker - September 2012 Challenge: Empanada Gallega
Patri of the blog, Asi Son Los Cosas, was our September 2012 Daring Bakers’ hostess and she decided to tempt us with one of her family’s favorite recipes for Empanadas! We were given two dough recipes to choose from and encouraged to fill our Empanadas as creatively as we wished!
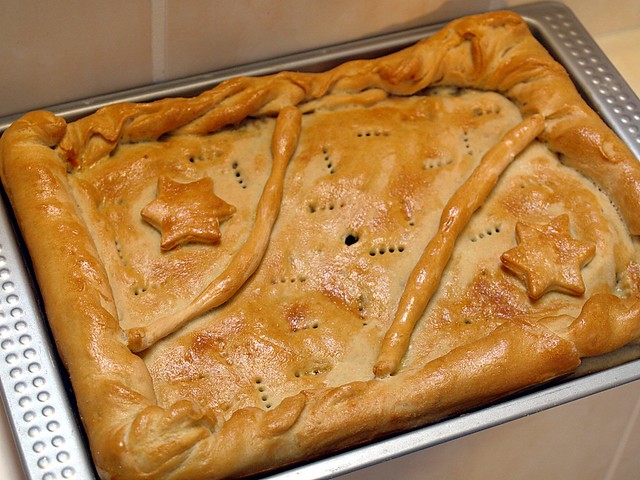
Yeah, let's be spanish for a change, and it happens to be a region of Spain I've been before: Galicia! I find a certain comfort in typical southern dishes, and this one has been no exception. Anything in a bread dough works for me, and given the chance to experiement with it was a lot of fun.
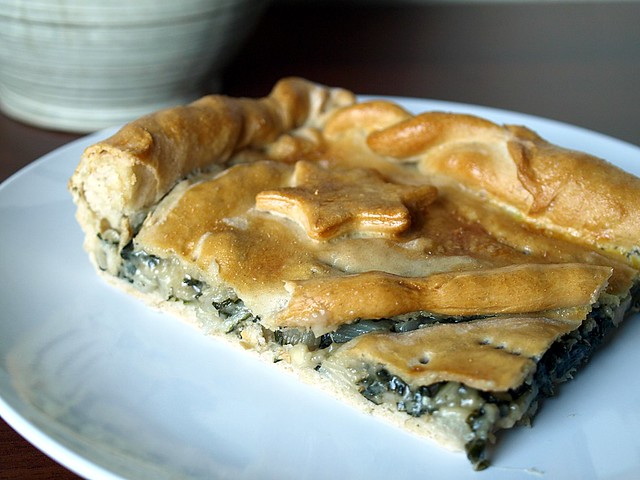
I've done one with ground beef, tomatoes and carrot, aswell as a small one (with leftover dough) with red bell pepper and goat cheese. But I prefered this version with swiss chard. As the proportion were given for 10 people(!!!) I took the liberty to divide it in half, and it got me thru a couple of meals. I'm keeping this one on my list, and will have to try a sweet version at some point.
Empanada Gallega with Swiss Chard, Parmesan and Almonds
Dough Ingredients:
375gr of bread flour
240ml of lukewarm water (about 85°F/30ºC), approximately
1 satchel (1 tablespoon) (15 gm) dry yeast or (1 oz) (30 gm) fresh yeast
1 teaspoon (10 ml) (11 gm) salt
2 tablespoons (30 ml) oil (you can use oil from the pan where you have cooked the filling)
1 large egg, for egg wash
Dough Directions:
- Measure out all the ingredients.
- Shift the flour into a big bowl and make a well in the middle. Rub the yeast in with your fingers.
- In a small bowl, mix the water and the salt.
- Now, using your fingers or a wooden spoon, start adding the water and mixing it with the flour-yeast mixture. Keep on working with your fingers or spoon until you have added enough water and all the flour has been incorporated and you have a messy ball of dough.
- On a clean counter top, knead the dough for approximately 10 minutes
- You could do all the above using a stand mixer, in that case mix the ingredients with the paddle attachment until mixed and then switch to a dough hook and knead on low for about 6 minutes.
- Clean and oil the big bowl you used for mixing and place the kneaded dough in it. Cover it with a napkin or piece of linen and keep it in a warm, draught-free place for approximately 40 to 50 minutes.
- Once risen, turn the dough back into a floured counter and cut it in half. Cover one half with the napkin to prevent drying.
- Spread the other half of the dough using a rolling pin. You can use a piece of wax paper over the counter, it will make it easier to move the dough around. Depending on the shape of your oven pan or cookie sheet, you will make a rectangle or a round.
- Now, the thinness of the dough will depend on your choice of filling and how much bread you like in every bite. For your first time, make it about 3mm thin (about 1/10th of an inch) and then adjust from that in the next ones you make.
Filling Ingredients
1 Swiss Chard2 Small Onions
1 Clove of Garlic
100gr of Parmesan, freshly grated
50gr of Almonds, chopped
Olive Oil
Salt, Pepper
- Clean the leaves of the swiss chard, separate the white from the green. Chop the white into pieces of about 1/2 a cm thick, clean again and set aside. Same with the green leaves, chop them up about the same size and set them aside too.
- In a big pan, on a medium heat, warm up some olive oil. Add the onions cut into half moons and with a bit of salt, cook them for about 2 to 3 minutes before adding the white part of the chard. Stir every now and then, and cook this for about 10 minutes.
- You can now add the green part of the chard aswell as the crushed clove of garlic, and like spinach it will reduce greatly, keep stiring until most the water steams out of it. When everything is well combined, take it off the heat.
- Away from the fire, add the freshly grated parmesan, the chopped almonds and stir to combine well. Taste to check for seasoning, add salt or pepper if needed. Set aside to cool down
Assembling the empanada:
- If you haven’t used wax paper, either lightly flour or line with wax paper your pan or tray.
- Cover the base and sides with the dough. Using the rolling pin or a knife, cut the extra dough.
- Place the filling, making sure it is cold and that all the base is covered. Using a hot filling will make the bottom layer of the empanada become soggy. Be careful to avoid adding too much oil from the filling, try to make it as “dry” as possible.
- Start preheating your oven to moderate 350°F/180ºC/gas mark 4.
- Take the other half of the dough and spread it out to the same or less thinness of the base. You can use a piece of wax paper for this too. Take into account that this “top” dough needs to be smaller around than the bottom, as it only needs to cover the filling.
- If not using wax paper, move carefully the top to cover the filling. If using wax paper, transfer the dough, turn upside down, cover the filling and gently peel off the wax paper.
- Using your fingers, join bottom and top dough, when you have gone all the way around, start pinching top and bottom together with your thumb and index finger and turning them half way in, that way you end up with a rope-like border. As a picture is worth a thousand words, please watch this video to see how it is done: http://youtu.be/CNpB7HkTdDk
- When you are finished, make a 1 inch hole in the middle of the top layer. This will help hot air exit the empanada while it’s baking without breaking the cover.
- You can use left-over dough to decorate the empanada, using rounds, bows, lines… let your imagination flow and make it pretty!
- Using a fork, prick the top layer or, using scissors, make snips that go all the way through the top layer.
- In a small bowl, beat an egg and add a tbsp of cold water. With the pastry brush, paint the top of the empanada with the egg wash.
- Place the empanada in the oven and bake for about 45 minutes. Check that the bottom part is done.
24/09/2012
The Imperfect Cookies
"Everything with passion, nothing with talent", this has been my motto for years, and I stick to it. I still can't play an F chord properly even after more than 10 years, I have to slow down when I say the word "narrower" otherwise it sounds like I'm missing out a few letters, I sing (proudly and loudly) out of key at all the concerts of my favorit artists.
So what? Life is not a perfect circle, an even square or a straight road. It's full of bumps and holes, it takes turn you don't expect, hits you in the face or hugs you, sometimes on the very same day. It breaks us down to the lowest, makes us rise again stronger.
So what? We're only humans, with our flaws and broken parts, trying to fix them and make the best out of it. And if we can't make it on our own, it's good know we have people we can count on.
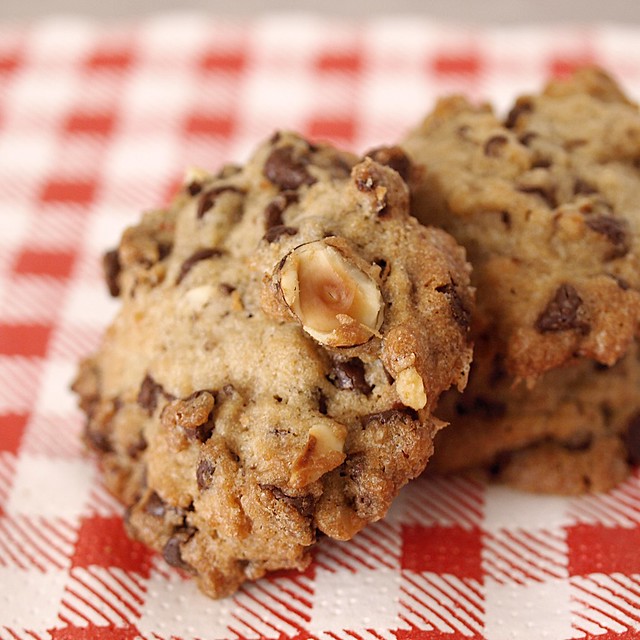
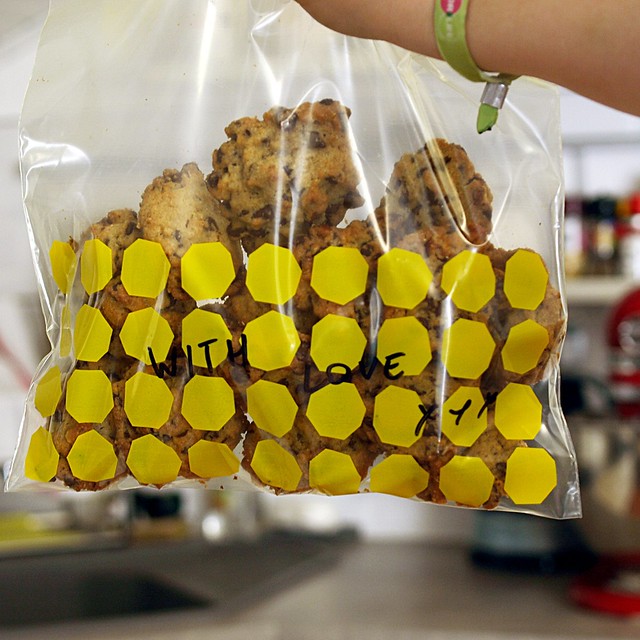
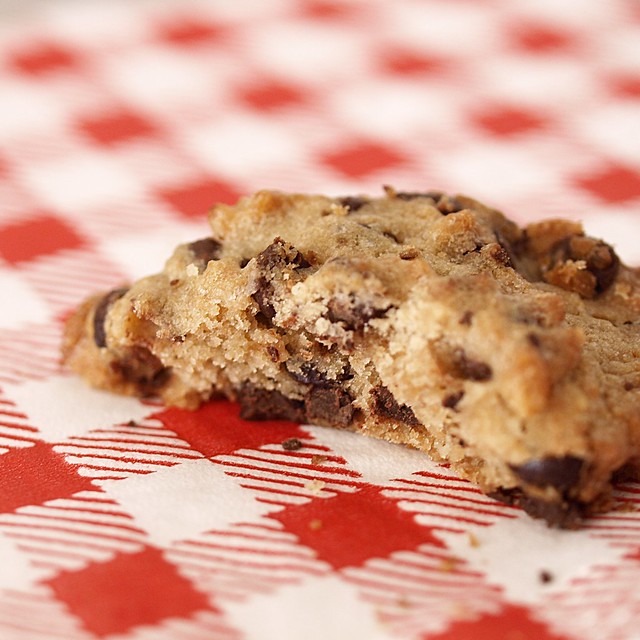
This is not a perfect cookie, they're shaped in funny ways and don't look identical at all. So what? They taste like cookie should: chocolatey, crunchy and comforting. This recipe is written in my book for years, and I can't remember from where I got it, but it's my "go-to" cookie recipe in any case of emergency. And if it doesn't actually resolve any problem... So what?
American Chocolate Chips and Hazelnuts Cookies
For about 60 cookies
250gr of Butter
150gr of Sugar
120gr of Brown Sugar (Vergeoise)
1 Teaspoon of Vanilla Extract
2 Eggs
350gr of Flour
350gr of Chocolate Chips
100gr of Hazelnuts, chopped
1/2 Teaspoon of Bicarb
1 Pinch of Salt
Take all the ingredients out an hour before starting the recipe.
Beat the butter with the sugar until it gets white and fluffy. Add both eggs and the vanilla extract. Set aside.
In the big bowl, combine the flour, the brown sugar, the bicarb and the salt. Sift in all in the egg/butter mixture and add the chocolate chips and chopped hazelnuts. Using your hands, or a plastic spatula, try to combine to form a dough and place it in the fridge for 20 minutes.
Preheat the oven to 170°C.
On a baking tray lined with parchement paper, using 2 small spoons, place the cookie dough about the size of a walnut on it. Leave enough space in between them to spread while cooking (about 5cm).
Place in the oven and cook for about 15 to 17 minutes. Place them on a rack to cool and than keep them in an airtight jar.
16/09/2012
Chocolate mousse, what else...
When life throws you out of your tracks, when it's taking an unexpected turn, when you feel like you're hanging on the edge of a cliff, not knowing if you're going to stay or jump, when you don't know if tomorow will be better or worse than today, if you should speak or stay quiet, when you just simply don't know, then, go back to what you do know.
Life is rarely what we expect it to be, or even more how we wish it would turn out. I guess what we make out of it, is really what makes the difference. So let's learn from every experience, and at least pretend it made us wiser.
Yes people, don't worry, this is still a food blog. Life, as cooking, is about failure and success, staying in your comfort zone or taking risks and learning as you go on.
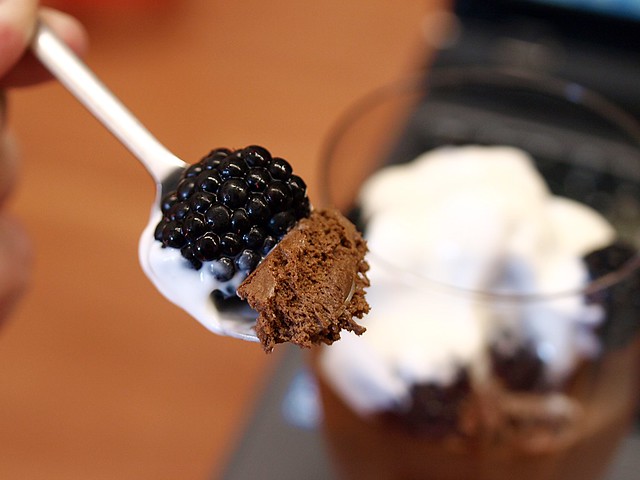
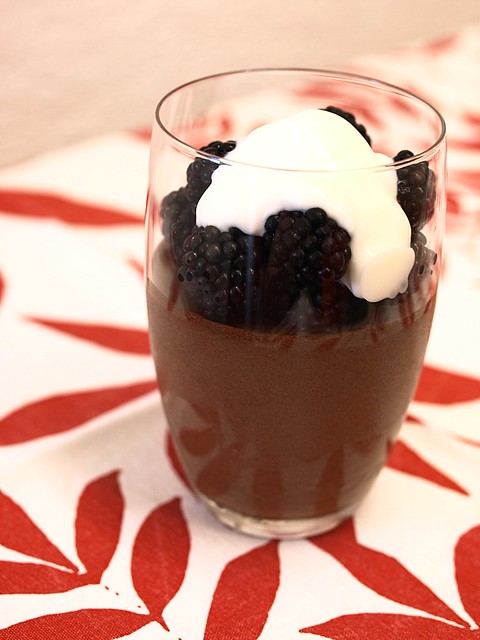
And if life gets a bit too confusing, I know I can turn to my kitchen and my favorit ingredient: Chocolate. A really good one is needed for this recipe, because there is not much more needed. Fresh eggs, some blackberries, a bit of yogurt and a night in the fridge, that might be the hardest part, but as I read somewhere, nothing worth having is easy.
Chocolate Mousse
Serves 4
200gr of Chocoalte (between 61% and 70%)
5 Eggs
100gr of Blackberries
1 Greek Yogurt
Salt
Break the chocolate in little pieces, place them in a small sauce pan that will fit into a bigger one filled with water. On a medium heat, place both pans and wait for the chocolate to melt, after it started to melt, you can help by stirring gently. Set aside.
Separate the egg white and yolks. Beat the egg white with a pinch of salt to soft peak. While you beat the egg white, if you use a standmixer, you can whisk the egg yolks with the melted chocolate until it's well combined.
Start adding just one spoon of the egg white to the melted chocolate/egg yolk mixture to make it more airy. Than add the rest of the egg white and combine gently with a spatula.
Pour carefully the mixture in one big bowl or individual ones and place them in the fridge for at least 6 hours. To serve, top them with fresh blackberries and a spoon of yogurt.
09/09/2012
Summer, are you still there?
It feels like summer is coming to an end, days are getting shorter, you need to wear your long sleeves in the morning and you can feel that little chill in the air once the sun is dawning. School is back in session, the pencils have been sharpened and the pupils are still full of good resolutions.
The long vacation days, where reading a book in the sun was the only thing on your schedule are long gone. It's september again, we're all back at work, back in our everyday life. Goodbye summer, as David would say "I would have gone and loved you anyway".
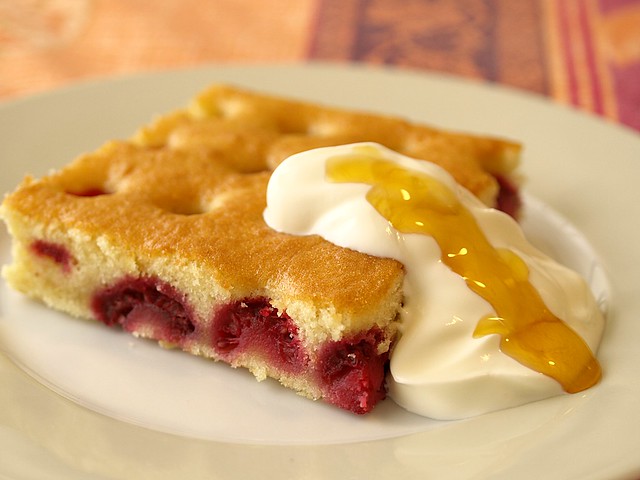
Let's hold on to one of the best things sunny days brings us, in my opinion at least, raspberries! Lots of jam is already stored in my pantry to get me thru (part of) the winter, I have enjoyed my fair share of fresh ones too, but making a cake needed to be done.
Something nice and fresh, to stay in that light summer feeling for just a little longer. Holding on to those last sunny days, before autumn sets in for good.
Raspberries Yogurt Cake
for 1 cake
4 eggs
150gr of Sugar
200gr of Flour
1 Greek Yogurt
2 Teaspoons of Baking Powder
10cl of Oil (Sunflower)
400gr of Raspberries
Preheat your oven to 180°C.
In your standmixer, beat the eggs and the sugar for about 5 minutes, until it almost doubles in volume. Add the yogurt and sift the flour and the baking powder in until everything is combined. Lower the speed of the mixer and add the oil slowly, keep mixing for a minute or two.
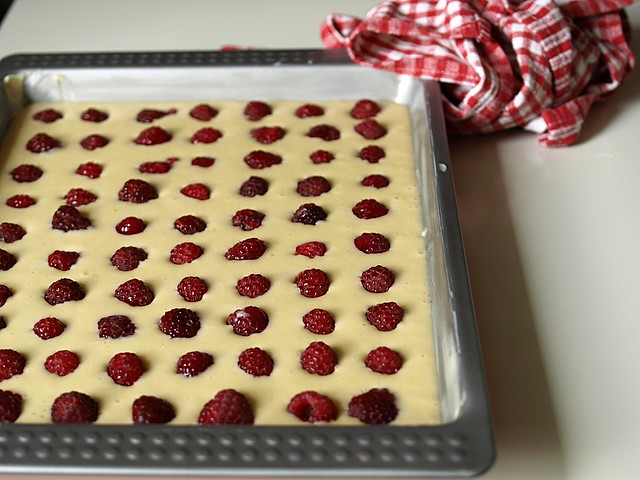
Butter your oven dish (in this case a 23x31cm) and pour the cake preparation in it. Now place your raspberries carefully on it, you can aligne them or try to sprinkle them evenly. Place in the oven for about 40 minutes, it should be a nice golden color.
Leave it to cool and you can serve it with a bit of greek yogurt and some honey on it.
Inscription à :
Articles (Atom)