27/12/2012

Daring Baker - December 2012: Panettone


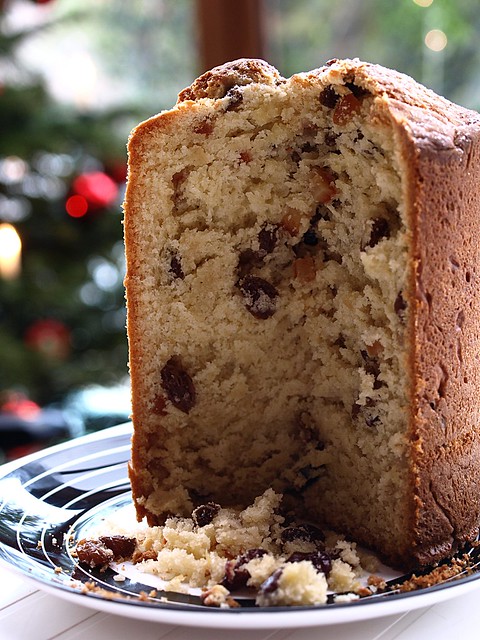
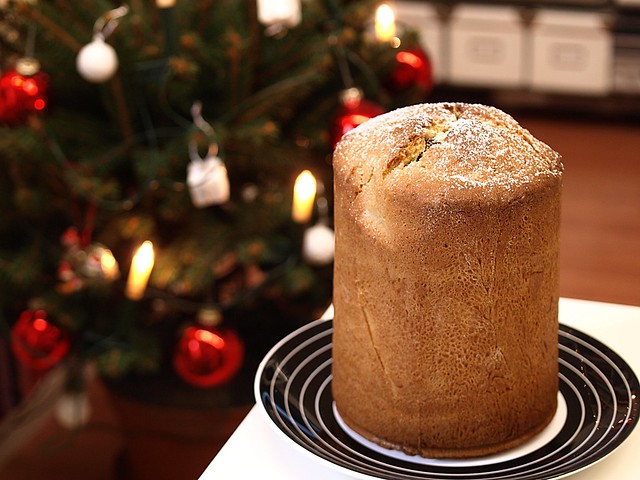
The December 2012 Daring Bakers’ challenge was hosted by the talented Marcellina of Marcellina in Cucina. Marcellina challenged us to create our own custom Panettone, a traditional Italian holiday bread!

With a little bit of delay, I wish you all a merry christmas. I hope it's been a pleasant time for you, and that you got to share it with your beloved ones.
This month's daring baker challenge is bringing us a standard on italian tables at christmas: the panettone. I never had a chance to make one before, though it resembles to something we have here, called Kougelhopf that exists in both sweet and savory version.

I divided the following recipe in half, because I only have one panettone pan, and because my family is not too found of raisins. It is quite time consuming in the process, but I loved the result and it keeps really well for a few days.
My only few changes, were switching the orange and lemon extract for orange liquor, I've only used candied orange and added a few cranberries to the raisins.

If I don't have the chance until than, let me just all wish you a happy new year!

Panettone


makes 2

Ingredients

Sponge
7 gr active dry yeast
80 ml warm water
70 gr unbleached all purpose flour

First Dough
7 gr active dry yeast
45 ml warm water
2 large eggs, at room temp
175 gr unbleached all-purpose (plain) flour
55 gr sugar
115 gr unsalted butter, at room temp

Second dough
2 large eggs
3 large egg yolks
150 gr sugar
45 ml honey
15 ml vanilla extract
5 ml lemon essence/extract
5 ml orange essence/extract
6 gr salt
225 gr unsalted butter, at room temp
420 gr unbleached all-purpose (plain) flour; plus up to 100 gr for kneading

Filling and final dough
250 gr golden raisins or golden sultanas
75 gr candied citron
75 gr candied orange peel
Grated zest of 1 orange
Grated zest of 1 lemon
15-25 gr unbleached all-purpose (plain) flour


Directions:

Sponge
  1. Mix the yeast and water in a small bowl and allow to stand until creamy. That’s about 10 minutes or so
  2. Mix in the flour.
  3. Cover with plastic wrap and allow to double in size for about 20 to 30 minutes
First Dough
By hand:
  1. Mix the yeast and water in a large bowl and allow to stand until creamy. Again, about 10 minutes or so
  2. Mix in the sponge and beat well with a wooden spoon
  3. Stir in the eggs, flour and sugar.
  4. Mix in the butter well
  5. This should only take about 5 – 6 minutes
  6. Cover with plastic wrap and allow double in size, about 1 – 1 ¼ hours
By Mixer:
  1. In the mixer bowl, mix together the yeast and water and allow to stand until creamy. Again, about 10 minutes or so
  2. With the paddle attached mix in the sponge, eggs, flour, and sugar.
  3. Add in the butter and mix for 3 minutes until the dough is smooth and even.
  4. Cover with plastic wrap and allow double in size, about 1 – 1 ¼ hours
Second dough
By Hand:
  1. Be sure to have your dough in a large bowl as above.
  2. With a wooden spoon mix in eggs, egg yolk, sugar, honey, vanilla, essences/extracts and salt.
  3. Mix in the butter.
  4. Then add the flour. Stir until smooth.
  5. At this stage the dough will seem a little too soft, like cookie dough.
  6. Turn it out and knead it on a well-floured surface until it sort of holds its shape. Don’t knead in too much flour but you may need as much as 2/3 cup (100 gm). Be careful the excess flour will affect the finished product.
By Mixer:
  1. With the paddle mix in thoroughly the eggs, egg yolks, sugar, honey, vanilla, essences/extracts, and salt.
  2. Mix in the butter until smooth.
  3. Add the flour and slowly incorporate.
  4. At this stage the dough will seem a little too soft, like cookie dough.
  5. Replace the paddle with the dough hook and knead for about 2 minutes.
  6. Turn out the dough and knead it on a well-floured surface until it sort of holds its shape.
  7. Don’t knead in too much flour but you may need as much as 2/3 cup (100 gm). Be careful the excess flour will affect the finished product.
First Rise
  1. Oil a large bowl lightly, plop in your dough and cover with plastic wrap
  2. Now we need to let it rise until it has tripled in size. There are two ways to go about this.
    • Rise in a warm place for 2 – 4 hours
    • Or find a cool spot (64°F -68°F) (18°C – 20°C) and rise overnight
    • Or rise for 2 hours on your kitchen bench then slow the rise down and place in the refrigerator overnight. If you do this it will take some time to wake up the next morning but I preferred this method.
Filling and Final Rise:

  1. oak the raisin/sultanas in water 30 minutes before the end of the first rise. Drain and pat dry with paper towels.
  2. Now take your dough and cut it in half. Remember we are making two panettoni.
  3. Combine all your filling ingredients and mix well
  4. Press out one portion of dough into an oval shape
  5. Sprinkle over one quarter of the filling and roll up the dough into a log
  6. Press out again into an oval shape and sprinkle over another quarter of the filling
  7. Roll into a log shape again.
  8. Repeat with the second portion of dough
  9. Shape each into a ball and slip into your prepared pans, panettone papers or homemade panettone papers.
  10. Cut an X into the top of each panettone and allow to double in size.
  11. Rising time will vary according to method of first rise. If it has been in the refrigerator it could take 4 hours or more. If it has been rising on the kitchen bench in a warm place it should be doubled in about 2 hours.
Baking
  1. When you think your dough has only about 30 minutes left to rise preheat your oven to moderately hot 400°F/200°C/gas mark 6 and adjust your oven racks
  2. Just before baking carefully (don’t deflate it!) cut the X into the dough again and place in a knob (a nut) of butter.
  3. Place your panettoni in the oven and bake for 10 minutes
  4. Reduce the heat to moderate 350°F/180°C/gas mark 4 and bake for another 10 minutes
  5. Reduce the heat again to moderate 325°F/160°C/gas mark 3 and bake for 30 minutes until the tops are well browned and a skewer inserted into the panettone comes out clean.
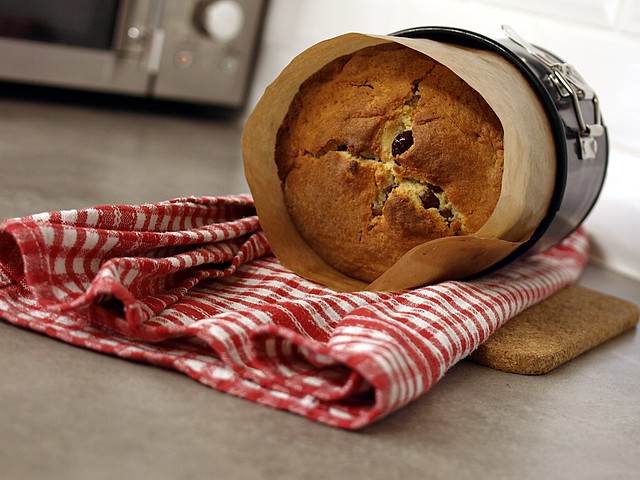
  6. Cooling your panettone is also important. If you have use papers (commercial or homemade) lie your panettoni on their side cushioned with rolled up towels. Turn gently as they cool. If you have used pans cool in the pans for 30 minutes then remove and cushion with towels as above.
  7. Panettone can also be cooled suspended. How to do this? Firstly you need to use papers (commercial or homemade), insert clean knitting needles into the bottom of the panettone in a X shape. Flip over and support the knitting needles on the edges of a large saucepan with the panettone suspended within the saucepan. Yep, a lot of trouble and I didn’t really find that much difference – maybe I took too long to insert the needles.

20/12/2012

Osso Buco with Gremolata


So tomorow is the end of the world, or so it seems. I remember we had a couple of those already, like that big solar eclipse a few years back, or a random asteroïd heading towards earth. Let's face it, one day we'll be there, but I'm pretty confident this one isn't it, yet. I don't think we'll have it so quick and easy anyway, I think it will rather be long and painfull...

But where's my holidays spirit! Let's all be joyfull, because if we actually make it to the 22nd of December, we can all feel like Bruce Willis in one of those movies he's saving the whole world in (I'll let you choose your favorit one here, there quite a few options).

To balance out my very sweet and dessert oriented blog, here's a great recipe for big crowds, easy to make and that is delicious. I don't think I have to say again that italians know what they are talking about when it comes to food. So buono appetito, and in case of an apocalypse, good luck!

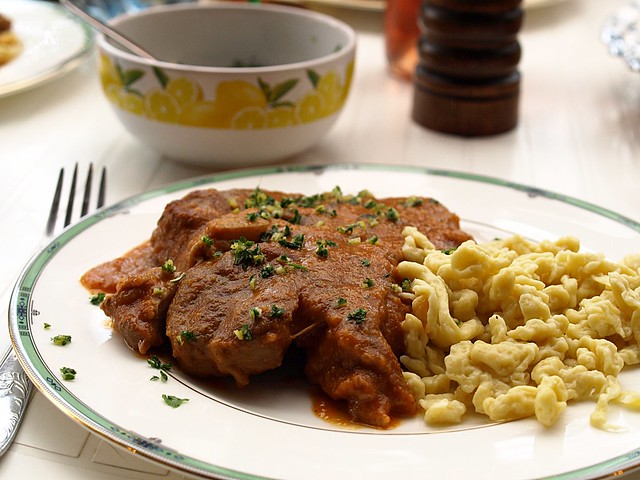
Osso Buco with Gremolata


Serves 8

for the Osso Buco
about 2.5Kilos of Veal Shanks
3 Onions
4 Carrots
1/2 a Celery
2 cans of Peeled Tomatoes
25cl of Tomato Paste
1/2 Liter White Wine
2 Bay Leaves
Thym
Rosmary
Olive Oil
Salt, Pepper
3 Tablespoon of Flour
for the Gremolata
1 Lemon,
1 Clove of Garlice
3 Tablespoons of Parsley

I've asked my butcher to cut the veal shanks in 8 equal parts, about 2cm thick each. Pat each one dry, cut with a sharp knife around the edges, about every 4 cm, so it won't shrink while it cooks. Dust each with flour, so they're covered on both side and shake off any excess. Set aside.

Peel the onion, dice it. Wash the vegetables, peel and dice the carrots and celery to about the same size, set aside.

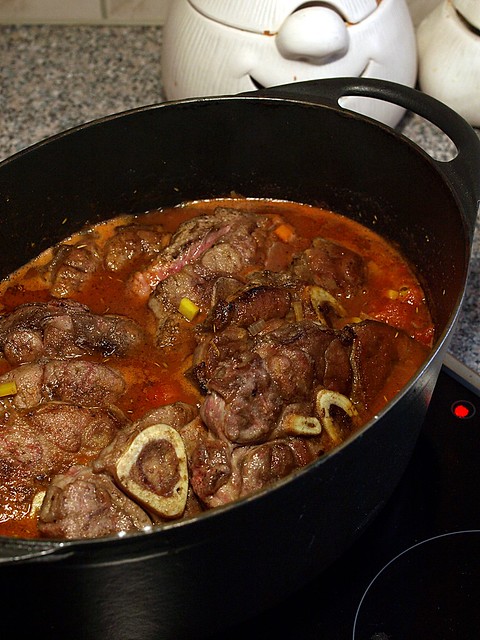
In a large cast iron pan, heat up some olive oil. When it's hot, place the veal shanks in it and brown them on both side for a few minutes. You may need to do this in a few batches, depending on the size of your pan. Remove when they have a nice color and set aside.

In the same pan, lowering the heat a little, add the diced vegetables and onions with a pinch of salt, and cook them for about 5 minutes, keep stiring so they don't attach to your pan, and when they start softening, add the white wine. Let it cook for 5 more minutes, before adding the peeled tomatoes and the tomato paste. Add the thym, rosmary and bay leaves, check for seasoning and add slat and pepper if needed.

Bring the sauce to a boil, then lower the heat and place the shanks back in the sauce, cover it and let it cook for about 1h30.

In the meantime, make the gremolata: peel the zest off the lemon and dice as small as possible, do the same with the garlic clove and the parsley. In a smal bowl, combine all the ingredients, then cover it with clingfilm and place in the fridge.

You can serve the dish like that, or as we did, take the meat out and using a plunging mixer, you can blitz the sauce so everything is combined.

Serve the veal shank with some sauce, sprinkle gremolata on top. You can serve this with rice, pasta or as we did, with spaetzle.

17/12/2012

Spitzbuebe: Christmas Cookies with Jam


Ho ho ho! Or something to that effect. It's christmas time, apparently... It's hard to get into the spirit these days, I guess it's just the whole rush of the season, combined with work and life in general... But I have my own way of getting into the christmas mood all by myself: I'm making christmas cookies!

It's one of the traditions that I like to perpetuate, because it results in a big box of cookies, a place that smell of cinnamon and spicies, and also a more personal gift to my family and friends. I've been doing those as a child already, they come from the same book I've used in several recipes here already, my trusty Betty Bossi Back Buch.

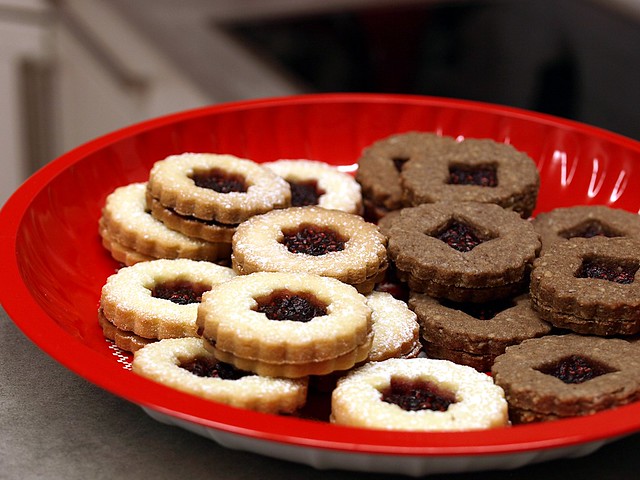
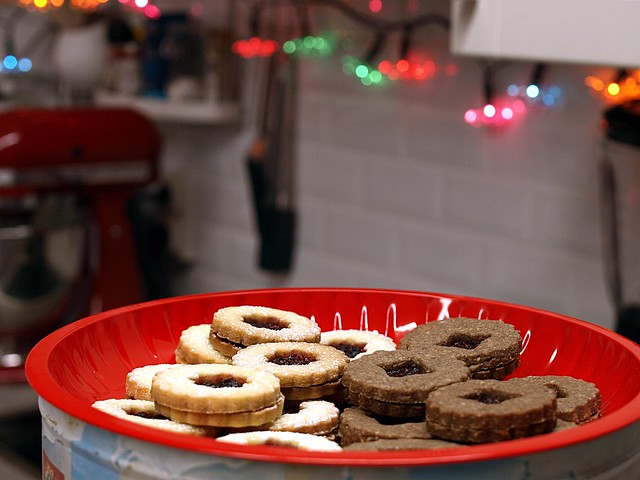
This year I could even make them with my own raspberry jam, all the more reason to bake some more, because as you can see on the picture, there is a cocoa-cinnamon version aswell. But my preference goes to the original, so that's the one I'm share with you today, afterall this is what this season is all about: sharing.

Spitzbuebe: Christmas Cookies with Jam (From the Betty Bossi Bach Buch)


Makes about 30

200gr of Butter, at room temperature
125gr of Icing Sugar, plus some for dusting
1 Egg White
1 Teaspoon of Lemon Juice
1 Pinch of Salt
350gr of Flour
6 Tablespoons of Raspberry Jam

In your standmixer, with the paddle attachment, beat the butter and the sugar until pale and well combined.
Add the egg white, the lemon juice, the flour and pinch of salt, and keep beating to a soft dough.

Place the dough in a clingfilm and leave it to cool for about 30 minutes.

Preheat the oven to 200°C.

Roll out your dough about 3mm thick, using cookie cutters cut out the base and leave it full, then cut out the top part and make a hole in the middle (look for the pictures). Obviously, make a matching number of base and top cookies.

Cook them in the oven for 8 to 10 minutes, they should be a very light brown color.

In a pan, heat up your jam, than using a small spoon, place a little bit of the hot jam on the base part of the cookie, and place a top part on it, press lightly together and let it cool on a rack. When the jam has cooled you can dust them with icing sugar.

06/12/2012

Manalas, the little brioche men


Happy Saint Nicolas day! I guess this won't mean much to most of you, but it's kind of a big deal where I live. Especially when you're a kid, for us Saint Nicolas is like Santa Claus, and has an "evil twin" in case you're not behaving, called "Père fouettard", who would threat you to take you in his bag or hit you with his martinet. That's always a great way to make children behave in my experience.

So the children who behave receive a gingerbread and an orange or mandarine, and also peanuts are traditional here. My grandma told me it was a big deal back in the days to get those sweets, they wouldn't get any others thru out most of the year. Which always makes me realised how spoiled we are, and how much worse it's getting with every generation.

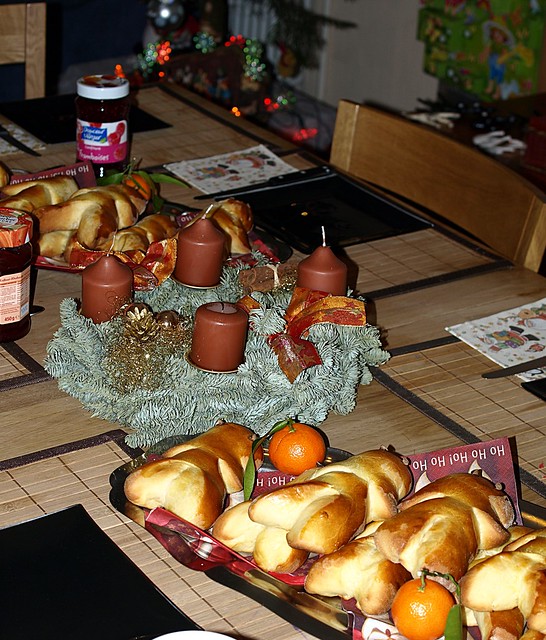
No Saint Nicolas celebration would be right without our "Manala", the little man made out of some sort of brioche dough. We have that for diner on the 6th of december (or the evening before depending on the families), with tea or hot chocolate, cutting them open and spreading butter, jam or nutella on them. Completly regressic and so good!

Manalas


Makes 9-10 units

500gr of Flour
100gr of Sugar
100gr of Butter
25gr of Fresh Baker Yeast
2 Eggs
200gr of Milk
5gr of Salt
1 Egg Yolk
optional: chocolate chips, raisins, pear sugar...

Heat up half of the milk, and add the fresh yeast into it, stir to combine a little. Add 100gr of Flour to that and combine aswell. Place a humid cloth on it and let it rise for 20 minutes near a radiator.

In a pan, with the other half of the milk, make the butter melt on a low heat, add the sugar and the salt with it too. Don't let it boil, and when everything is melted, set aside to cool a little.

Now combine the yeast preparation with the melted butter using a wooden spoon, or you standmixer on a low speed. Add the two eggs and the rest of the flour (400gr) and keep mixing for about 15 minutes, the dough has to be smooth and elastic. When you're finished, cover it with a cloth and leave it for 30 minutes in a hot place.

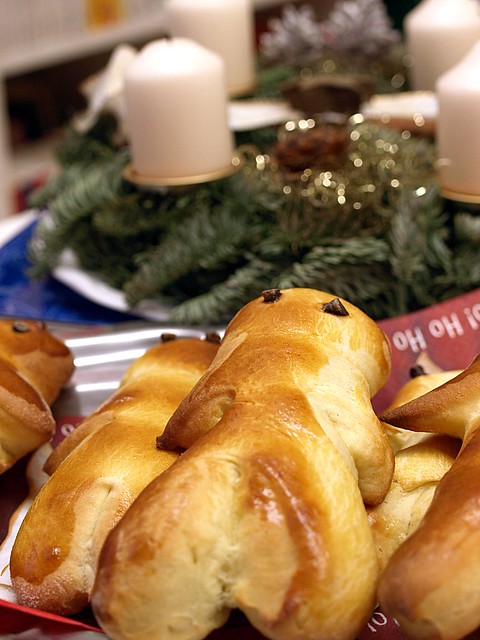
Now tip the dough on a floured worksurface and form the little men. Roll out a cylinder, about 15cm long, pinch the top part to form the head, using a sharp knife, cut the legs by cutting the lower part in two, and than cut the arms out on each side (see the picture).

Place them on the oven tray lined with parchement paper. Beat the egg yolk with a bit of milk and brush the men with it. Now you can use chocolate chips or raisins for the eyes, you can sprinkle pearl sugar on their tummies for instance.

Leave them to rise for 20 minutes. Preheat the oven to 180°C.

Place in the oven for about 15 minutes, or until they have a nice golden, light brown color. Cool them on a rack and enjoy!

03/12/2012

Beef and Root Vegetables Enchiladas


Fair warning people, this might be a cynical post. I guess I'm trying to get it out of my system, before all the happiness and merriment comes around the corner for christmas. You know people fighting in shops over the last hello kitty doll (or whatever is in fashion this year), cutting in front of you at the checkout counter of the supermarket, or drivers not stopping at the pedestrian crossing, when it's freezing out there and they are all comfy in their heated cars!

This might not reflect it, but I'm actually an optimistic person, but sometimes you just have to sit down, take a deep breath and complain! To yourself, to your cat or a really good friend, let it all out. Then maybe you'll realise it's not that bad after all, that things can turn around eventually. And in the meantime, you can turn to what makes you feel better, which in my case is cooking.

Last week on my day off, I was craving meat, which is very unusual for me. Normally, I tend to crave something sweet more than I should, or maybe some pasta every now and then. But meat sounds like a weird pregnancy craving... and for anyone who knows me for real, this is funny.
Then I realised it was full moon, so maybe I'm part warewolf and I don't know about it... it's just as plausible as me being pregnant after all ;)

Though my first impulse was making hamburger, I wanted to do something different for a change, and because of the outside temperature, I thought something with a little bit of heat would be nice. I love the tortillas I've done a while ago, but I didn't have the chance to do some since, so this was the perfect opportunity.

Beef and Root Vegetables Enchiladas


serves 2/3

6 Tortillas
400grs Ground Beef
2 Carrots
1 Turnip
1 Onion
1 Teaspoon of Ground Coriander
150ml Tomato Sauce
Tabasco
Salt, Pepper
Olive Oil
100gr of Cheese (I choose Comté)
Fresh Chives or Parsley to serve

Peel the onion and dice it. Clean the vegetables and peel them, dice them about the same size as the onion.

In a big pan, on a medium flame, heat up some olive oil and add the onion with a bit of salt. Stir for about 2-3 minutes until the onion is soft, but not too colored.
Add the diced carrot and turnip, stir for a minute or two, lower the heat a little and add a lid to your pan and let them cook for about 10 minutes, stir every now and then.

Now add the ground beef, and using a wooden spoon, break it into little pieces while it cooks, so it blends better with the vegetables. Then add the coriander and the tomato sauce. You don't want to add too much, just enough to coat all ingredients. Add Pepper and Tabasco to your taste (a few drops in my case). Let it cook slowly, lid off, for an other 20 minutes or so and stir every now and then.

Preheat the oven to 170°C.

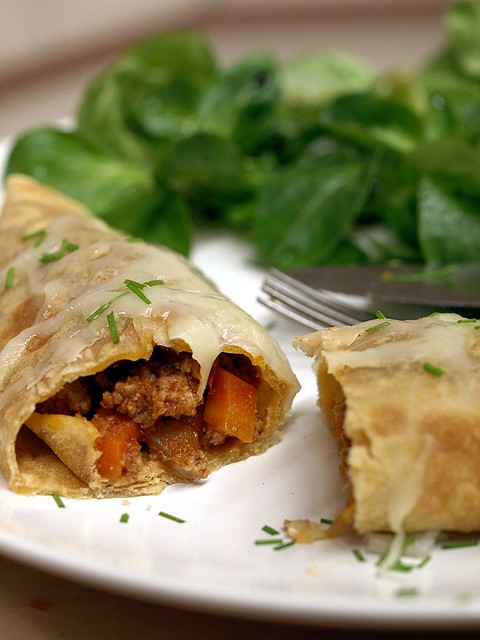
To serve, you can whether place some of the ground beef sauce in the middle of the tortilla and roll it to make a wrap, place the wraps you've made in an oven dish, sprinkle some grated cheese on top and place it in the oven for about 5 minutes (until the cheese melts) and serve it which freshly chopped chives.
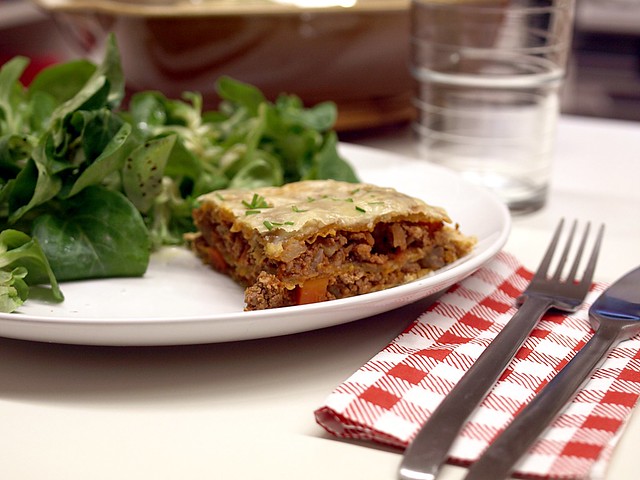
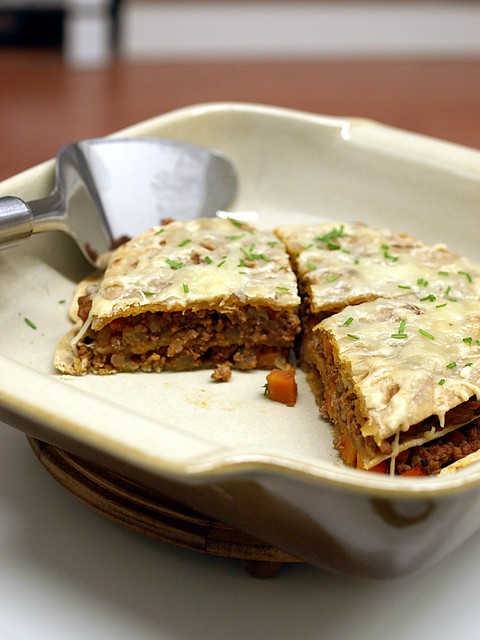
Or in a dish place a tortilla, cover it up completly with beef, place an other tortilla on top and make layers (like you would for a lasagna) than on the last layer tortilla you sprinkle cheese and place it in the oven for 5 minutes also, and sprinkle it with fresh herbs to serve with a green salad.