27/05/2012

Daring Baker - May 2012 Challenge: Challah


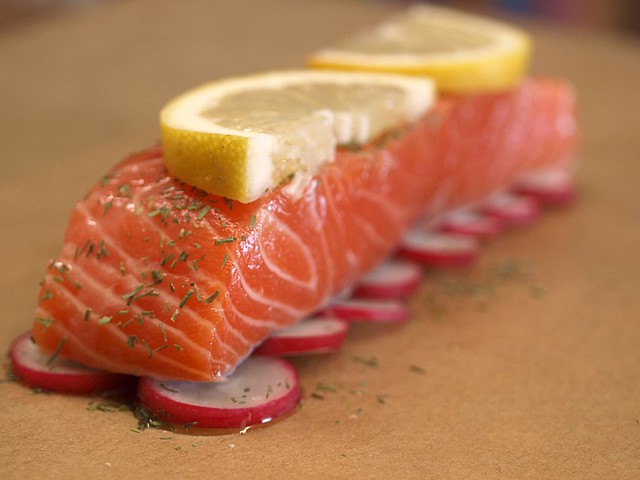
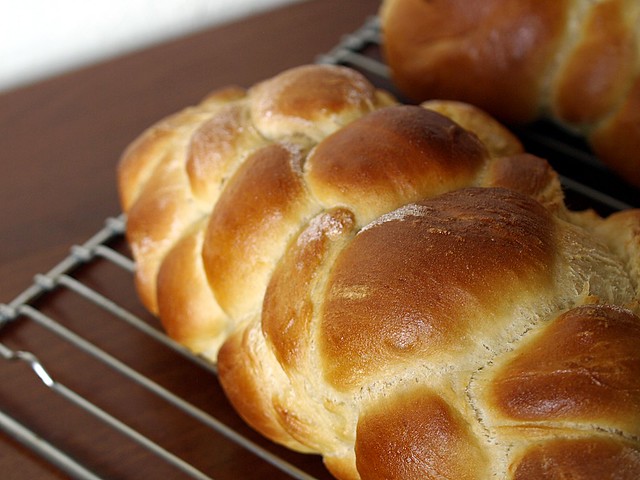
May’s Daring Bakers’ Challenge was pretty twisted – Ruth from The Crafts of Mommyhood challenged us to make challah! Using recipes from all over, and tips from “A Taste of Challah,” by Tamar Ansh, she encouraged us to bake beautifully braided breads.

Second time around at the Daring Baker, and this happens to be one of those happy coincidence, Challah was on my "to-do" list for a while, as I kept seeing it in many bread recipe books. I'm used to braid brioche here, but mostly just two or three strand braid.
So trying out the 4 and 6 strand braid has been a fun challenge, I've check some tutorial over the internet, and it does make a pretty loaf in the end, even if I can still work on my braiding skills in the future.

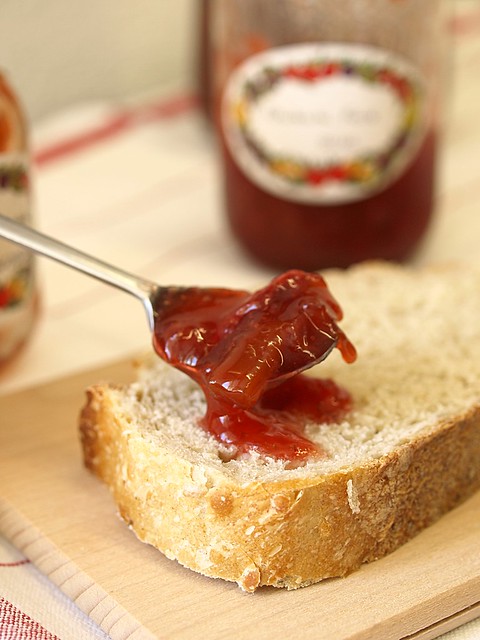
Though I'm not a religious person, I love food that comes with an history, a tradition or even a legend. In a time where so many people focus on the differences between cultures, maybe we should see more what we have in commun and unites us. Bread is one of those things, a landmark, a standard on every table around the world in various and beautiful forms, like this challah.

Challah Honey White (from Tammy’s Recipes)

Servings: 2 loaves

Ingredients
1 ½ cups (360 ml) Warm Water, separated
1 Tbsp. (15 ml) (15 gm/½ oz) Sugar
2 Tbsp. (2-2/3 packets) (30 ml) (18 gm) (2/3 oz) Dry Active Yeast
½ cup (120 ml) Honey
1 Tbsp. (15 ml) Oil (light colored vegetable oil, or olive oil if you prefer)
4 large Eggs
1 ½ tsp. 7½ ml) (9 gm) (1/3 oz) Salt
5 cups (1200 ml) (700 gm/25 oz) all-purpose (plain) Flour, plus more as needed (up to 8 or 9 cups total)
1 Egg beaten with 1 tsp. water

Directions:
1. In mixer bowl/large mixing bowl combine ½ cup warm water, 1 Tbsp. sugar and 2 Tbsp. yeast. Allow to proof approximately 5 minutes until foamy.
2. To the yeast mixture add the remaining water, honey, oil, eggs, salt and 5 cups of flour. Knead (by hand or with your mixer’s dough hook) until smooth, adding flour as needed. Knead for approximately 10 minutes.
3. Transfer dough to a clean, oiled bowl, turn to coat or add a bit more oil on top. Cover bowl with a kitchen/tea towel. Leave to rise in a warm place until doubled, about 1 ½ hours.
4. Punch down the dough, divide it into two sections. Use one half to make each loaf (shaped or braided as desired).
5. Place loaves on parchment lined or greased baking sheets, cover with a towel, allow to rise 30 minutes.
6. Preheat oven to 325 degrees.
7. Brush tops loaves with egg wash. (Sprinkle with seeds or toppings here if wanted.)
8. Bake loaves 30-40 minutes until done.
9. Cool on wire racks.

22/05/2012

Looking forward and making Jam


Let's pretend it is actually spring, that the sun is shining, the temperatures are getting warmer and we enjoy day after day without rain... Are you convinced? Well here, it would take a lot of persuasion strength to make you believe so. Even if it's finally getting better, temperature wise, the weather forecast keeps showing me a little cloud with raindrops falling! It's almost june, c'mon!

So hoping this will bring the sun out from behind the clouds, I'm making jam, and not just any jam, one that includes beautiful strawberries. When I brought them back home, my sister asked me what I would do with them, immediatly I said Jam! She thought it was a pity for such good looking strawberries.
But I don't see jam as a way to get rid of fruit that is about to turn bad, I see it as a way to enjoy summer fruits in the middle of the winter, and I know I'm going to remember how gorgeous they were, when I'll pop that lid open on some cold(er) days.

Nature does things right, because mostly what grows around the same time, can be used in the same recipe. This is a classical combination: rhubarb and strawberries. And it is a classical for a reason, it goes perfectly together.
Now for a little change and adding a personal touch to it, I've added something that starts to be in season here aswell: melon. It doesn't have that acidity you find in the rhubarb or even a little in the strawberry, so you don't need as much sugar in the end.

Rhubarb, Strawberries and Melon Jam


for about 3 Jars

300gr of Rhubarb
300gr of Strawberries
300gr of Melon (about 1 or 1,5 depending on the size)
1 Lemon
800gr of Sugar

Peel and cut the rhubarb into 1cm pieces, place them in a bowl with 300gr of sugar on them, leave them like this for a couple of hours.

Clean the strawberries before you cut the top off, and cut them in 2 or 4 pieces depending on the size.

Cut the melon in two, remove the seeds, and slice every half in 4 pieces. Cut the skin away, and cut the flesh to about the same size as the strawberries.

Place the rhubarb with the sugar and the liquid that came out of them into the pan you're going to cook the jam in, add the strawberries, the melon, the remaining sugar (500gr) and add the zest of the lemon, then the juice of it.

Place it on a medium heat soo it starts to bubble, and cook it for at least 20 minutes. To check if it's good, place a plate in the fridge when you start to cook, place a drop of the jam on the cold plate, place it back in the fridge for a minute and see it the consistency suits you.

Pour the jam into jars you have sterilised in boiling water, place the lid on, let them cool up side down and you can store them for about 1 year.

18/05/2012

A Biscotti Moment


My working schedule, and life in general, has kept me a little away from the kitchen this week. So when an unscheduled break came across, I almost litterally ran home to my kitchen, to try a recipe I had in mind for a while: Biscotti.
If I tell you I've been willing to make biscottis for a long time because of the "gilmore girls", it might not make a lot of sense to most people. I'm a TV show addict and the gilmore girls remain one of my favorits. The main characters bring back some biscottis from their trip to Europe, and save them for important "biscottis moments". It's silly, fun, a bit dorky, all the more reasons to like it and to bake biscottis.

You have to give the italians that, when it comes to food, they know how to make simple ingredients into delicious dishes. I don't think I know anyone who doesn't like pasta, pizza might be one of the most popular dish in the world and who can say no to a gelati?
Plus I like the straight forward naming : Panna Cotta, means cooked cream, Semifreddo, half cold and Biscotti, twice baked. Where the french go for religieuse, éclair, opéra, charlotte... more poetic maybe, but also more confusing.


So my biscotti moment was a well deserved break, gazing thru the window with a sun playing hide and seek thru the clouds, looking at the flowers my nieces picked for me. It might not be the most dashing bouquet you've ever seen, but it's beautiful in so many other ways, like those biscottis. Enjoy!

Almonds, Pistachios, Cranberries and Cardamom Biscotti
(based on a recipe from "Kitchenaid 90")


Four about 40 biscottis

300gr of Flour
1 1/2 Teaspoon of Baking Powder
150gr of Sugar
1 Teaspoon of Ground Cardamom
3 Eggs
50gr of Almonds
30gr of Pistachios
80gr of Dried Cranberries

Preheat the oven to 180°C.

Combine all the dry ingredients in the bowl of your mixer: the flour, the baking powder, the sugar and the ground cardamom. Combine at a low speed, then add the eggs and beat until a dough forms, this will take about 2 to 3 minutes.

Now add the almonds, pistachios and cranberries and combine all the ingredients. On a floured surface, place the dough and separate it into 2 equal parts. Roll them out to have two cylinders of about 4 to 5 cm diameter, and place them on a baking tray lined with parchement paper.

Cook in the oven for about 20 minutes, it should be nicely golden. Take it out of the oven and let it cool for about 10 minutes.
Now slice it carefully, about 1 to 1,5cm thick, and place on the baking tray again to cook it the second time, for 10 minutes.

Leave it to cool on a rack and keep them in an airtight jar, to enjoy with your cup of tea.

10/05/2012

Spice and Honey Carrot Pie


I love sleeping in a bed with freshly washed linen, but I don't like changing the sheets. I love storms when I'm comfy inside my home, not when I'm outside. I love leaving for holidays aswell as I enjoy coming back. I do my best to be an eco citizen but I work with a car all day. I'm a quiet person, but love to sing out loud when I'm alone.
You could say I'm full of contractions, which is true, but I'd rather say that I'm opinionated. That getting older makes you see life differently, and that there are a lot of shades of grey in between that black and white you saw in the beginning.


I love, and take it as a challenge, to try out recipes that take many hours to make, with different preparations to get ready, like this fraisier I did a couple of years ago, or the merguez done from scratch on this blog. But sometimes, making something easier in the process is just as rewarding if the result is as delicious as this pie. Very few ingredients, just the the right ones.
Carrots and puff pastry. Those are the main ingredients of this pie, though I sometimes make my own puff pastry, it does require a lot of time, so I used a good quality one I bought. A few carrots left, a recipe in Saveurs magazine, there you have a nice super.

Spice and Honey Carrot Pie (adapted from a recipe from Saveurs Magazine N°191)


Serves 2

150gr of Puff Pastry
4 Carrots
2 Tablespoons of Honey
1 Teaspoon of Cumin
2 Tablespoons of Olive Oil
2 Tablespoons of Butter, melted
Salt, Pepper

Peel the carrots and cut them lenghtwise into four pieces, or more, depending on the size of the carrot. Steam cook them for 20 minutes.

In the meantime, preheat the oven to 180°C.

In a small bowl, combine the honey, the olive oil, the cumin and pepper. Place the carrot in an oven dish, and pour the honey/oil mixture on them, try to coat them in it.
Place in the oven for 20 minutes, and turn them around half way thru.

Roll out your puff pastry, about 3-4 mm thick, place on an oven tray covered with parchement paper. Brush the melted butter on the pastry, before placing the carrots on it and cook it in the oven for about 20 minutes.

When it comes out of the oven, sprinkle it with a bit of salt. Serve it hot, with a salad, or if you feel like you need some more carbs, with some Rösti.

08/05/2012

Change: Steamed Salmon with Radishes


This last couple of weeks have been a lot about change, in many different ways of my life: a new month that starts and finally feels like it's spring, a new painting on the walls, a new work schedule, a few more responsabilities, a will to spend more time outside and on a less private level, but on a more important one, a new president for my country.

Is it for the best or the worst? I can't say, only time will tell us. My persistant optimistic soul, and my political beliefs, hope for the best. Because, after all, even if we don't like them sometimes, changes are inevitable, they challenge us, they might scare us, but I believe they always make us grow in some way. Even if our confort zone is where we are safe, it's not where we learn the most.


In the kitchen, change is essential to me, I'd be depressed if I had to cook and eat the same dish everyday. This blog only shows the recipes that I think are good enough to be shared, but I'm experimenting almost daily. Changing an ingredient or how to cook it, adding or removing something to make a recipe better.

Today's change in the kitchen is due to my weighing scale, because experimenting in the kitchen has it's consequences ;). Steaming fish is not something I had done much before, but finding some nice organic salmon made my choice of recipe easy.
And not that it's that uncommun, but for this recipe I had the help of my little sous-chef, my 4 year old niece who wants to be a cook when she grows up, maybe she'll make tomorow's change.

Steamed Salmon with Radishes and Wasabi Dip


Serves 1

125gr of Salmon
3 Radishes
1 Lemon
Dill
Olive Oil
50gr Fresh Cheese
1/2 Teaspoon Wasabi
1 Teaspoon Soy Sauce
1 Tablespoon Sesame seeds

Preheat the oven to 190°C.

Cut the radishes in slices and place them in two rows (or as wide as you piece of salmon is) in the middle of your parchement paper, where you have sprinkled a bit of olive oil.
Place the salmon on top of the radishes, press a bit of lemon juice on the fish before sprinkling a bit of dill. Place some lemon slices on top of the fish.
Now wrap your parchement paper in order to seal it completly, place it in a dish into the oven for about 12 minutes (more if your fish is bigger).

In the meantime prepare your dip by whisking the fresh cheese with the wasabi and the soy sauce, try it and season it to your taste. Roast the sesame seeds for a few minutes in a pan with no fat. When you take the fish out of the oven, sprinkle them on top of it.
Serve it with a salad and the wasabi dip for a light supper.

01/05/2012

A Birthday Celebration: Lemon Cream on Chocolate Cake


Today, I'm celebrating a birthday: this blog is one year old on this very day! Ok, most likely nobody cares but me, but still I'm having a party on my own, and a little post dedicated to it. Good thing I choose a day off to start it!
Even if it's going to make me sound like an old gal, I haven't seen this year go by. I guess I was too busy reading cook book and magazines, before trying things out in my kitchen. It's been a lot of fun and an enriching experience so far, so let's keep going with it ;)

What better than a cake to celebrate a birthday? Nothing in my opinion. This recipe has been used to celebrate an other anniversary in my family, and as it's a recipe from my grandma, I thought it was the perfect choice for today.
I don't have the original anymore, it was from a german magazine my grandma use to read, but it's always a big hit wherever I take it.

So to a great year, hopefully to a few more, thanks for everyone who stopped by here *cheers*.

Lemon Yogurt Cream On Chocolate Sponge Cake


For the sponge cake
100gr Butter, at room temperature
100gr Sugar
1 Pack of Vanilla Sugar
1 Pinch of Salt
3 Eggs
150gr Flour
50gr of Ground Almonds
1 Teaspoon of Baking Powder
3 Tablespoon of Cocoa Powder
50ml Milk

For the cream
2 Lemons, organic
6 Gelatin Sheets (can be replaced with Agar-Agar)
150gr of Sugar
450gr of Yogurt, plain or greek
200gr of Heavy Cream, very cold

To decorate
2-3 Kiwis
Other fruits if you wish (strawberries, lemon...)

Preheat your oven to 170°C. Butter a round cake tin of about 24cm.

Start with the sponge cake. Mix the butter, the sugar, the vanilla sugar, the salt and the eggs. This has to be combined well, preferably with a hand or stand mixer, you have to add a lot of air to it so the sponge cake will be soft.
Sift the flour into it with the baking powder, than add the almonds and the cocoa, finish with the milk.
When well combined, pour into the buttered cake tin, and place in the oven for about 20 minutes, check with a knife, it should come out clean, but still a little moist, you don't want it to be too dry.
Leave it cool before releasing it from the tin.

Place the gelatin sheets in cold water for a few minutes. Zest both lemons, and press their juice into a small sauce pan. Place on a medium heat, so it bubbles a little, take it from the heat, add the gelatin sheets that you have taken out of the the cold water, and pressed in your hand to remove as much water as possible. Whisk and the gelatin sheets should dissolve easily in the lemon juice, set aside.
In a bowl, put the yogurt, the lemon zest and the sugar and start whisking together, when it has cooled down just a little, add the lemon juice with the gelatin, scrap the bottom of the sauce pan, not to leave any gelatin in it, and whisk again.
Using a mixer, beat your cold heavy cream until you have stiff peaks. Add it carefully to the yogurt mixture.

Place the sponge cake on the serving dish. Using a bottomless circle mould, or the circle of the cake tin you baked it in (if removable), place it around the sponge cake tightly. Pour in the yogurt cream and place carefully in the fridge, for at least 3 hours.
When it has taken, use a sharp knife to release the edges to remove the circle. Decorate with the fresh fruits of your choice.