21/11/2013
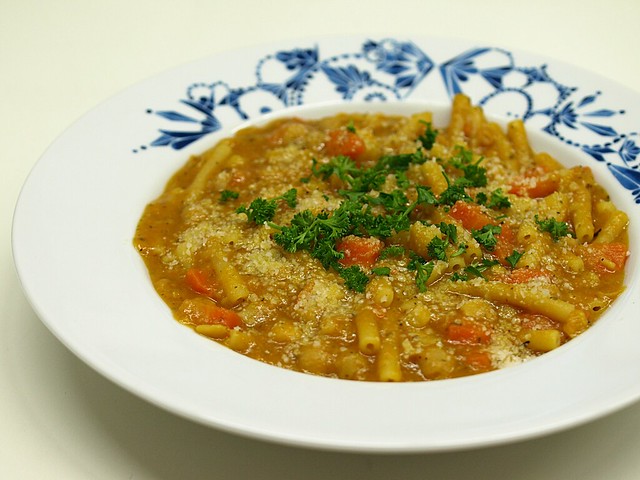
Pasta e Ceci, a hearty soup with chickpeas
Today I bought thermal underwear, got domestic heating fuel delivered, switch to my winter tires and we had the first snow of the season, can you all sense a theme here? Though it is not technically winter yet, it really does feel like it!
I've have been running around Europe a lot lately, which has been an absolut blast aswell as a tiring time, with very little time to blog. There will be a final trip next week, to Scotland (hence the thermal underwear) before enjoying the end of the year at home.
Though I'm over the board happy to finally go to Scotland, I'm slightly worried about the food. Their national dish, the Haggis, is served in a sheep's stomack, not to mentionned that they invented the "deep-fried Mars bar"... Uhmm, let's see how that will turn out, I'll keep you posted. On that subject I had a great fish and chip in London last week at the Blue Anchor, thanks to my friend Mieke for finding that one! ;)
Let's go back to cooking, tonight was all about feeling a bit warm, and this italian dish works amazingly well. It's a very hearty and thick soup with pastas and chickpeas, I used the recipe from the blog Tasca da Elvira, but did a vegetarian version of it. Like all good recipes, this one can be adapted to your taste, and warm you up from the inside out!
Pasta e Ceci
Serves 2
1 Onion
3 Cloves of Garlic
1 Carrot
1/4 of Celery Root
400gr of Chickpeas (I used canned ones)
1 Liter of Vegetable Broth
2 Tablespoons of Tomato Paste
2 Bay Leaves
100gr of Pasta (I used Macaroni)
Rosmarin and Thym
Salt and Pepper
Olive Oil
Fresh Parsley
Freshly Gratted Parmegiano
Diced the onion and garlic, heat up a big pan with some olive oil and add the onion and garlic. Stir for a couple of minutes until soft.
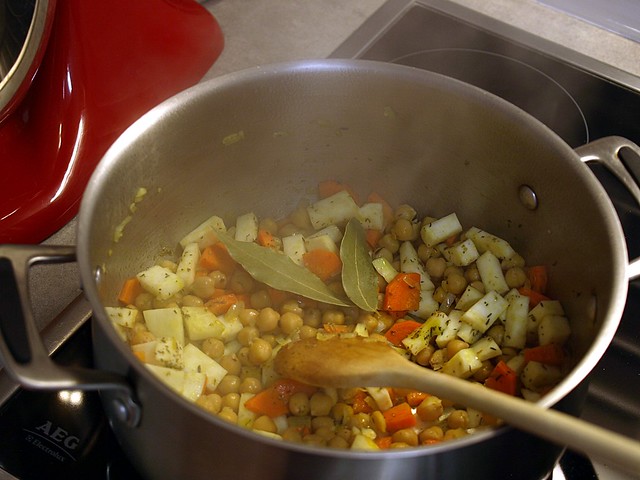
Clean, peel and dice the carrot and celery (you should have the same amount of both) and add them in the pan, keep stiring, at this point you can add the thym, rosmarin and the 2 bay leaves.
In an other pan, heat up the vegetable broth, while you wash the chickpeas thoroughly (again I used canned one, if you use fresh one you'll need to soak them overnight and cook them longer). Add the chickpeas to the big pan with the other vegetables and add half of the broth with the tomato paste, let it cook slowly for 30 minutes.
Take out about 2/3 of the vegetables and set them aside, using a plunging mixer, turn the rest into a creamy soup. Pour the vegetables back into the soup and add the pasta at this point.
Now, like with a risotto, you'll need to stir all the time, adding the broth as you go. The pasta should take a bit longer to cook than what's written on the box, but try and keep them a bit "al dente". Taste for seasoning, add salt and pepper if needed.
Serve immediatly with some fresh parsley and sprinkle some parmegiano on top, enjoy!
27/10/2013
Daring Baker - October 2013: Savory Pot Pies
Hannah of Rise and Shine was our October 2013 Daring Bakers’ hostess and she challenged us to bake our own double crusted savory pot pies. Using any from-scratch crust and filling we choose, we were allowed to get completely creative with our recipe, showing off the savory flavors and fillings from our own home or region.
Some food is really delicious, though not "pretty", which doesn't always make it the first choice when you have a food blog, unfortunatly I would said, because I love stews for instance, but you can't really make it look gorgeous, unless you're a professional, which I'm not.
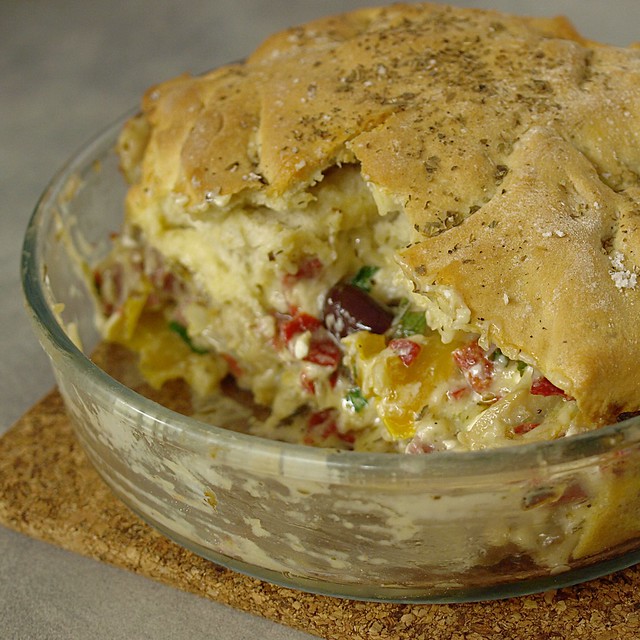
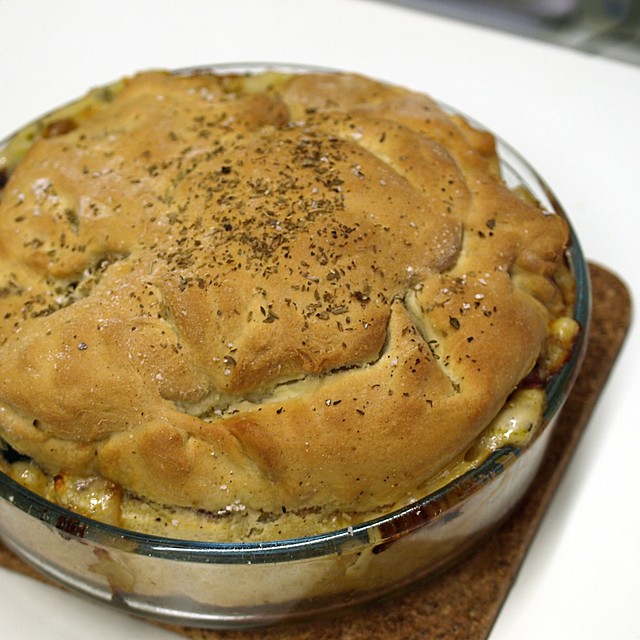
This pot pie, kind of belongs to that category, it was scrumptious, tasty, great to warm you up on a colder evening, but I couldn't make it look as good as it tasted. Nevertheless you should try this one, it has been a big hit around here.
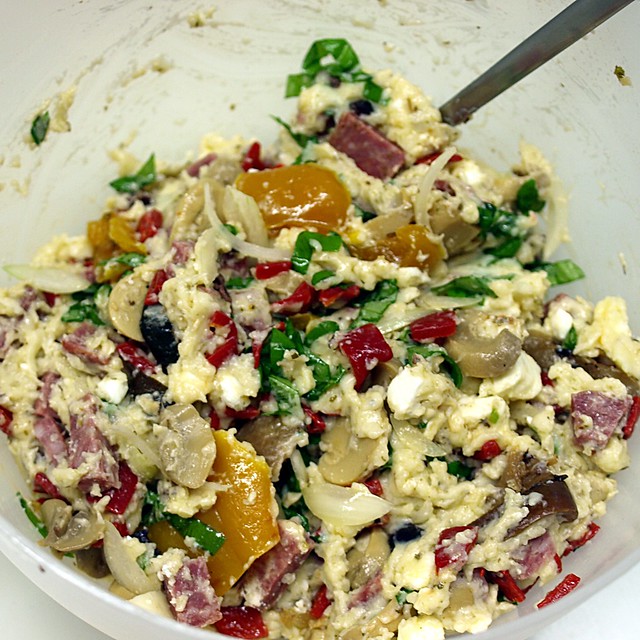
I but down the original recipe, mine was slighty adapted, I didn't have any chicken, but I used mushroom instead (in the quattro stagioni spirit) aswell as a bit of salami/pepperoni, just because I like it! Substituted the spinach with basil and provolone with gorgonzola. The dough got a bit too thin in some places and opened up during cooking, it was still delicious!
Mediterranean Pizza Pot Pie:
Servings: about 8 (one 10 inch (25 cm) pie)
Ingredients
Tender Pizza Pot Pie Crust:
2 tablespoons (30 ml) (¾ oz) (21 gm) active dry yeast
1 teaspoon (5 ml) (5 gm) sugar
3/4 cup (180 ml) warm water
1/2 teaspoon (3 gm) salt
1 tablespoon (15 ml) oil
1 1/2 cups (360 ml) (7 ½ oz) (210 gm) bread flour, plus more for dusting
Creamy Garlic Gravy:
3 tablespoons (45 ml) (1-2/3 oz) (45 ml) butter
3 tablespoons (45 ml) (1 oz) (26 gm) flour
1 cup (240 ml) milk (I use 2 percent)
1/4 teaspoon salt
1/4 teaspoon black pepper
4 garlic cloves, minced
1/2 cup (120 ml) (1½ oz) (45 gm) shredded Parmigiano-Reggiano cheese
Filling:
2 cups (500 ml) (280gm) (10 oz) cooked chicken, chopped
1 small onion, sliced into thin wedges
2 medium tomatoes, seeded and diced
1/2 cup (120 ml) (2 oz) (60 gm) shredded provolone cheese
1/2 cup (120 ml) (2 oz) (60 gm) crumbled feta cheese
1/2 cup (120 ml) (½ oz) (15 gm) tightly packed fresh spinach leaves, slivered
4 medium-large artichoke hearts, diced
1/3 cup (80 ml) (2 oz) (60 gm) kalamata olives, roughly chopped
1 teaspoon (5 ml) fresh oregano leaves
Pinch of salt, black pepper, dried oregano (for topping)
Directions:
1. Mix together yeast, sugar and warm water in a medium bowl. Let it rest several minutes until foamy.
2. Add salt, oil and up to 1 1/2 cups of bread flour, one half cup at a time, mixing with a wooden spoon until the dough picks up most of the flour and pulls together in a wad around the spoon. Turn the dough onto a lightly floured surface.
3. Sprinkle the dough with flour and knead for several minutes or until the dough is smooth and not sticking badly to clean hands as you knead (add sprinkles of flour as you knead until the stickiness subsides).
4. Place the dough in a lightly oiled bowl and cover with lightly greased plastic wrap. Place in the refrigerator overnight or prepare dough in the morning and leave it in the fridge until dinner. An hour before you start prepping the pizza, punch down the dough in the bowl. Leave it in the bowl to rest at room temperature for an hour.
5. Melt your butter over medium heat in a medium saucepan. Sprinkle flour over the butter and whisk together. Cook for a short minute as it bubbles, then pour in the milk. Whisk and bring it to boil, then stir in salt, pepper and garlic. Whisk until it’s as thick as honey, which should take about a minute. Remove from the heat and stir in cheese. Set aside while you prepare the components for your filling.
6. Preheat the oven to hot 220°C/425°F/gas mark 7.
7. Lightly grease a 10-inch (25-cm) cast iron skillet or similar sized baking dish. Roll out your pizza dough on a floured surface with flour sprinkled on the top of the dough, so it spreads six inches beyond the edges of your pan on all sides. You will need plenty of flour under the dough and on the top surface to keep it from sticking to itself and the counter. Lay the dough into your pan, without pulling it, so it fits into the pan with the extra dough hanging over the edges. Repair any holes that may have appeared.
8. In a large bowl, stir together the garlic sauce and filling, reserving the salt, pepper and dried oregano for the top of the crust. Pile all of the filling into your pan.
9. Wrap the dough up over the top of the filling. Seal tightly in the middle by pinching the dough together. Using kitchen scissors, snip away any large sections of excess dough. Sprinkle a bit of salt, pepper and dried oregano onto the top of the dough.
10. Bake for 30 to 35 minutes in the lower third of your oven, until the crust is golden brown. Serve immediately while warm.
17/10/2013
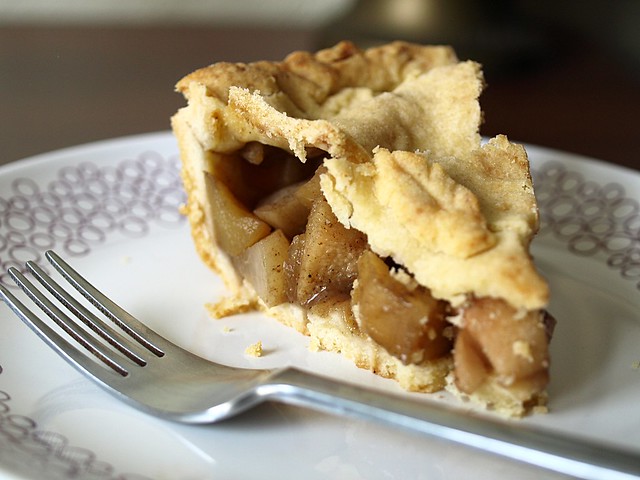
Swiss Apple Pie
They say "time flies when you're having fun", well apparently it also rushes by when you're really busy. I can't believe we're in October already, that I'm getting christmas toys catalogues in the mail and the annual letter for paying the rest of my taxes (yeah, it's all about the fun, isn't it). I feel like I'm talking like my grandma, complaining about the world spinning around way too fast.
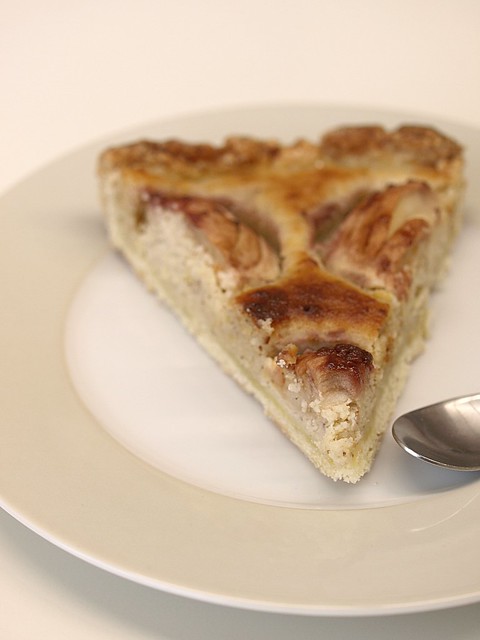
So let's dig into on of my grandma's book for the sunday family lunch, maybe it will help us slow down things a bit, or take us back in time. This is a swiss apple pie, original name: Zürcher Pfarrhaustorte (gesundheit!) for those of you who want to practise some swiss-german food vocabulary. The picture in the book looked good, the pie tasted even better, what else do we need. Let's go for a slice of old-fashioned apple pie.
Swiss Apple Pie (From Betti Bossi)
For a 27cm pie dish
for the crust
250gr Flour
25gr Sugar
1 Teaspoon of Salt
125gr Butter
1 Egg
2-3 Tablespoon Cream
for the filling
150gr Ground Almonds
2 Eggs
1 Teaspoon of Cinnamon
100gr Sugar
5-6 Apples
1 Lemon, juiced
2 Tablespoon of Jam (Raspberry)
Start with the pie crust: In bowl, mix the flour, the sugar and the salt. Cut the butter into little cubes and add to the bowl. Using your hand rub the butter into the flour mixture.
When well combined, add the egg and the cream. Using a wooden spoon try to make it into a dough without working it too much. Place in the fridge for 15 minutes.
Preheat the oven to 220°C.
Now we can work on the filling: in a large bowl, pour the ground almonds, the egg yolks (save the whites for after), the cinnamon and the sugar and combine.
Take 1 of the apple, peal it and using a cheese grater, grate it into the almonds mixture with the lemon juice.
Beat the 2 egg whites to a soft peak and add gently to the rest of the mixture.
Take you pie dough out of the fridge and roll it out to fit your pan. With a spoon, make a layer of your almond mixture on top of the pie crust.
Now clean, peal, cut in half and core your apples. Before placing them on top of the almond mixture, slice the top carefully (not all the way thru, see picture).
Heat up the jam for a couple of minutes, than brush the apples with the jam. Place it in the oven for about 35minutes.
This can made a day in advance and you can sprinkle some icing sugar on top before serving it.
27/09/2013
Daring Baker - September 2013: Pastel de Tres Leches
Inma of la Galletika was our Sept. 2013 Daring Bakers’ hostess and WOW did she bring us something decadent and delicious! Pastel de Tres Leches or Three Milk Cake, creamy yet airy, super moist but not soggy.. just plain delish!
Another baking travel thanks to the daring baker, this time to south America, with the Pastel de Tres Leches. I never heard of it and at first I thought it might have something to do with the dolce de leches.
The sponge cake recipe is great, and will be used again, as many I was worried the cake might be soggy but it turned out great (ok, I admit I didn't use the whole syrup, because it seemed an awfull lot).
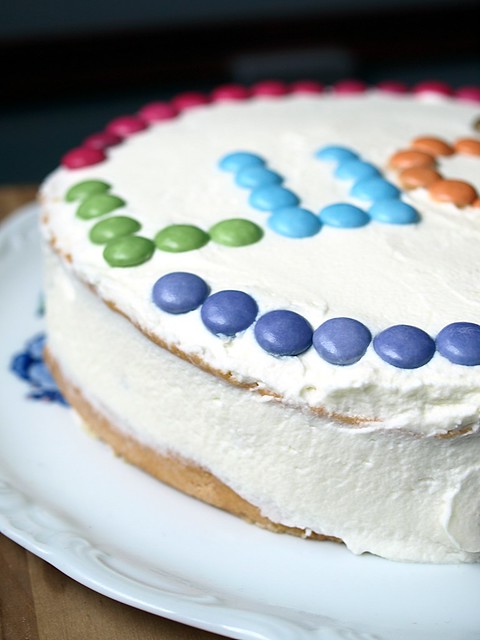
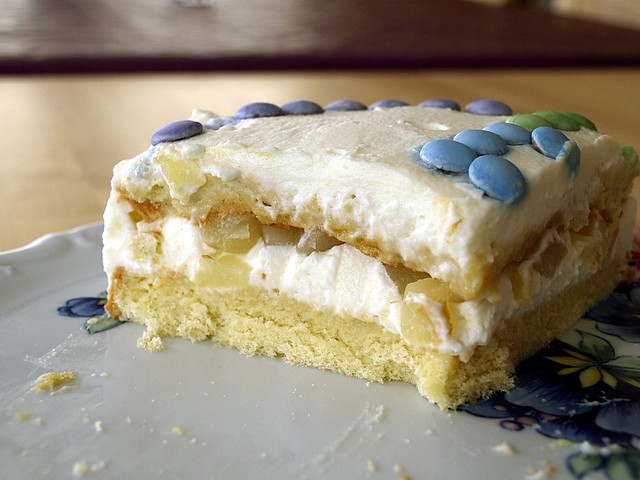
I matched this cake with my smallest niece's birthday, hence the colored chocolate chips decoration, and I choose to go with pears in the filling. It's nice and fresh with the whipped cream and is always a good match with chocolate.
Classic Three Milks Cake
Servings: 12
Ingredients for the vanilla sponge cake
5 large eggs (separated)
½ cup (120 ml) (4 oz) (125 gm) sugar
2 teaspoons (10 ml) of vanilla extract
1 cup (240 ml) (5 oz) (140gm) all-purpose (plain) flour (sifted)
For three milks syrup
1 can (14 oz) (400 gm) sweetened condensed milk
1 can (12 oz) (340 gm) evaporated milk
1 cup (240 ml) heavy cream (about 35% fat) or 1 cup of half & half or 1 cup milk
1 cinnamon stick
2 teaspoons (10 ml) rum (or other flavoring)
Topping and filling
2 cups (500 ml) of whipping cream (about 30% fat)
½ cup (120 ml) (4 oz) (125 gm) sugar
Canned or fresh fruit (to fill and decorate the cake)
Directions For the Sponge Cake:
- Preheat oven to moderate 180°C/350°F/gas mark 4. Prepare a square 9”x9” (23cmx23 cm) pan or 9” (23 cm) round cake pan
- Separate the egg whites from the yolks.
- Beat the egg whites on medium speed, 3 - 5 minutes.
- When soft peaks form slowly add the sugar in small batches.
- Whip until stiff peaks form about 5 minutes. Set aside.
- In a medium bowl beat egg yolks at medium-high speed for about 5 to 6 minutes, or until the egg yolks become pale colored, creamy and puffy. Stir in vanilla.
- Pour the egg yolks over the egg whites, gently fold until just combined trying not to lose any volume from the mixture.
- Fold in the flour little by little in the form of rain. Mix until just combined (over-beating will result in a denser, flatter cake).
- Pour the batter into the prepared 9”x9” (23cmx23 cm) square cake pan or 9” (23 cm) round cake pan.
- Bake in the preheated moderate oven for 25 minutes or until the toothpick comes out clean
- Let it cool
- Once cool, split the cake in half, flip the top of the cake and place it on a base. Poke using a fork holes all over the cake to better absorb the three milk soaking liquid.
- In a saucepan add the sweetened condensed milk, evaporated milk, heavy cream and cinnamon stick, bring to a boil, reduce the heat and continue boiling for 5 minutes. Remove it and let it cool.
- Once it is cool, add the rum or any other flavoring you are using
- Gradually brush all the milk soaking liquid into all sides of the cake (including the cut surfaces) until all absorbed. Best to rest the cake in the fridge overnight to complete the soaking process.
- Layer some whipped cream on the bottom layer and cover with canned or fresh fruit and decorate the top layer with whipped cream and the fresh or canned fruit.
19/09/2013
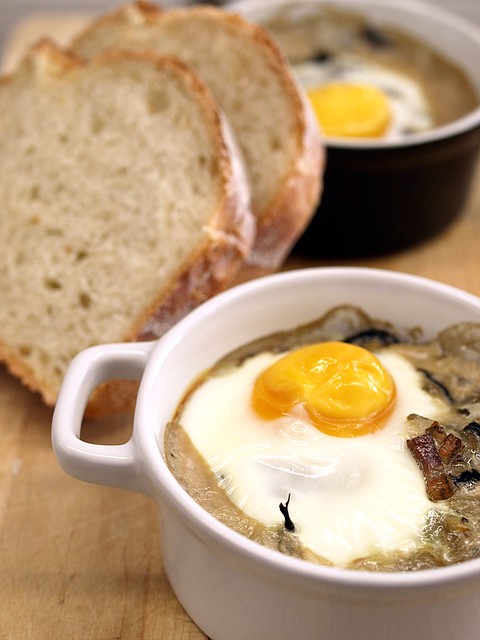
Cocotte Egg with Mushroom
So let's check: 3 layers of clothes, a big blanket on the bed, temperatures below 10°C at night, yeap, it looks like autumn is coming in early this year. Not that I mind, it's one of my favorit time of the year, but it always takes some adjustement, because I'm a girl and I'm almost always cold, so bring on the big socks, polar jacket and blankets to watch TV.
Because of the (too) many concerts booked, the travels that are planned and some upcoming expenses I know I will have until the the end of the year, I'm mostly cooking out of my pantry these days. Which, once again, proves that it is important to have a well stocked pantry.
This simple recipe is done under 30 minutes (even if you are slow like me) and fits perfectly these early autumn days, for a decent budget.
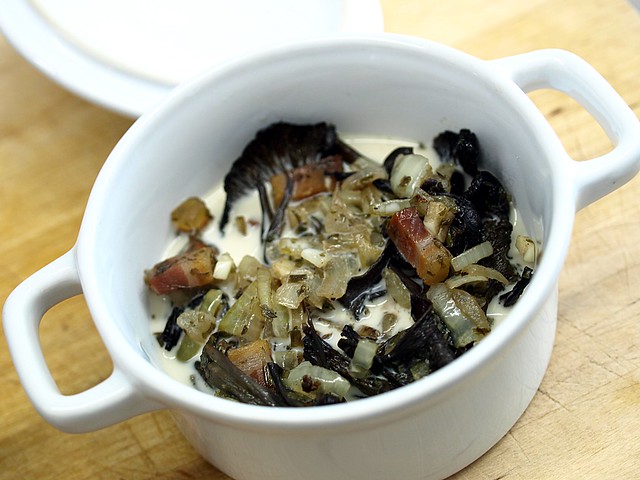
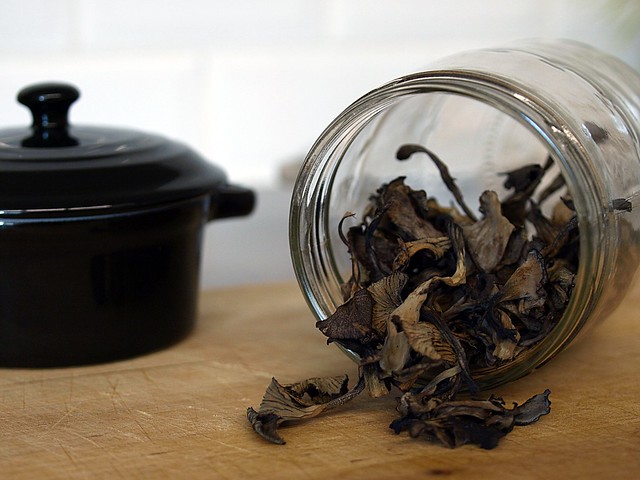
The mushroom are still from last year's hunting, dried up and stored properly, you can keep them easily. Onions and garlic have to be in every house, I used dried up parsley (obviously fresh would be better, but as said, I'm cooking out of the pantry), a small piece of speck leftover, some cream or soja cream and you're good to go. Enjoy your autumn!
Cocotte Egg with Mushroom
for 2 Cocottes
1 Handfull of dried up Mushrooms (I used trumpets of death)
1 Onion
1 Clove of Garlic
1 Tablespoon of Parsley (dried)
10cl of Cream
50gr of Speck
2 Eggs
Olive Oil
Salt, Pepper
Preheat the oven to 180°C.
Put the dried up mushroom in some hot water and let them sit there for about 15 minutes. In the meantime, peel and dice the onion aswell as the garlic clove.
In a non sticky frying pan, heat up some olive oil and add the onions with a bit of salt and cook them for about 5 minutes. Add the dried up parsley, the garlic and the diced speck, lower the heat.
Drain the mushroom (but keep some of the water aside) and add them to the onion and garlic mixture.
Pour the water you kept in the sauce pan and reduce it on a high heat, when there is about 3 or 4 spoonfull left, add those spoonfull to the cream, it will add a nice mushroom flavor to it, add a bit of pepper.
In your cocotte, place the mushroom, onion and garlic mixture first, than poor over the cream/mushroom sauce on it and top it with a raw egg. Place in the oven for 12 to 15 minutes, depending how you like your yolk to be.
Serve with some toasted bread if you want, but if you have a nice fresh loaf of good bread no need to toast it first.
12/09/2013
One track mind: Patty Melts
Not that I particularly believe in astrology, at least when it says something bad is going to happen to me, but I often "blame" my quirkiest behaviour on the fact that I am a cancer (ascendant cancer, because I never do things by half) and I really think we are the most adorable weirdos in the whole zodiac!
I believe we are very constant in our affections, once we love something or someone, it's there to stay (unless they run away -fearing the crazy- obviously). This works for TV shows, clothes, leisures... or music and bands for instance, because seeing the same band 15 times in 6 months is borderline insane (and I'm not even exagerating for dramatical purpose, this is really happening).
Food is no different, I love trying new things, experiencing ingredients, new spices...etc. But some recipes will just always do, no matter how many time you ate them. My mum's lamb is one of those for instance or anything including good dark chocolate.
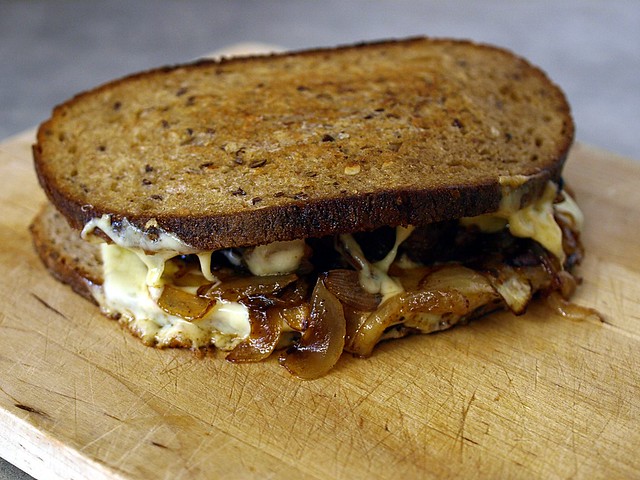
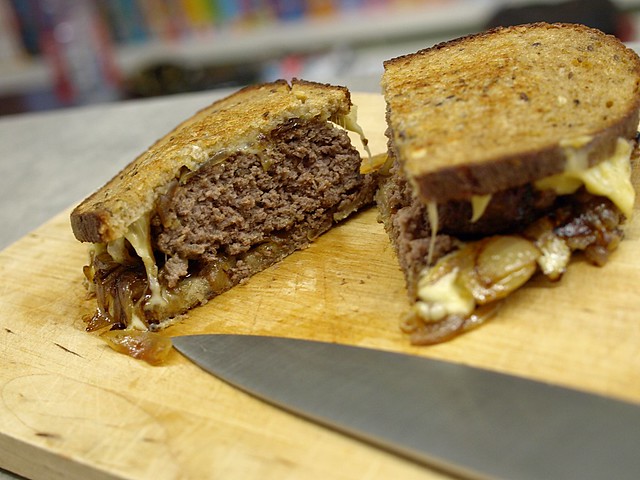
My latest craving is the patty melt. I love a good burger, but I often don't plan soon enough to make the buns, so when I read about this recipe using rye bread on David Lebovitz's page, I knew I had to try it out. This was about a month ago, ever since I kept trying this in so many different ways: with different cheese or bread, vegetarian, with sausages... and I liked them all.
Here's the more classic version of the recipe, with a lot of butter. I have to say that it's nice, every once in a while, to cook with butter, I'm an olive oil kinda of girl, but this is just the way to go for this recipe. Don't bother to make fries with that one, it's rich enough, even a salad seems too much to add to this lovely rich burger. I would just advice to go for a walk afterwards!
Patty Melt (from the Pioneer Woman)
Serves 1
2 Slices of Rye Bread
2-3 Small Onions
150-200gr of Ground Beef
2 Slices of Cheese (I used Gouda)
Butter (about 75gr)
Salt, Pepper
Worchester Sauce
Peel and cut the onions in half moons, put a bit of butter in a non-sticky frying pan and add the onions. Add salt and pepper and cook on a medium heat for about 15 minutes, stiring often so it doesn't attach, they should be soft and golden.
Season you ground beef with salt, pepper and some worchester sauce, form a patty that is bout the size of the slice of bread you are using.
In a non-sticky frying pan, heat up some butter and cook your patty the way you like it.
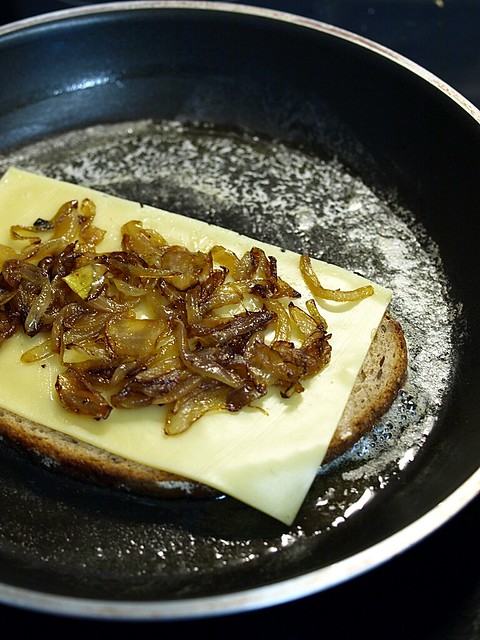
In an other pan, heat up some butter and place one slice of bread in it and top it with one slice of cheese. When the cheese starts to melt a little, add half the onions on the cheese, place your burger on top and add the remaining onions. Now place the second slice of cheese on the onions, aswell as the second slice of bread on top of all that.
Press down a little on your burger, than carefull flip in to color the other slice of bread to a nice golden brown.
Slice in half and enjoy!
27/08/2013
Daring Baker - August 2013: A Cake and Two Cookies
Aparna of My Diverse Kitchen was our August 2013 Daring Bakers’ hostess and she challenged us to make some amazing regional Indian desserts. The Mawa Cake, the Bolinhas de Coco cookies and the Masala cookies – beautifully spiced and delicious!

This month's Daring Baker challenge is making me travel to India. A country I don't know much about, except it's touristic clichés, Rajesh Koothrappali, and whose cooking is more famous for it's spicy savory recipes, but I had no idea what's in store for the sweet tooth in India.
I choose to make the mawa cake aswell as the bolinhas de coco, for I love coconuts and also I couldn't get a hold on curry leaves that where necessary for the masala cookies. Plus the name clearly stated it's portuguese history, and that's always a plus in my book!
Making the mawa was a whole new experience, it almost felt like making some kind of cheese, and in the end it gives the cake a nice moist texture. The use of cardamom in both recipe gives them an exotic touch, it's a spicy that I love, but don't get to use it so often.
MAWA CAKE (Cardamom Flavoured Milk Cake):
Servings: Serves 8 to 10
Ingredients
For the Mawa:
1 litre (4 cups) full fat milk
For the cake:
1/2 cup (1 stick) (120 ml) (4 oz) (115 gm) unsalted Butter (soft at room temperature)
3/4 cup (180 ml) packed crumbled mawa
1-1/4 cups (300 ml) (10 oz) (280 gm) castor sugar
3 large eggs
5 to 6 cardamom pods, powdered, (about 1-1/2 tsp powdered cardamom)
2 cups (500ml) (9 oz) (260 gm) cake flour
1 teaspoon (5 ml) (5 gm) baking powder
1/4 teaspoon salt
1/2 cup (120 ml) milk
1 teaspoon (5ml) vanilla extract (optional)
Cashewnuts (or blanched almonds) to decorate (about 18 to 20)
Directions:
1. First make the “Mawa”. Pour the milk into a heavy bottomed saucepan, preferably a non-stick one. Bring the milk to a boil, stirring it on and off, making sure it doesn’t stick to the bottom.
Turn down the heat to medium and keep cooking the milk until reduces to about a quarter of its original volume. This should take about an hour to an hour and a half.
2. The important thing during this process is to watch the milk and stir it frequently to make sure it doesn’t stick to the sides or bottom of the pan and get burnt. The danger of this happening increases as the milk reduces and gets thicker.
3. Once the milk it has reduced to about one fourth, 1/4 quantity, lower the heat to low and let cook for a little while longer. Keep stirring regularly, until the milk solids (mawa) take on a lumpy appearance. There should be no visible liquid left in the pan, but the mawa should be moist and not stick to the sides of the pan.
4. Remove the pan from heat and transfer the mawa to a bowl and let it cool completely. Then cover and refrigerate it for a day or two (not more) till you’re ready to make the cake. It will harden in the fridge so let it come to room temperature before using it.
You should get about 3/4 to 1 cup of mawa from 1 litre (4 cups) of full-fat milk.
5. Now start preparations for the cake by pre-heating your oven to moderate 180°C/350°F/gas mark 4. Beat the butter, the crumbled mawa and the sugar in a largish bowl, using a hand held electric beater, on high speed until soft and fluffy.
6. Add the eggs, one at a time, and beat on medium speed till well incorporated. Add the vanilla and milk and beat till mixed well.
7. Sift the cake flour, baking powder, cardamom, and salt onto the batter and beat at medium speed and well blended. If you cannot find cake flour, place 2 tablespoon of cornstarch in the bottom of your 1-cup measure and then fill it with all-purpose (plain) flour to make up to 1 cup.
8. Grease and line only the bottom of an 8 inch (20 cm) spring form pan. Pour the batter into this and lightly smooth the top. Place the cashew nuts (or blanched almonds) on top of the batter randomly. Do not press the nuts down into the batter. A Mawa Cake always has a rustic finished look rather than a decorated look.
9. Bake in a preheated moderate oven for about 1 hour until the cake is a golden brown and a skewer pushed into the centre comes out clean. Do not over bake the cake or it will dry out. If the cake seems to be browning too quickly, cover it will aluminium foil hallway through the baking time.
10. Remove from oven and allow it to cool for 10 min in the tin. Release the cake, peel off the parchment from the base and let it cool completely.
BOLINHAS DE COCO (Cardamom Flavored Coconut Biscuits/ Cookies):
Servings: Makes about 4 dozen cookies
Ingredients:
2 cups (500 ml) (5-1/3 oz) (150 gm) fresh grated coconut, packed
1-1/2 cups (360 ml) (9 oz) (250 gm) semolina
1-1/4 cups (300 ml) (8-3/4 oz) (250 gm) granulated sugar
3/4 cup water (180ml) (6 oz) (175 gm) water
A pinch of salt
2 tablespoons (30 ml) (1 oz) (30 gm) ghee (clarified butter) or melted unsalted butter
2 large eggs
8 to 10 pods cardamom, powdered (about 1-1/2 teaspoon)
Directions:
1. Run the grated coconut in your processor or the small jar of your blender a couple of times so that the flakes are smaller and uniform in texture. Do not grind into a paste. Keep aside.
2. Put the semolina in a pan and toast/ roast it, over low to medium heat, until it starts giving off an aroma, and looks like it’s about to start changing colour. This should take a couple of minutes. Do not brown. Transfer the semolina into a bowl and keep aside.
3. In the same pan, pour the water and add the sugar to it. Place it on medium heat and keep stirring until the sugar dissolves completely. Once the sugar has dissolved, keep stirring the solution and let it cook for about 2 minutes. Turn off the heat. The sugar solution should just begin to start forming a syrup but is still watery. Do not cook until it forms a thick syrup.
4. Add the toasted/ roasted semolina and mix well. Then add the coconut, salt and ghee (or melted butter) and mix well. Put the pan back on the stove, and over medium heat stir the coconut mixture until it is really hot and easily forms a thick clump. This should take about 2 to 3 minutes.
5. Take the pan off the heat and let the semolina coconut mixture cool to room temperature. Transfer this into a bowl or container, cover and refrigerate for at least 8 hours, ideally overnight. For really fluffy biscuits/ cookies, the overnight rest is recommended.
6. The next day, take the dough out of the fridge and let it come to room temperature. Separate the yolks from the egg whites. Lightly beat the yolks with a fork to break them and add to the dough. Also add the powdered cardamom and mix well with a wooden spoon or fork.
7. Whisk the egg whites by hand until frothy and add to the dough. Mix well till incorporated.
8. You will now have a slightly moist and sticky dough. Refrigerate this dough for about half an hour so it firms up a bit.
9. Pre-heat your oven to moderate 180°C/350°F/gas mark 4. Line your baking trays with parchment or grease them well with some ghee or melted butter.
10. Take the dough out and pinch off walnut sized bits of dough. The dough should be firm enough to handle without difficulty. If the dough is sticking to your palms, lightly dust your palms with flour before shaping the dough. Roll the bits of dough into balls and then flatten them very slightly.
11. Decorate the top by marking criss-crosses (3 equidistant lines one way and another 3 crossing them at right angles), with a table knife. Press down a bit but not too deep or right through the biscuit/ cookie. Use up all the dough this way.
12. Place the shaped dough on the baking trays leaving a little space between them. Bake in a preheated moderate oven for about 20 to 25 minutes until they’re a golden brown and done. Let them cool on the sheets for about 5 minutes and then transfer to racks to cool completely.
13. Store the biscuits/ cookies in airtight containers. This recipe makes about 4 dozen Bolinhas de Coco.
25/08/2013
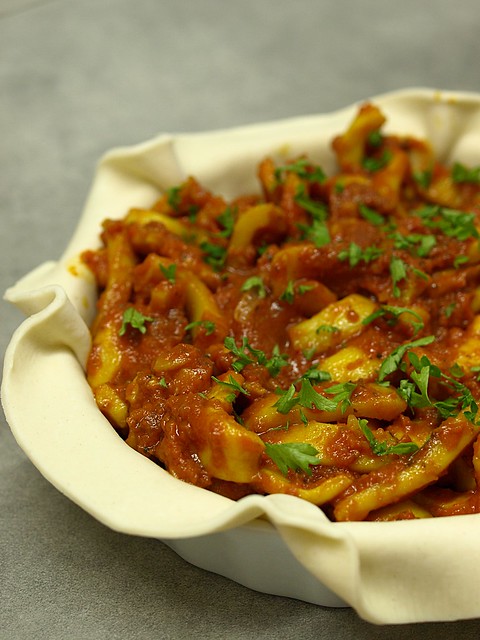
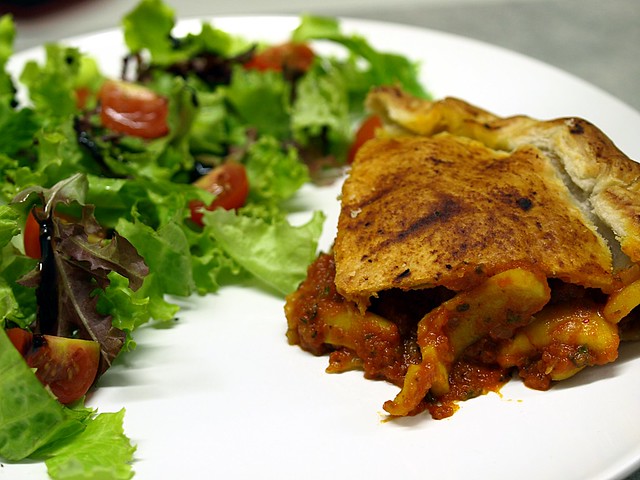
Squid Fish Pie or "Tielle à la Sétoise"
I know, it's only the end of August, but somehow it feels like the end of summer, maybe because vacations are coming to an end for most people, that kids are getting their school bag ready for the beginning of classes, or maybe just because the weather isn't quite playing along anymore.
This is a time of year I always enjoyed, I was one of those
But slowly walking towards autumn, it is nice to take something with us from this time of year we all enjoy and wait for. It could be the memory of a clear blue sky, the quiet we felt resting in the middle of the afternoon with a good book, the pride of walking your way up a mountain (a very small one in my case) or just the taste of a dish that feels like holidays.
Every year I come back with a dish (or two) that really feels like summer to me, and everytime I make it again, it won't fail to remind me of the holidays that are linked to it. So even on a gray day, I can bring back some sunny days I've experienced during the time away.
This year dish includes squids, which I love and have loved ever since I was a kid (there is a picture of a six year old me shovelling in "fristo misto di mare" during a vacation in Italy to prove it), there something about this chewy consistency that works for me.
Nothing fancy of complicated in this dish, just buy some good ingredients, and take your time to cook the filling, because with squids, whether you cook them very quickly or for a long time, everything in between just won't work.
Tielle à la Sétoise (from "Cuisine du Sud")
Serves 2
400gr Puff Pastry
500gr Squid Fish (or Octopus)
1 Onion
1 Clove of Garlic
300gr of Tomato Sauce
2 Stigmas of Saffron
Olive Oil
Thym, Oregano, Marjoran...
Piment d'Espelette
Salt, Pepper
Parsley
Peel and cut the onion. In a big pain heat up some olive oil and add the onion, cook until soften. Add the squid fish cut into rings and cook for at least 10 minutes, add salt and pepper.
Add the crushed clove of garlic, the piment d'espelette, thym, oregano and marjoran (to your taste). Pour the tomato sauce and add the safran, cook until the sauce thickens and leave to cool down.
Roll out the puff pastry, and cut out two circle, one the size of your dish (in this case 20cm) and one a bit bigger.
Preheat the oven to 180°C. Place the bigger circle of puff pastry in your oiled pie dish, pour in the squid tomato filling and add a bit of freshly chopped parsley.
Place the second circle of puff pastry on top and seal the two circles together using your fingers.
With a brush, use a bit of the remaining tomato sauce from the filling to brush the top of the pie. Place it in the oven and cook for 35 minutes. Serve with a salad.
06/08/2013
A Taste of Holidays: Cannelloni al Pesto
As someone use to sing "All good things come to an end" and so it happens to the holidays too. I know we wouldn't appreciate them as much if we'd be on holidays all the time, but it takes a certain kick in the behind to go back to work after enjoying a couple weeks of rest.
No clock to watch, no appointment to get to, just living on your own rythm, following the sun and your mood, does make your life feel smoother and peacefull.
Hopefully we all keep something from that inner peace and quiet that lives with us during that time, and take it with us to our daily lives. Obviously I need to watch the time again and follow my schedule, but beside that trying not to multi-task all the time, enjoying some time to just do nothing or do what I want instead of what I'm supposed to, is something I will try to apply to my daily life.
Holidays also mean time to cook, not that I don't take time the rest of the year (I have a food blog afterall!!), but cooking in a different place, not having to be finished at a certain time, always makes it a bit different.
Last month's daring kitchen challenge made us choose from the archive, and this recipe from the daring cook section immediatly sounded appealing: Cannelloni al Pesto! Without my pasta machine, it took a bit of work with the rolling pin, and even if it didn't end up as thin as with the machine, the cannelloni were lovely and tasted like holidays!
Cannelloni al Pesto
EGG PASTA
Ingredients (to make enough cannelloni for 4 persons):
100 grams (2/3 cup plus 2 teaspoons) (170 ml) (3½ oz) plain (all-purpose) flour
1 large egg
Directions: 1. Put the flour and eggs in a food processor and mix. When the dough looks like crumbs, pour it onto the bench top sprinkled with a little flour. Knead well by hand until you obtain a smooth dough. Make it into a ball, wrap it in cling wrap and let it rest for 10-15 minutes.
2. Now you are ready to make your egg pasta. Cut out a piece of egg pasta dough and flatten it into a rectangular shape with your hands. Put a little flour on it and begin passing it though the pasta machine. Turn the dial to the widest setting (#1) and, starting with one of the shorter sides of the rectangle, feed it through the rollers. Now fold one side of the piece of dough into the middle, then fold the other side over that to form 3 layers. Starting with one of the narrower sides of the folded dough, feed the pasta through the machine, again at the widest setting. Repeat the folding and rolling technique on the widest setting for at least a couple of times.
3. Now you can start rolling it thinner, by turning the dial to the next narrowest setting (# 2). Roll the pasta through the machine without folding the dough between settings. Keep reducing the settings until #7 (it is the second last on my machine – about 1 mm thick). If the sheet of pasta gets too long, you can cut it in half with a knife. To make cannelloni, cut out rectangular pasta sheets (10x15 cm) (4”x6”).
BÉCHAMEL SAUCE
Ingredients (enough to make cannelloni for 4 people):
2 cups (500 ml) milk, hot
3½ tablespoons (52½ ml) (50 gm) (1¾ oz) butter
1/3 cup (80 ml) (50 gm) (1¾ oz) all-purpose (plain) flour
1 pinch salt
1 pinch nutmeg
Directions: 1. Put the butter in a non-stick pot and let it melt. Add the flour and whisk constantly until well incorporated: this is the “roux”. Let it cook for a minute or two.
2. Now start adding hot milk little by little, while mixing continuously until the milk is well incorporated. Do not add more milk unless it is well incorporated. Keep doing so until all the milk is incorporated.
3. Add salt and nutmeg and cook it on a low flame for 10 minutes or until it thickens.
4. When ready, cover it to prevent a film to appear on the surface.
CANNELLONI AL PESTO
Ingredients (serves 4)
Cannelloni sheets per recipe above (you should have about 8 sheets)
For pesto (makes about 190 gms/ 1cup)
2 cups (480 ml) (80 gm) (2¾ oz) basil, washed
¼ cup (60 ml) (15 gm) (½ oz) parsley, washed
1 small clove garlic
3 tablespoons (45 ml) (25 gm) (¾ oz) Pecorino Romano, finely grated
1 tablespoons (15 ml) (10 gm) (¼ oz) Parmigiano Reggiano, finely grated
4 to 5 tablespoons (45 to 60 ml) extra virgin olive oil
½ tablespoon (12½ ml) (5 gm) pine nuts
Salt to taste
For the filling
2 cups (480 ml) (500 gm) (18 oz) ricotta
¾ cup (180 ml) (150 gm) (5⅓oz) pesto (from the above recipe)
1½ cups (360 ml) (85 gm/3 oz) Parmigiano Reggiano, finely grated
1 pinch nutmeg
Salt and pepper to taste
1 small potato, boiled and sliced
8 green beans, boiled
To assemble
2 cups (500 ml) béchamel sauce
¼ cup (60 ml) (40 gm) (1½ oz) of pesto (from the above recipe)
½ cup (120 ml) (35 gm/1 oz) Parmigiano Reggiano, finely grated
Directions: 1. Start by making pesto. Simply blend the garlic, pine nuts, salt, basil, parsley and half the extra virgin olive oil together (I use a hand blender to do this) until obtaining a fine paste. Transfer to a bowl, add the grated cheeses and the remaining extra virgin olive oil and mix well. Adjust salt to taste and cover it with a thin layer of extra virgin olive oil to prevent oxidation. Keep it aside.
2. To make the filling, mix the ricotta, ¾ cup (150 gm) of pesto, 1½ cups (85 gm/3 oz) of Parmigiano Reggiano, nutmeg, salt and pepper together until well combined. Refrigerate until ready to use.
3. Mix the béchamel sauce with the remaining pesto.
4. Put a large pot with salty water on the fire and bring to a boil. Cook the pasta sheets in it for 1 minute. Do this in batches (I use a shallow but large pot and I cook them in 1 layer, so I am sure they do not stick together). Remove them with a slotted spoon and put them on a clean tea towel to cool down.
5. Now take one sheet of cooked pasta and put 1/8 of the filling along the long side of the rectangle. Put 1 boiled green bean and 1 or 2 slices of boiled potatoes on top and roll the pasta over to make a cannellone. Do so for the remaining rectangles of pasta.
6. Take a big enough oven dish to fit all your cannelloni tightly. Spray the oven dish with some cooking oil (or melted butter) and pour some béchamel and pesto sauce on the bottom. Spread it well, especially in the corners. Put the cannelloni in the oven dish on 1 layer.
7. Cover the cannelloni with the béchamel and pesto sauce and sprinkle with the remaining ½ cup (120 ml) (35 gm/1 oz) of Parmigiano Reggiano.
8. Bake them in a pre-heated moderate oven 350°F/180°C/gas mark 4 for 20 minutes, then broil (grill) them at 400°F/200°C for another 5 minutes.
9. Serve immediately.
27/07/2013
Daring Baker - July 2013: Eenie Meenie Miney Moe! Mezze it is!
In a "celebration" of past Daring Baker and Daring Cook challenges, Lisa challenged all of us to search through the Daring Kitchen archives and pick any one we'd like! The REAL challenge was picking which delicious recipe(s) to try!
So this month, it was all about choosing, and as we could pick from the daring cook archives aswell, I thought I'd give this a try. I've actually made quite a few recipe from both the daring baker and cook, you'll get to see a few post around here I guess, the previous chocolate cake was one of them for instance.
Right now, I'm on holidays (yes, I know, lucky me), so to fit the weather and the mood of this time of year, I picked the february 2010 daring cook challenge "Mezze", the middle eastern version of the spanish tapas.
Under some scorching hot sun, eating something cold, or even fresh, seems like a wise choice. And even on holidays, nothing feels more therapeutic than making bread, any kind of bread. I've made Pita Bread before, but from a different recipe.
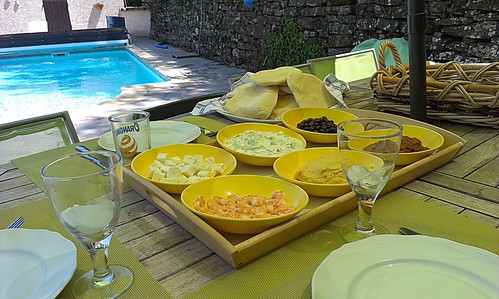
To go with the lovely pita breads, some hummus, cucumber raita, some eggplant parmeggiano leftover, feta cheese, olives, schrimps... Anything you fancy really, that's the fun of this kind of recipe, and also a great way to use what's left in your fridge.
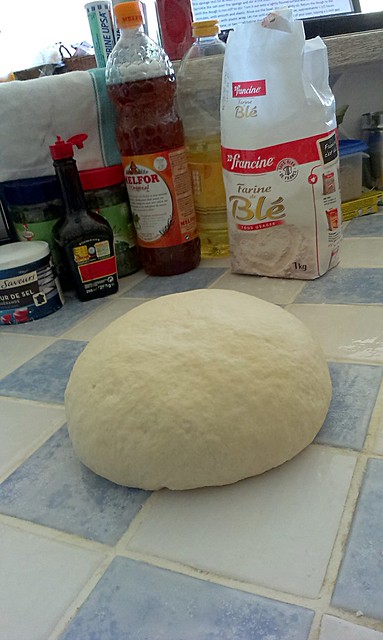
This is a bit of a "low-fi" recipe, because I have my camera with me, BUT I forgot the cable to transfert my pictures to my computer, so in order to post on time, I decided to take picture with my cell phone instead, aahhh the joy of technology!
Mezze
Pita Bread (Recipe adapted from Flatbreads & Flavors by Jeffrey Alford and Naomi Duguid)
makes about 16 breads
2 teaspoons regular dry yeast (.43 ounces/12.1 grams)
2.5 cups lukewarm water (21 ounces/591 grams)
5-6 cups all-purpose flour (may use a combination of 50% whole wheat and 50% all-purpose, or a combination of alternative flours for gluten free pita) (17.5 -21 ounces/497-596 grams)
1 tablespoon table salt (.50 ounces/15 grams)
2 tablespoons olive oil (.95 ounces/29 ml)
- In a large bread bowl, sprinkle the yeast over the warm water. Stir to dissolve. Stir in 3 cups flour, a cup at a time, and then stir 100 times, about 1 minute, in the same direction to activate the gluten. Let this sponge rest for at least 10 minutes, or as long as 2 hours.
- Sprinkle the salt over the sponge and stir in the olive oil. Mix well. Add more flour, a cup at a time, until the dough is too stiff to stir. Turn it out onto a lightly floured surface and knead for 8 to 10 minutes, until smooth and elastic. Rinse out the bowl, dry, and lightly oil. Return the dough to the bowl and cover with plastic wrap. Let rise until at least doubled in size, approximately 1 1/2 hours.
- Place a pizza stone, or two small baking sheets, on the bottom rack of your oven, leaving a 1-inch gap all around between the stone or sheets and the oven walls to allow heat to circulate. Preheat the oven to 450F (230C).
- Gently punch down the dough. Divide the dough in half, and then set half aside, covered, while you work with the rest. Divide the other half into 8 equal pieces and flatten each piece with lightly floured hands. Roll out each piece to a circle 8 to 9 inches in diameter and less than 1/4 inch thick. Keep the rolled-out breads covered until ready to bake, but do not stack.
- Place 2 breads, or more if your oven is large enough, on the stone or baking sheets, and bake for 2 to 3 minutes, or until each bread has gone into a full balloon. If for some reason your bread doesn't puff up, don't worry it should still taste delicious. Wrap the baked breads together in a large kitchen towel to keep them warm and soft while you bake the remaining rolled-out breads. Then repeat with the rest of the dough.
1.5 cups dried chickpeas, soaked in cold water overnight (or substitute well drained canned chickpeas and omit the cooking) (10 ounces/301 grams)
2-2.5 lemons, juiced (3 ounces/89ml)
2-3 garlic cloves, peeled and crushed
a big pinch of salt
4 tablespoons tahini (sesame paste) OR use peanut butter or any other nut butter—feel free to experiment) (1.5 ounces/45 grams)
additional flavorings (optional) I would use about 1/3 cup or a few ounces to start, and add more to taste
- Drain and boil the soaked chickpeas in fresh water for about 1 ½ hours, or until tender. Drain, but reserve the cooking liquid.
- Puree the beans in a food processor (or you can use a potato masher) adding the cooking water as needed until you have a smooth paste.
- Add the rest of the ingredients and mix well. Adjust the seasonings to taste.
1 medium cucumber, peeled and most of the seeds removed
1 teaspoon cumin seeds (.1 ounce/3 grams) OR use a small pinch of dried cumin—to taste
2 cups plain whole milk or Greek yogurt (17 ounces/473ml)
1 garlic clove, peeled and minced
fresh coriander or mint, chopped, a couple pinches or more to taste
cayenne pepper or paprika, just a pinch to use as a garnish (optional)
- Peel cucumber, de-seed, and dice. Blot off moisture with paper towels.
- Toast cumin seeds for a few seconds in a small, heavy frying pan over high heat.
- In a bowl, stir yogurt until it is smooth.
- Mix it with the cumin, garlic and coriander or mint leaves (I used some grated radish instead).
- Stir in the cucumber and sprinkle with cayenne or paprika, and chill before serving.
08/07/2013
Death by Chocolate: Chocolate Valentino Cake
As stated many times before, my addiction to chocolate knows no boundaries. I don't know where it comes from, or for how long it's been going on, but as far as I can remember, I've been enjoying, seeking, longing for chocolate in one form or an other. And thru difficult times, nothing works quite as good for me as some good dark chocolate.
So yes summer is here, my holidays are around the corner, I'm healthy... bla bla bla... When your mind is not into it, there is just no way of getting it there sometimes. I call that my post birthday depression, once you're over 25, all of the sudden, birthday turn into this big questionning about your achievement, where you're going with your life... All that grown up stuff I don't like. Have I mentioned I'm a cancer before, and that we are all kinds of nutcases?
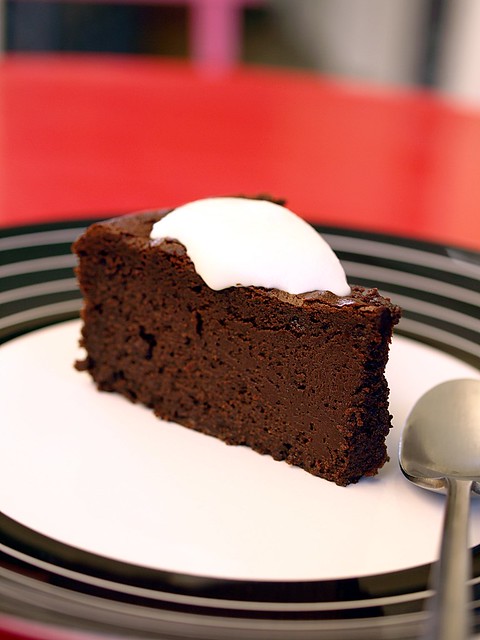
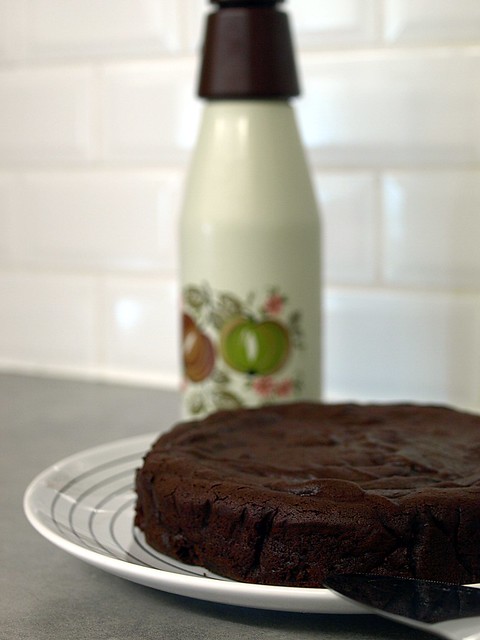
Anyway, I'm going to shake this of, and one good way is heading to the kitchen and baking something. This chocolate cake is ridiculously delicious, is only for true chocolate lovers, because it just taste like pure chocolate... Choose your favorit chocolate for this recipe, and remember chocolate is the answer!
Chocolate Valentino Cake (From Chef Wan's Sweet Treats)
450gr of Black Chocolate (I used Meunier)
150gr of Butter
5 Eggs
Preheat the oven to 190°C. Grease a 20cm oven dish, line it with parchement paper and butter it again.
Break the chocolate into small bits, add the butter into cubes into a heatproof bowl. You can melt this over a "bain-marie", meaning over simmering water, or the lazy way: in the microwave. On low power, never over 30 seconds each time and whisk in between, this should be done in 3 or 4 times. Leave to cool a little.
Separate the egg white and yolk, whip the egg white to a stiff peak and seat aside. Beat the egg yolk a little to add some air to them and whisk them in the cooled chocolate/butter mixture.
Using a spatula, fold in a third of the egg white to soften the batter, than add the rest of the egg white, carefull fold until it's well combined.
Pour the batter into the greased dish and place it in the oven for 25-30minutes, the top should be like a brownie and a cake tester should come out wet.
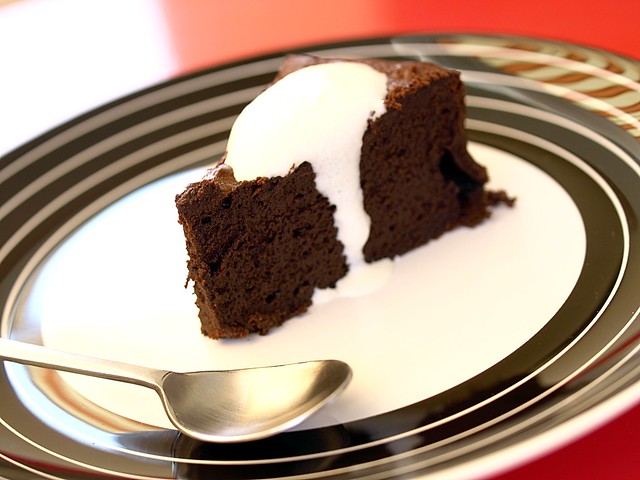
Leave it to cool for at least 10 minutes then unmold. You can enjoy this with a bit of whipped cream flavored with vanilla sugar.
30/06/2013
Life of Pie, episod 2: American Apple Pie
I have unfortunately never been to the USA, so my (most likely mis-) conception of it comes from the movies and TV shows I've seen or from the books I've read. Considering the size of the country aswell as the number of states, this vision must be about as accurate as summing up France by just talking about Paris.
But some images, or should I even say clichés, seem just as american as can be. One of those is the apple pie. I guess I have this on my mind from some "Tom and Jerry" cartoon I watched growing up, with Mammy two Shoes backing a pie and leaving it to cool on the window counter, before Tom and Jerry start doing some kind of mayhem involving that pie.
Then, there is also that song "American Pie", which I shamefully admit, that I got to know this song from Madonna's version of (it's not an excuse, but I wasn't born in 1971). I catched up in the meantime, but I still like Madonna's version and video.
On a side note it's also a song that I really enjoy, because it's one of the few I can kinda play on my guitar and badly sing along to it, all the more fun (for me).
As I had a lot of fun with this month daring baker challenge, I used the week end to make the double crust apple pie. My only addition to the original recipe given below is that I did about half apple and half pears and added a bit of cinnamom to the filling.
So as the 4th of July is upon us, aswell as I wanted to chear americans on the historic week they've been thru, let's all be a little bit american today.
Double Crust Apple Pie:
Servings: 8
Active time: 45 minutes altogether
Baking time: 50 minutes
Chilling time: 1 hour
Ingredients
Flaky pastry
2/3 cup (160 ml) (150 gm) (5-1/3 oz) unsalted butter
1¾ cups (420 ml) (250 gm) (8-2/3 oz) all-purpose flour
2 teaspoon (10 ml) (10 gm) (1/3 oz) sugar
1/4 teaspoon (1½ gm) salt
3-8 tablespoons (45-120 ml) cold water
Filling
1 – 1½ kg (2¼ to 3-1/3 pounds) apples (depending on the depth of your pie dish)
1 cup (240 ml) (200 gm) (7 oz) light brown sugar, lightly packed (more or less to taste)
1 tsp ground cinnamon
pinch of ground cloves, nutmeg and/or ginger (optional)
1 - 2 teaspoons (5-10 ml) (5-10 gm) white sugar for sprinkling (optional)
Glaze
either 1 egg beaten with 1/2 teaspoon water, or 1 tablespoon milk
Directions:
Flaky pastry
1. Weigh/measure out the correct amount of butter, wrap it in foil and freeze it for at least 30 minutes.
2. Sift the flour, sugar and salt into a large bowl.
3. Using the large holes on a box grater, grate the frozen butter directly over the flour in the bowl. Hold the butter by the foil to avoid warming it up too much and work as quickly as possible.
Using a table fork, toss the grated butter in the flour until it's all coated.
Alternatively, finely chop the butter and rub in with your fingertips, working quickly to avoid warming it. This is best left to those lucky folk with cool hands!
4. Sprinkle 3 tablespoons (45 ml) of cold water over the mixture and mix together with the fork. Add more water, spoon by spoon, as needed - it will depend on temperature, humidity and a million other factors, but the finished dough should be moist and starting to come together, but not wet. I used 7 tablespoons (315 ml). Use your fingertips to test if it's sticking together.
5. Finish by using your hands to quickly bring the dough together into a ball. Just press, don't knead.
6. Wrap dough in plastic and refrigerate for at least 30 minutes.
Pie
1. Preheat oven to hot 220°C/425°F/gas mark 7 . Lightly grease a deep 9"/24cm ceramic or metal pie dish. Note that a dish this size results in quite a thin top crust - if you want a sturdier top which cuts more cleanly, then you should use a smaller dish so you don't need to roll it out so thinly.
2. Take 2/3 of the pastry dough (I weighed my dough and 2/3 was about 12oz/340g) and roll out to fit pie dish, right up to the rim. Line the pie dish with it, prick all over the bottom with a fork and set aside.
3. Peel, quarter, core and slice the apples and place in a bowl. How tightly you can pack them into the pie depends on how thinly they are sliced - I like them chunky, but you will get a firmer filling if they are very thin.
4. Sprinkle the brown sugar and spice(s) over the apples and toss well to coat.
5. Pack the apples tightly into the lined pie dish. The filling can come up above the rim of the dish in a mound.
6. Roll out the remaining pastry dough to fit over the apples.
7. With a wet finger, moisten the edge of the pastry in the dish. Place the dough lid on the pie and press the edges together. Trim the edges as necessary and crimp the seam closed with your fingers or the back of a fork.
8. With a pair of kitchen scissors, cut three vents in the top of the dough. You can either cut leaf-shaped vents and use the pieces you removed to fashion decorative leaves, or you can cut straight vents and use any pastry trimmings to fashion decorations as desired. Moisten the back of the decorations with a wet finger and gently press onto the top of the pie.
9. Glaze the top of the pie with a beaten egg or milk, then sprinkle the top with a little white sugar.
10. Place pie dish on a baking sheet and put it into the center of the oven. Bake for 20 minutes, then reduce heat to moderate 180°C/350°F/gas mark 4 and bake for a further 30 minutes. The top should be light golden brown.
11. Serve hot, warm or cold.
27/06/2013
Daring Baker - June 2013: Life of Pie
Rachael from pizzarossa was our lovely June 2013 Daring Bakers’ host and she had us whipping up delicious pies in our kitchens! Cream pies, fruit pies, chocolate pies, even crack pies! There’s nothing like pie!

Summer is here! And one of my "go to" dessert during those hot days is pies. We have so many gorgeous fruits during this time of the year, it would be a shame not to use them some way or an other for dessert.
I'm also lucky enough to have farmers in my family, so when I got a call a few weeks ago, and got asked "Do you want some strawberries?" of course I said yes! Little did I know that "some" meant about 4 kilos!! So I spend my day off making jam, which is always a fun day and with the oh-so-satifying feeling of having those pretty jar aligned on the kitchen counter. A job well done!
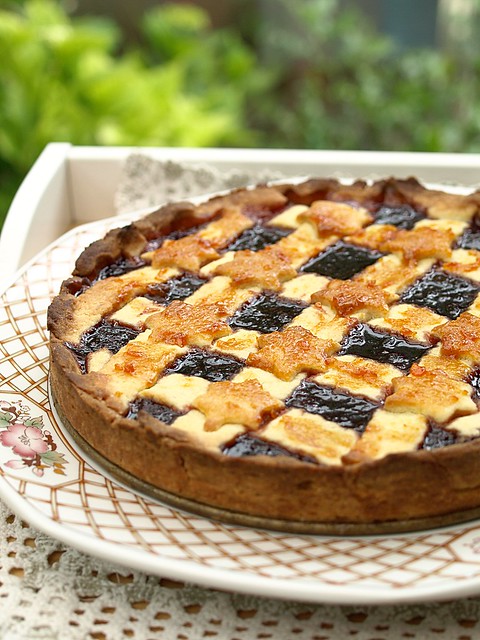
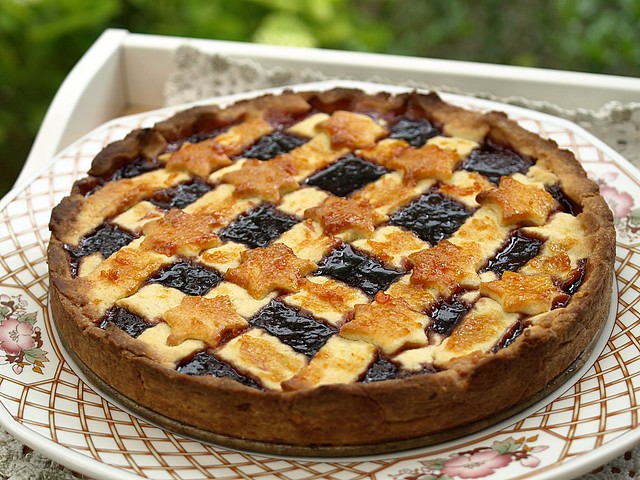
Although Rachael offered many different recipes, which I would try out in the future, I went for the crostata di marmellata, an italian pie with a jam filling. Around here, we have something similar, called Linzertorte, a raspberries filled pie with a spices and almonds crust, which is one of my favorit dessert.
So between the freshly made strawberry jam and the expectation of trying this pie, my choice was obvious. And I'm really pleased with the result, where the linzertorte is more a winter dessert, for its rich dough, this one really feels like summer. I loved the lemon flavored dough that makes a soft and crumbly crust, I will used it again in many more pies to come.
Crostata di marmellata:
Servings: 8
Active time: 1 hour altogether
Baking time: 30 minutes altogether
Chilling and resting: 2 hours altogether
Cooling time: 3 hours altogether
Ingredients
Filling
3-1/3 cups (800 ml) 500 gm strawberries, washed, hulled and quartered
250 gm 2:1 gelling sugar (or 500 gm of 1:1 gelling sugar, or as much white sugar (1 to 2 cups) as desired + pectin according to manufacturer's quantities)
2 tablespoons (45 ml) freshly squeezed lemon juice
Pasta Frolla (basic Italian pie pastry)
2/3 cup (160 ml) (150 gm) (5-1/3 oz) unsalted butter, room temperature
1/3 cup (80 ml) (75 gm) (2-2/3 oz) sugar
1 large egg, room temperature
1 teaspoon (5 ml) vanilla extract
grated zest of 1 medium lemon
1-2/3 cups (400 ml) (225 gm) (8 oz) all-purpose (plain) flour
pinch salt
Glaze
¼ cup (60 ml) (75 gm) (2-2/3 oz) apricot jam
1-2 teaspoons (5-10 ml) freshly squeezed lemon juice
Directions:
Filling
1. Stir everything together in a heavy-based saucepan and heat slowly over medium-low heat, stirring constantly.
2. When the strawberries have released their juice and the mixture comes to a boil, allow to boil for the time given in the gelling sugar/pectin manufacturer's directions.
3. Allow mixture to cool to room temperature.
4. Can be made ahead and refrigerated, covered, for up to a week until needed.
Pastry
1. Using a paddle attachment on a stand mixer or an electric hand mixer or whisk, cream the butter and sugar until pale and fluffy, 2 - 5 minutes. The amount of time you cream the butter will affect the final dough - longer means lighter which in turn means a softer, more fragile dough which is less easy to work, but I prefer the texture of the cooked pastry this way because it's lighter too. If you want to do a more intricate lattice, I'd recommend a shorter creaming time so you have a firmer dough.
2. Add the egg, vanilla and lemon zest, one at a time, mixing thoroughly after each addition.
3. Add the flour and salt and mix until the dough comes together but remains soft, about 1 minute using a stand or electric mixer or a wooden spoon if mixing by hand. Don't over-mix.
4. Wrap dough in plastic wrap and refrigerate for 30 minutes to one hour.
5. When getting ready to bake, rest dough at room temperature for about 30 minutes.
6. Lightly grease a shallow 9"/24cm metal pie dish.
7. On either a piece of parchment or a lightly floured surface, roll 2/3 of the dough (I weighed my dough and 2/3 was about 12oz/340g) out to a circle to generously line the pie dish. I prefer to use parchment with a circle traced on it so I can roll it as quickly as possible, before the dough gets too soft to handle, then use the parchment to transfer it to the dish.
8. Transfer the dough to the pie dish, press in gently and roll the edges to form a good surface for attaching the lattice later. Prick all over the bottom with a fork.
9. Refrigerate the dough-lined pie dish for 30 minutes to reduce shrinkage during baking.
10. Preheat oven to moderate 350°F/180°C/gas mark 4..
11. Line pastry with parchment and fill with dry beans or pie weights. Bake until set, around 15 minutes.
12. Remove the weights and parchment and allow to cool. If using a springform or loose based pie dish, remove the side of the pan.
13. Preheat oven to moderately hot 400°F/200°C/gas mark 6.
14. Roll the remaining dough to fit the pie dish and cut it into roughly half inch/1.5cm-wide strips.
15. Spread the filling over the par-baked crust.
16. Arrange the strips of dough in a lattice over the filling (see links below for some how-to guides - you can do an intricate intertwined lattice or a very simple overlay one like I've done), trim as needed and lightly pinch the ends onto the rolled edge of the bottom crust.
17. Place pie dish on a baking sheet and place in center of oven. Bake until lattice is golden, around 20 minutes. Meanwhile, prepare the glaze.
Glaze
1. Heat the jam and water in a small saucepan over medium heat until mixture comes to a boil. Alternatively, you can heat it on medium-high in a bowl in the microwave for about 2 minutes, stirring halfway.
2. Strain through a fine mesh sieve if it's chunky.
3. While glaze and pie are both still warm, brush over lattice crust.
4. Allow pie to cool completely before serving.
20/06/2013
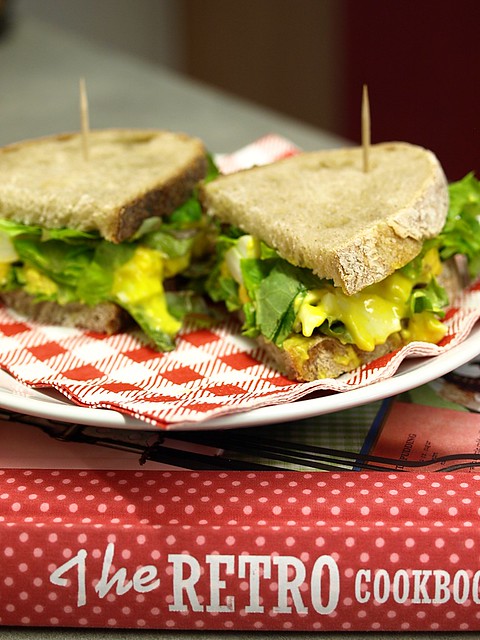
Retro cooking: Curried Egg Sandwiches
Some strange thing happened to me the over day: as you may already know, I'm a bit of a TV show junkie and have many DVD (never enough to my taste though) that I enjoy to watch. I tend to wait for a serie to come to it's end, so that I can buy the boxset and marathon myself thru it. Yes, I'm strange in many ways.
So, I just went thru the absolutely brilliant second season of Sherlock, thinking what to watch next? A rerun of the Gilmore Girls or Buffy, a few Big Bang Theory or Friends episods... Than I just sat down to have lunch instead. And all the sudden there's a song in my head:
"I've been down this road.
Walking the line that's painted by pride.
And i have made mistakes in my life that i just can't hide."
It took me a few seconds to realise that's the theme song from Ally McBeal! Which is weird, I do have the DVDs, but I haven't watched it in so long, it wasn't even in my thought process of the moment.
Maybe our brains and body try to tell us stuff sometimes, and we just don't listen to them, or are too busy doing something else on top of something else. Or maybe I'm just crazy, and my brain goes coucou from all the things that are stored in it. Either way, I'm enjoying Ally McBeal, and it's great fun.
This recipe is long overdue, or at least the use of the book it came in. One of the good thing about having real friends, is that they still like you, even when they really know you and also that they know you well enough to get you cool gift, like this awesome cookbooks.
The retro cookbook has been on my shelves for almost a year now, and I pick it up quite often to get ideas, but today I finally channeled the 50's housewife in me (that took a lot of effort, believe me) to make this easy and summerish recipe.
Curried Egg Sandwich (based on the Retro Cookbook)
Serves 2
1 Egg Yolk
1/2 a Tablespoon of Mustard
Salt, Pepper
1/2 a Tablespoon Whine Honey Vinegar (such as Melfor)
3-4 Tablespoon Sunflower Oil
2 Teaspoon of Curry powder
4 Eggs, boiled
A Handfull of Salad
2 small Pickled Cucumber
Bread
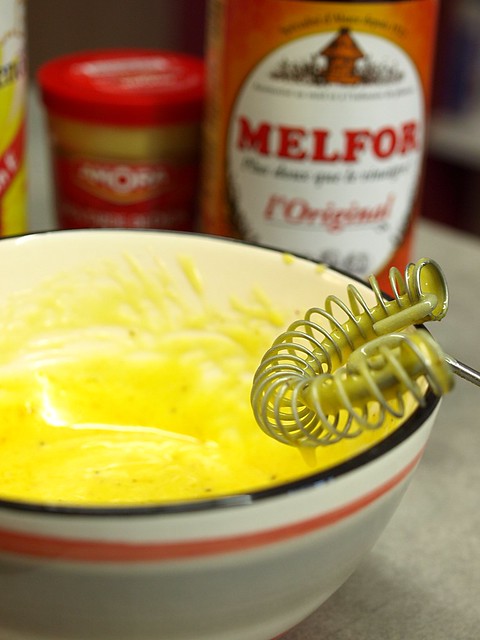
Let's start with the mayonnaise, using a whip (if you have one like the picture, they work very well for mayonnaise) combine in a small bowl, the egg yolk, the mustard, the salt and pepper. Than start adding slowly the oil until you have the consistency you wish. Add the vinegar and the curry powder, whip it a bit more and taste to check the seasoning, correct if necessary. Place in the fridge.
Boil the eggs and leave them in cold water once they are cooked. Peel them and chop them up with a knife. Using a fork, mash the eggs and mayonnaise together, add the pickled cucumber that you have thinly chopped. Set in the fridge for a few minutes, it's better cold.
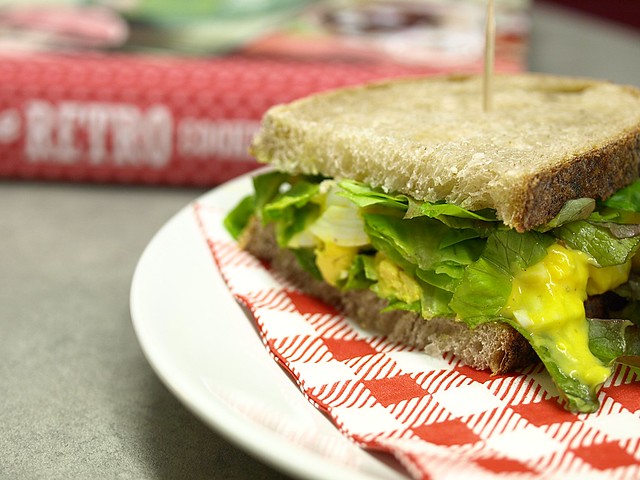
In the meantime, cut your bread (this should do for 2 to 3 big sandwiches) and shred your salad. On the bread, place a bit of salad, than the curried egg mixture, than a bit more salad and the other slice of bread. Cut the sandwich in two and add a toothpick so it holds better.
13/06/2013
Cheesy New York Cheesecake
Have you noticed that life is a lot about expectations? We hope for the weather to improve, for the unemployement rate to get better, for a parking space to open when we arrive at our destination, for our problems to be solved, for love to be around the corner or for a miracle to happen (like a healthy diet based on Nutella).
But isn't the problem with expectations, that we just "expect" them? Seated on our behinds, complaining nothing ever happens. Because it's safer, because that way you can blame everyone but yourself, because if you don't do anything, how could you do something wrong?
And if we may not do anything wrong, we might not do anything right either. So here's to the brave ones, who take decisions at the blink of an eye or to the sound of a heartbeat, who dare doing something different than everybody else, who might success or might fail, but at least had the courage to try.
I do not belong to the brave ones, I can get myself to brave moments every now and than though, and that's a start. For trying is always better than regretting.
What does this have to do with cheesecake? Not much to be honest, beside the hope for it to meet the expectations of your guests, or the promise to make you travel to New York just with a spoonfull.
New York Cheesecake (based on Marcus Wareing, Cozinhar na Perfeição...)
For a 10 slices pie
60gr of Butter
135gr of Graham Crackers
500gr of Cream Cheese (Philadelphia)
150gr of Sugar
5 Tablespoons of Cream
30gr of Flour
4 Eggs
Preheat the oven 110°C with the fan. Butter a 20cm springform or cake pan.
Melt the butter in a small sauce pan or in the microwave (10-20seconds steps only). Blitz or break the graham crackers to have some sand. Pour the melted butter on the crackers and combine, than pour that in your pan and using a spoon, press down the mixture to evenly coat the bottom of your pan.
Have the cream cheese at room temperature and pour in the sugar to start mixing with a spatula. Now add the the cream and the flour and keep mixing.
Crack your eggs in an other jar, beat them lightly, before adding them to the creamcheese. Carefully whisk until everything is combined and smooth.
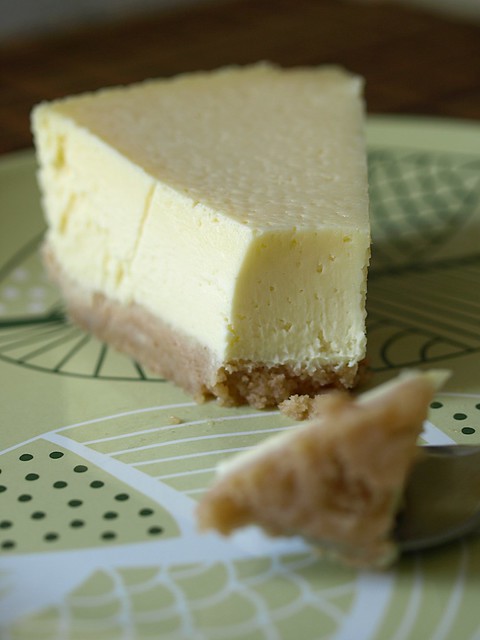
Pour this mixture on top of the cracker layer, try to smooth the top for the air bubbles to disappear. Place in the oven for 1h30min. The middle should still be a bit shaky went you take it out of the oven.
Leave it to cool at room temperature. Even if it's not adviced in the book, I like to have my cheesecake in the fridge, makes the texture denser and is nicer on a hot day.
27/05/2013
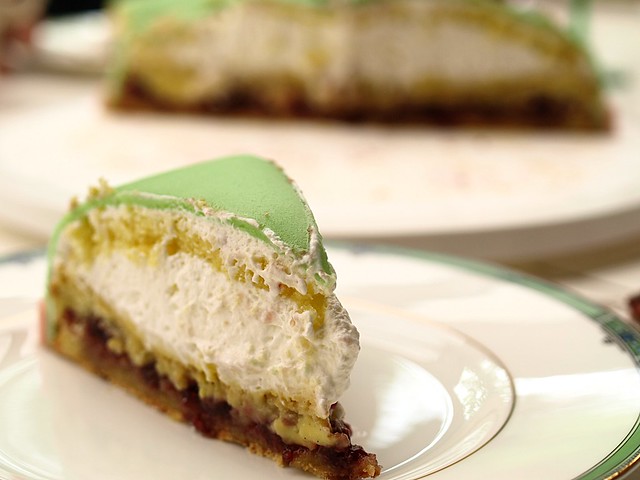
Daring Baker -May 2013: SWEDISH PRINSESSTÅRTA!
Korena of Korena in the Kitchen was our May Daring Bakers’ host and she delighted us with this beautiful Swedish Prinsesstårta!
I have never been much of a princess kinda girl. Ask my parents, I wanted GI Joes for christmas, I had a tool box, a wood saw kit or a basket ball. Though my mum wanted me to keep my hair long as a child (and I was happy to cut them shorter when I grew up), I'm thankfull for my parents not pushing any stereotypes on me, I didn't have to wear a pink dress and flowers in my hair, and could be what I wanted to be.
Even though I'm still looking like a tomboy today, I believe I've learned to be in touch with my "girly" side. And making this cake was definetly a good way to that! My nieces, who are not found of desserts in general (it cuts into their playing time!!) were all over it. So I guess the cliché still stands today, and (most) little girls want to be princesses.
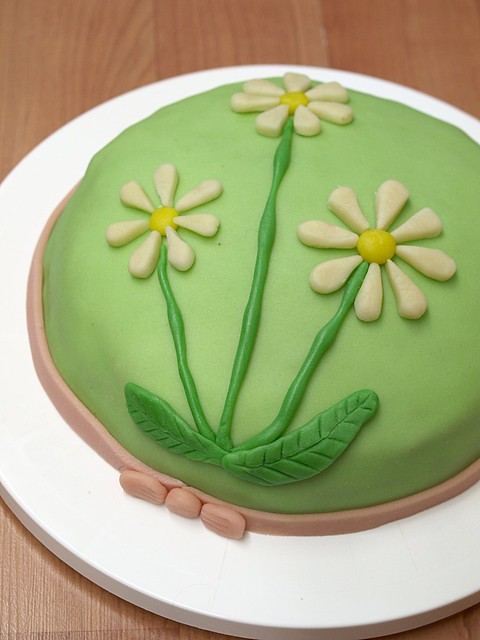
I've basically used the recipe given by Korena, I've just made my custard with soy milk and I was a little low on time, so I used store bought marzipan to decore it with daisy (not roses like the tradtional one). Even if it is time consuming, by taking it step by step, it does make a great cake with an impressiv result.
Thank you Korena for this fun and girly challenge, and please, I don't want to be told the calory count for each slice ;)
Traditional Swedish Prinsesstårta
Servings: 8 – 10. Makes one 9” round cake.
Vanilla Custard
Ingredients
1 cup (240ml) heavy cream, divided
4 egg yolks from large eggs
2 tablespoons (30 ml) (15 gm) (½ oz) cornstarch
2 tablespoons (30 ml) (30 gm) (1 oz) granulated white sugar
1 vanilla bean, split and scraped (or 2 teaspoons (10 ml) vanilla extract)
Directions:
1. In a medium bowl, whisk together the cornstarch, sugar, and egg yolks. Gradually whisk in ½ cup (120 ml) of heavy cream until smooth. Meanwhile, in a medium saucepan over medium heat, combine the remaining ½ cup (120 ml) of heavy cream and the scraped vanilla bean and bring just to the boiling point. Remove the vanilla bean pod, leaving behind the seeds. Slowly whisk the hot cream into the bowl with the egg mixture to temper the eggs.
2. Pour the mixture back into the saucepan and cook over medium-low heat, whisking constantly, until it becomes thick like pudding and just comes to a boil. The mixture must hit a boil for the cornstarch to properly thicken the custard, and also to cook out any starchy taste. If it starts to look curdled or lumpy, remove it from the heat and whisk vigorously until smooth, then return to the heat. As soon as it comes to a boil, remove it from the heat. If using vanilla extract, add it now.
(If desired, pass the custard through a fine mesh sieve before continuing.)
3. Pour the custard into a clean bowl and press a piece of plastic wrap directly onto the surface to prevent a skin from forming. Refrigerate until completely cold. Can be prepared a day ahead and kept in the refrigerator.
Sponge Cake
Ingredients
Fine dry breadcrumbs for the pan (such as crushed panko)
4 large eggs, at room temperature
1 cup (240 ml) (225 gm) (8 oz) granulated white sugar
½ cup (120 ml) (70 gm) (2½ oz) all-purpose (plain) flour
½ cup (120 ml) (65 gm) (2¼ oz) potato starch (or cornstarch)
1 teaspoon (5 ml) (5 gm) baking powder
1/8 teaspoon salt
Directions:
1. Preheat the oven to moderate 350°F/180°C/gas mark 4 with a rack in the lower third of the oven. Thoroughly butter a 9” (23 cm) round springform pan, line the bottom with a circle of parchment paper, then butter the paper. Dust the buttered pan with enough breadcrumbs to coat the bottom and sides, just like flouring a cake pan. Set aside.
2. Place the eggs and granulated white sugar in a mixing bowl and beat on medium-high speed with an electric mixer or stand mixer with whisk attachment until the eggs are tripled in volume and very light coloured and fluffy, about 5 minutes. The mixture should fall from the beaters in thick ribbons. Don’t overbeat the eggs – once they form thick ribbons and stop growing in volume, stop beating.
3. Sift the all-purpose (plain) flour, potato starch, baking powder, and salt into a bowl, then sift the flour mixture over the whipped eggs. With a balloon whisk, fold the flour into the eggs until blended, keeping as much air in the batter as possible. Use large, gentle yet confident strokes, bringing batter from the bottom of the bowl to the top. Once mixed, the batter should be quite thick and smooth.
4. Pour the batter into the prepared pan, spread it out evenly, and bake in the lower third of the preheated moderate 350°F/180°C/gas mark 4 oven for about 40 minutes or until golden brown on top, springy to the touch, and a toothpick inserted in the center comes out with a few moist crumbs sticking to it.
Let the cake cool in the pan for a few minutes then run a knife around the edge and remove the sides of the springform pan. Don’t worry if it sinks a bit in the middle.
Invert the cake onto a cooling rack and peel off the parchment paper. If the cake is lopsided, press gently to make it level, then allow it to cool completely before continuing. The cake can be made a day ahead and stored, well-wrapped in plastic, at a cool room temperature.
Prinsesstårta Assembly
Ingredients
2 cups (480 ml) heavy cream, chilled
granulated white sugar, to taste (scant 1 tablespoon is plenty)
Sponge Cake, cooled
1/3 cup (80 ml) seedless raspberry jam (or regular jam pressed through a sieve to remove seeds)
Vanilla Custard, chilled
Marzipan Covering and Rose
Icing sugar, for rolling and dusting
Optional: melted chocolate, royal icing, or piping gel
Directions:
1. In a large bowl, whip the heavy cream until soft peaks form. Add sugar to taste (keep in mind that the rest of the cake components are sweet, so the whipped cream should be very lightly sweetened at most) and continue whipping the cream until stiff. You want it to be sturdy enough to provide structure to the cake, but not over-whipped enough to make butter. Set the whipped cream aside.
2. With a long serrated knife, slice the sponge cake into three even layers. This cake is very delicate, so do this as carefully as possible. Use a gentle sawing motion to move the knife through the cake instead of trying to pull it through the cake. Use a spatula to help you lift off each layer after you cut it. Set aside the middle layer – this will become the top layer of the assembled cake as it is the most flexible and therefore easiest to bend into a dome over the whipped cream.
3. Place one of remaining layers on a cake board or serving platter and spread it evenly with the raspberry jam. Spread or pipe half the chilled custard over the jam in an even layer, leaving enough room around the edges so that it doesn’t spill over the sides of the cake.
4. Top the custard with another layer of cake. Spread or pipe the remaining custard evenly over it, again leaving some room around the edges.
5. Reserve ½ cup (120 ml) of the stiffly whipped cream. Pile the rest into a mound on top of the custard. Spread it into a thick layer with a thin, flexible spatula or off-set spatula, then hold the spatula at an angle to shape the whipped cream into a dome, piling it up in the middle of the cake as much as possible.
6. Place the final layer of sponge cake (the one cut from the middle of the cake) on top of the whipped cream. Do not press on the top of the cake – instead, gently tuck the edges of the cake layer into the whipped cream, so that they are flush with the cream. This will create a smooth, seamless dome on top of the cake.
7. Gently spread the reserved ½ cup (120 ml) of whipped cream over the entire cake to fill in any cracks and even out the surface. If necessary, refrigerate the cake to firm it up before continuing.
8. Dust your work surface with icing sugar and press the marzipan into a 6-inch (15 cm) disc (knead it a bit to warm it up first). Coat both sides with icing sugar and roll it out into a 14” (35½ cm) diameter circle less than 1/8” (3 mm) thick. Use plenty of icing sugar to prevent it from sticking. Alternatively, you can roll the marzipan out between two wide sheets of parchment paper (still use plenty of icing sugar).
9. Use the rolling pin to drape the rolled-out marzipan sheet over the cake and smooth it around the cake gently with your hands.
If it seems like it wants to fold or buckle around the cake, gently lift and stretch it away from the cake with one hand while smoothing it down with the other.
Trim the excess marzipan from the bottom of the cake with a paring knife or spatula blade.
10. If desired, cut leaves out of the scraps of green marzipan (you can knead in another drop of green food colouring to make the leaves a slightly darker green). Use a paring knife to score vein-like lines, then pinch one end of the leaf to give it some shape.
Dust the cake with icing sugar, then place the marzipan rose and leaves in the middle of the cake.
(You can also use melted chocolate, royal icing, or piping gel to pipe a design on top of the cake, if you wish.)
11. To serve, cut the cake into wedges with a large, sharp knife (run the blade under hot water and wipe it clean after every cut for neater slices). The cake can be served immediately but will be easier to slice after chilling in the refrigerator for at least an hour.
22/05/2013
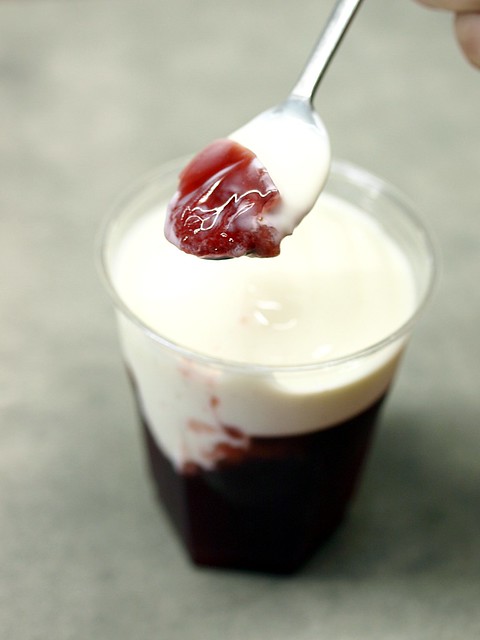
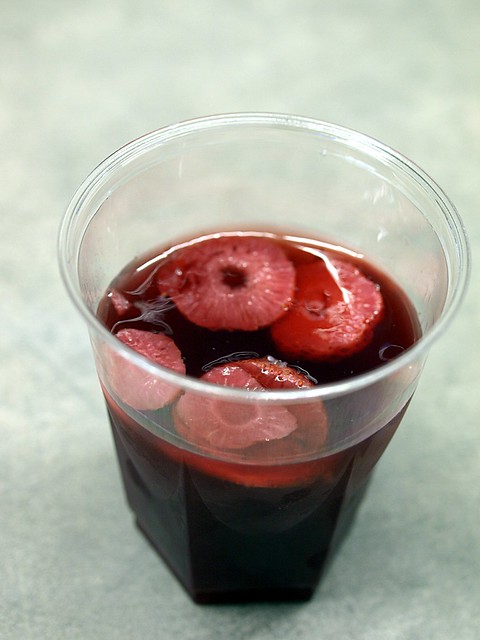
Strawberry and Tea Jelly
If insanity is doing the same thing over and over again and expecting different results (Albert Einstein), cooks, bakers and food blogger must be really sane people! As our time spend in the kitchen is mostly about trying, changing ingredients, temperatures and proportions to finally come to the expected result.
Because in life, much like in the kitchen, we should all learn from our mistakes. Not falling back to old patterns, we may know as familiar, but that will end up being bad for us. This is how I think we grow, even if we all have our crosses to bear and our walls to break.
Coming back to food, if desserts, chocolate or sugar would be illegal, I'd be an outlaw for sure. But I know I have to be (most of the time) carefull and wise, that's what this dessert is about.
I hope I'm not making this sound too boring, because even if I came up with this recipe in order to have a lighter dessert, I really enjoyed this and will do it again. Plus, you can mix and match teas and fruits. Regular gelatin could work too, but Agar-Agar is a healthier option in my opinion and is quicker to set. If there was any sun around, it would be a nice summer dessert.
Strawberry and Tea Jelly
Serves 3
1/2 a Liter of Water
2 Tablespoons of Strawberry Flavoured Black Tea
2 Tablespoons of Agave Nectar (Syrup)
2gr of Agar-Agar
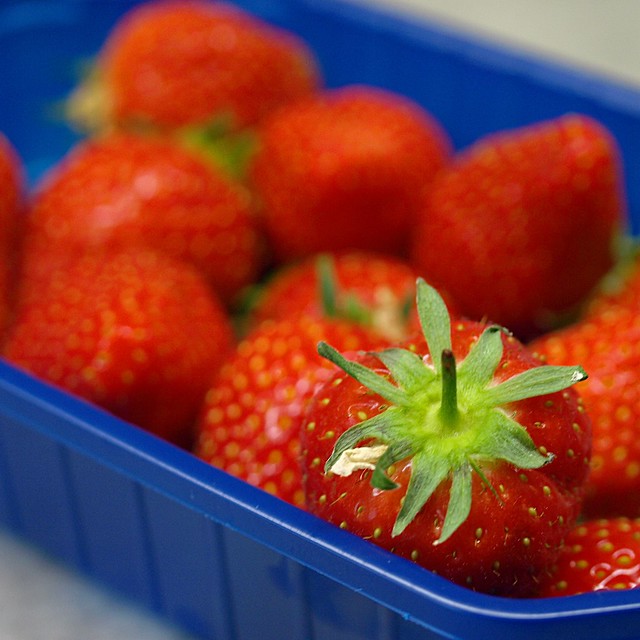
10 Strawberries
6 Tablespoons of Vanilla Yogurt
Prepare your tea, boil the water and let the tea infuse for about 8 to 10 minutes. Pour your tea in a sauce pan thru a sieve (to remove all residue from the tea) add the agave nectar (or honey if you prefer) and the Agar-Agar (mine is powder), bring to the boil and set aside, check if it's sweet enough for your taste.
Wash the strawberries, than cut of the top and slice them not too thinly. I used 3 glasses (20cl), place the sliced strawberries evenly in each glass, than pour the tea slowly over. Leave it too cool on your kitchen counter, before placing them in the fridge. They just need a couple of hours to set, but you can leave them overnight.
To serve, pour 2 tablespoons of vanilla yogurt on top of each jelly and enjoy.
13/05/2013
Greek salad meets couscous, or the other way around
You know it's a bad start into the week when you put on your "bad days" jeans, and they feel a bit tight. Ahhhh, just the kind of monday I enjoy... But I have an explanation to this: I've recently discovered the joy of stretch-fabric jeans, did you know they made these???
Not being very aware about fashion and stuff, I use to buy the old kind of way jeans, the ones you need to wear for months until they soften somehow, the one that would not forgive you any extra slice of desert, at the risk of running out of air, and you have to put them on lying on your bed (you know what I'm talking about, right?)
Enters the stretchy jeans. Oh the joy! They adjust, adapt and expend if needed! But how sneaky is that in the end? I didn't notice that extra slice of pie made any difference (ok, I may have gone ignorant on purpose here too). It's like my old jeans were my too-much-dessert-chastity-belt... ehm.. so to speak.
The weather being so cold here doesn't really help on switching to a "summer" diet either. But I'm not looking for any more excuses, I know better than that by now, I just enjoyed my food lately, and now is time to be a bit more carefull and wise.
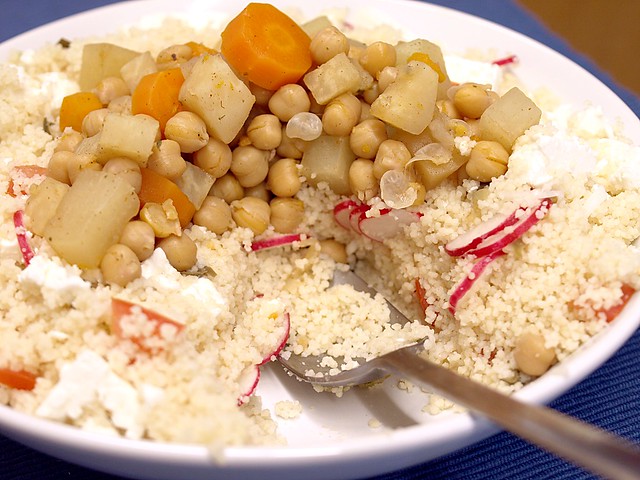
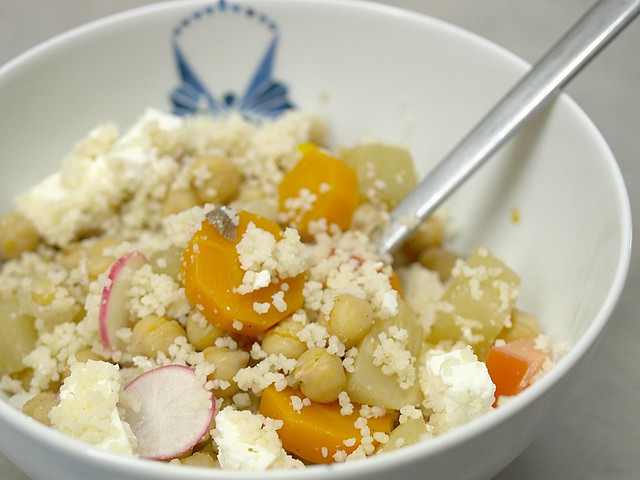
So today it's all about vegetables, I couldn't choose between making a greek salad or some couscous, so I decided to mix and match. This works hot or cold, as a main dish or as a side (see how flexible I can be). I used the vegetables I had at hands, feel free to add the ones you like to the recipe.
Greek Couscous
Serves 2/3
150gr of Couscous Semolina
2 Carrots
1 Kohlrabi
1 tin of Chickpeas
1/2 a Celeriac
1 Liter of Vegetable Brothe
1 Teaspoon of Ras El Hanout
1 Teaspoon of Red Paprika
1 Teaspoon of Cumin
1 Tomato
2 or 3 Green Fresh Onion
4 or 5 Pink Radish
1/2 a Cucumber
1 Tablespoon of Capers
50gr of Feta Cheese
Olive Oil
Apple Cider Vinegar
Salt
Start by making the couscous vegetables ready. Peel the carrots, the celeriac and the kohlrabi, slice the carrots and dice the celeriac and kohlrabi. In a pan place those vegetables in 1 liter of vegetable broth with the spices (ras el hanout, paprika and cumin), cook it for about an hour, try the vegetables they should be cooked thru and a bit spicy.
In the meantine, make the salad vegetables ready. Wash the radishes and slice them (I used a mandoline to have something even), than cut the green onions thinly and place them in a bowl with about 2 tablespoons of the vinegar.
Clean the tomato, remove the stem and the seeds inside just to keep the flesh and dice it quite small. Peel the cucumber, remove the seeds aswell and dice it the same size as the tomato, set aside.
Chop the capper and the feta cheese too.
If your vegetables are almost cooked, add the drained chickpeas so they heat up. In an other pan, heat up the volume of salted water that matches the volume of your 150gr of couscous semolina. When it's boiling, take it of the heat, add the semolina, put the lid back on and let it sit like that for 5 minutes.
After those 5 minutes, pour some olive oil on it, and using a fork, separate the little grains of couscous.
Drain the couscous vegetables in a colander, you can keep the water to add to your plate if you like it spicier. In a bowl, still using a fork, pour in the semolina, the tomato, the cucumber, the radish, the onion (with the vinegar), the capers and the feta cheese, stir to combine all ingredients. In a deep plate, pour in carefully your couscous and salad mixture so it forms a dome, than make a bit of a well in the middle and place the drained vegetables on top. Serve cold or hot.
Inscription à :
Articles (Atom)

